基于springboot+thymeleaf实现的多法人博客系统
一、项目简介
Hexo Boot 是基于 Spring Boot + MySQL 开发的一套开源的博客系统。前身是 ml-blog 博客系统,在此基础上演变和扩展而来。
二、扩展功能
除了继承 ml-blog 中的功能(文章、分类、标签、全局参数)外,Hexo Boot 还扩展了一下功能
-
评论、留言功能 :轻松查看网友的评论与留言,及时互动,同时还附带表情功能,丰富回复内容
-
友链功能 :与网友互换主页,友好分享
-
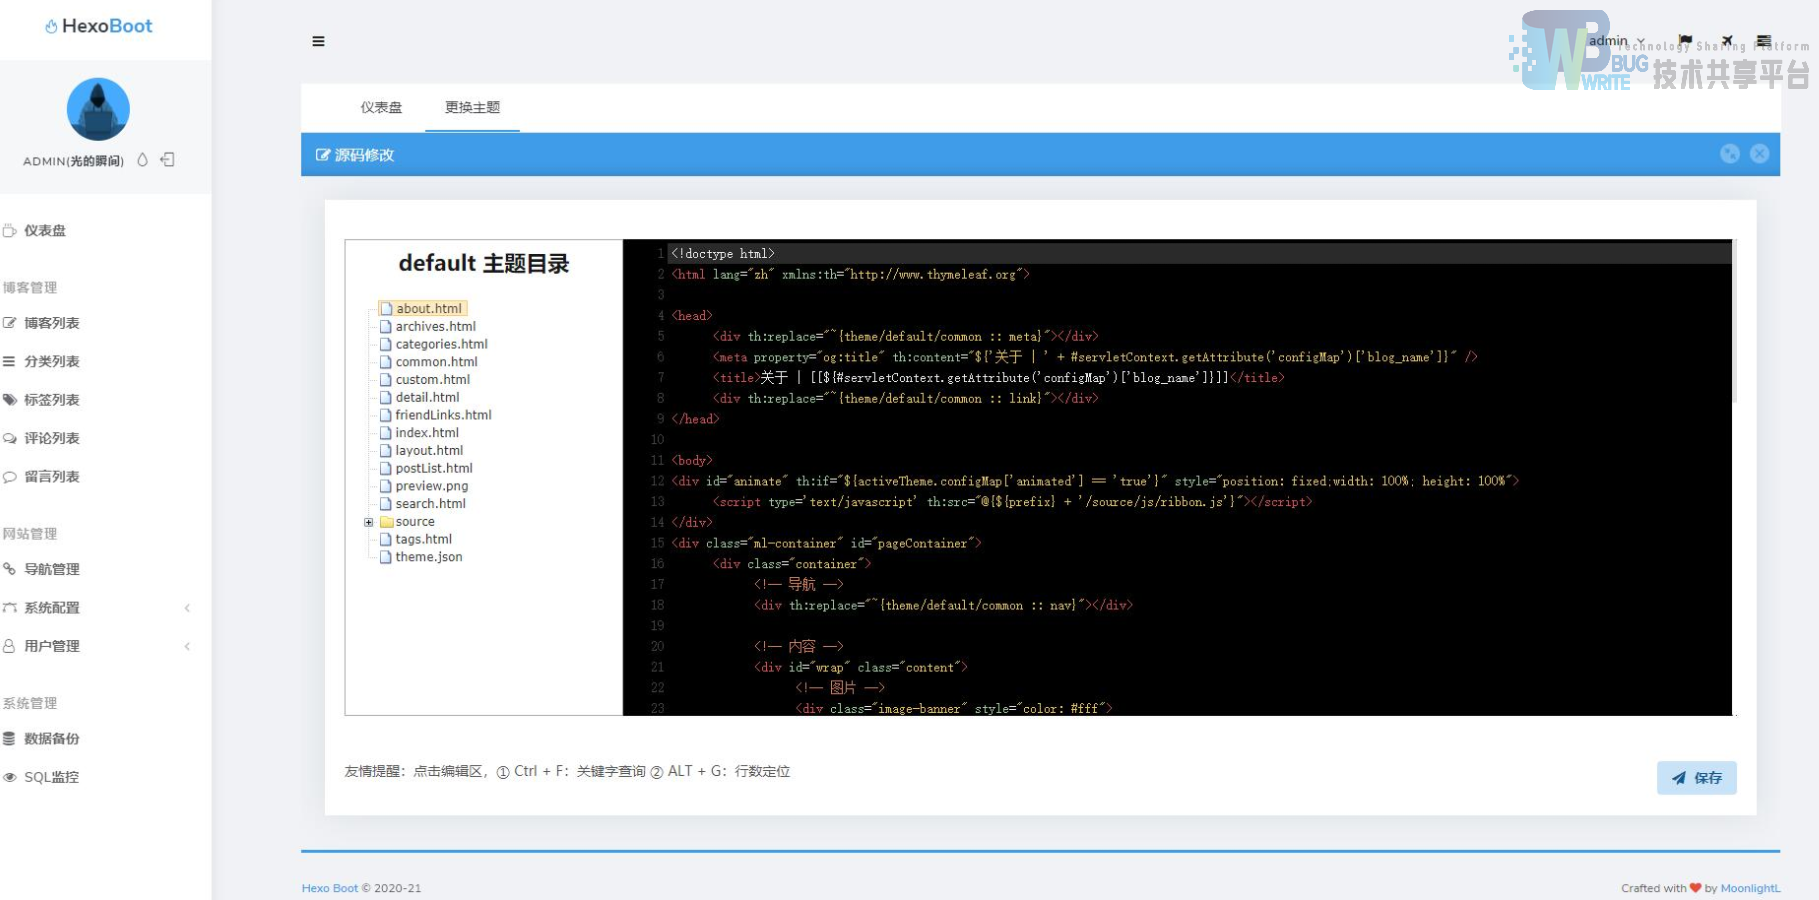
主题功能 :支持前端页面主题动态变换以及在线编辑源码,让页面色彩丰富起来,同时支持自定义主题
-
黑名单功能 :设置 ip 黑名单,防御网络小人恶意攻击系统
-
附件功能 :支持本地、七牛云、OSS 3种附件管理
-
备份功能 :支持自动和手动备份SQL数据,防患数据丢失
-
音乐播放 :支持音乐配置管理以及在线播放,切换页面不中断
-
动态 :发表个人心情(支持图片、视频和 emoji 表情)、名人名言等简短信息
-
默认主题特色 :支持 CDN 配置
-
图片延迟加载
-
图片灯箱
-
夜间模式
-
音乐播放
-
打赏功能
-
点赞功能
-
评论功能 (支持两种:默认和Twikoo)
-
文章布局 (支持两种:卡片和列表)
-
实现 pjax
三、预览效果
3.1 后台管理预览图


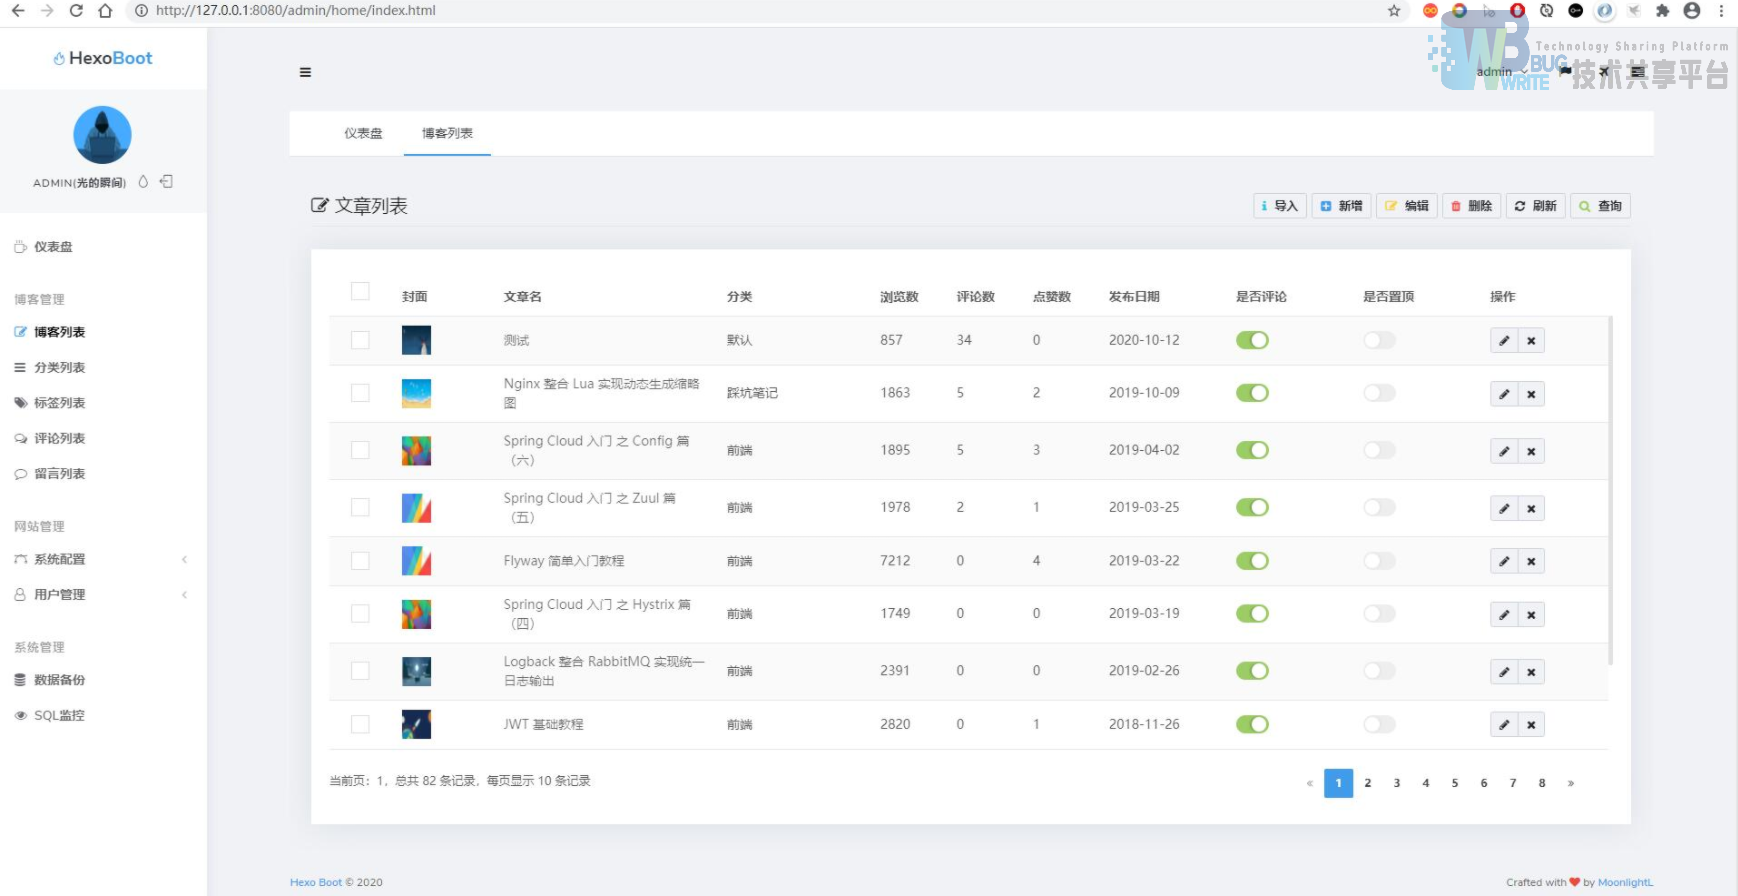
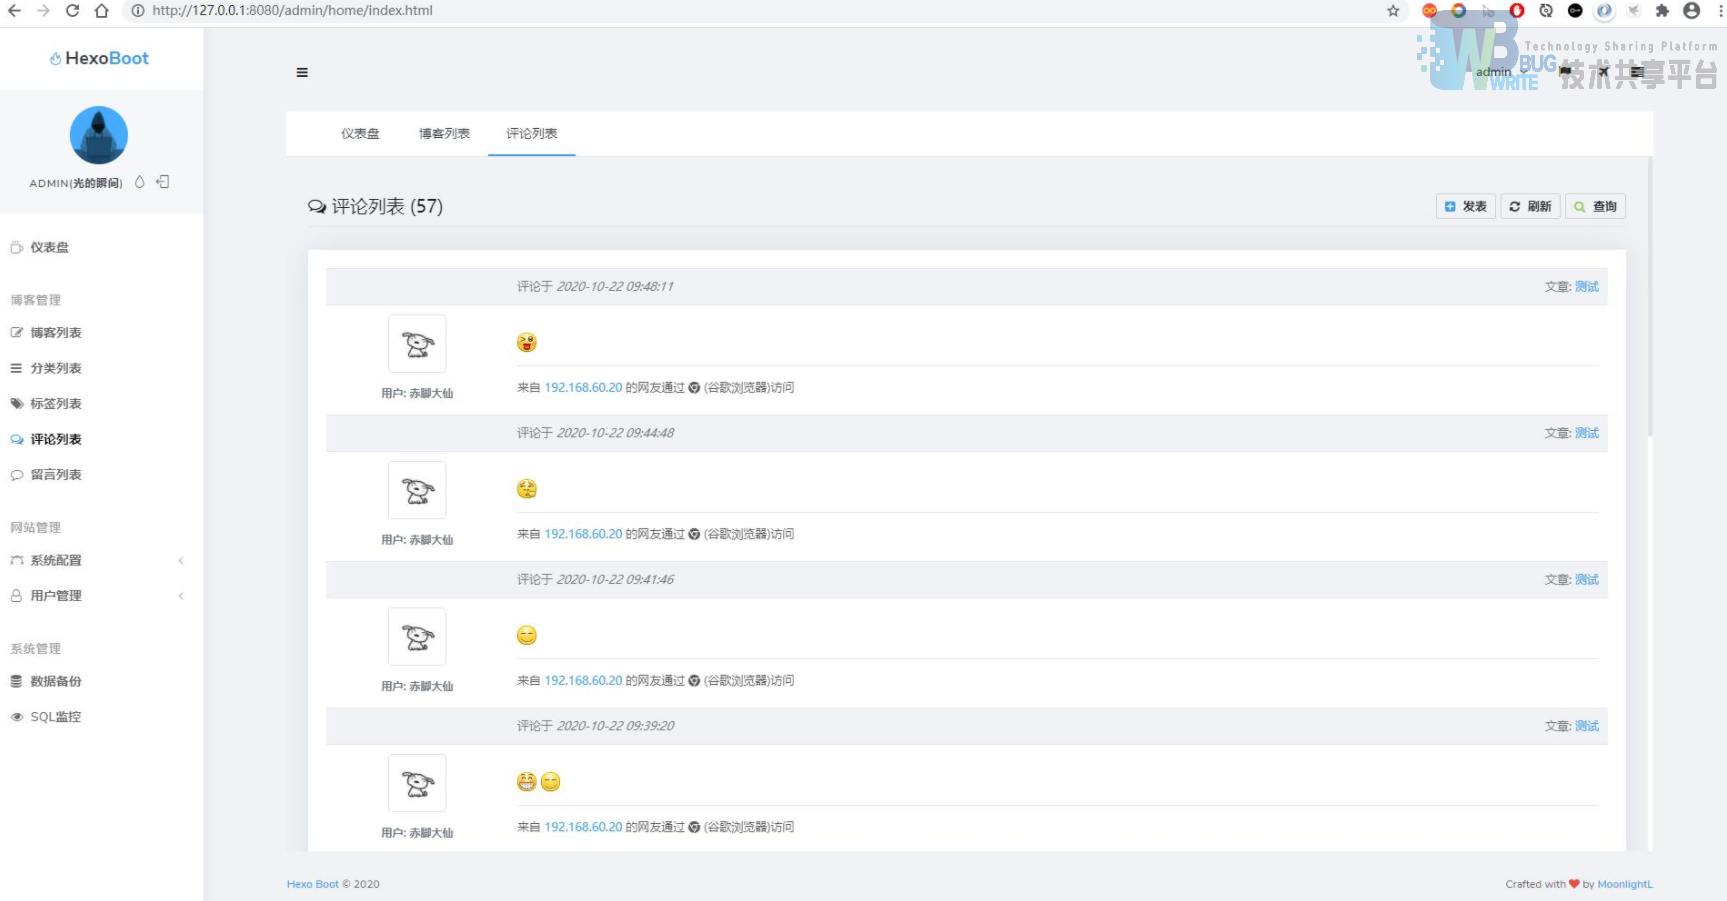


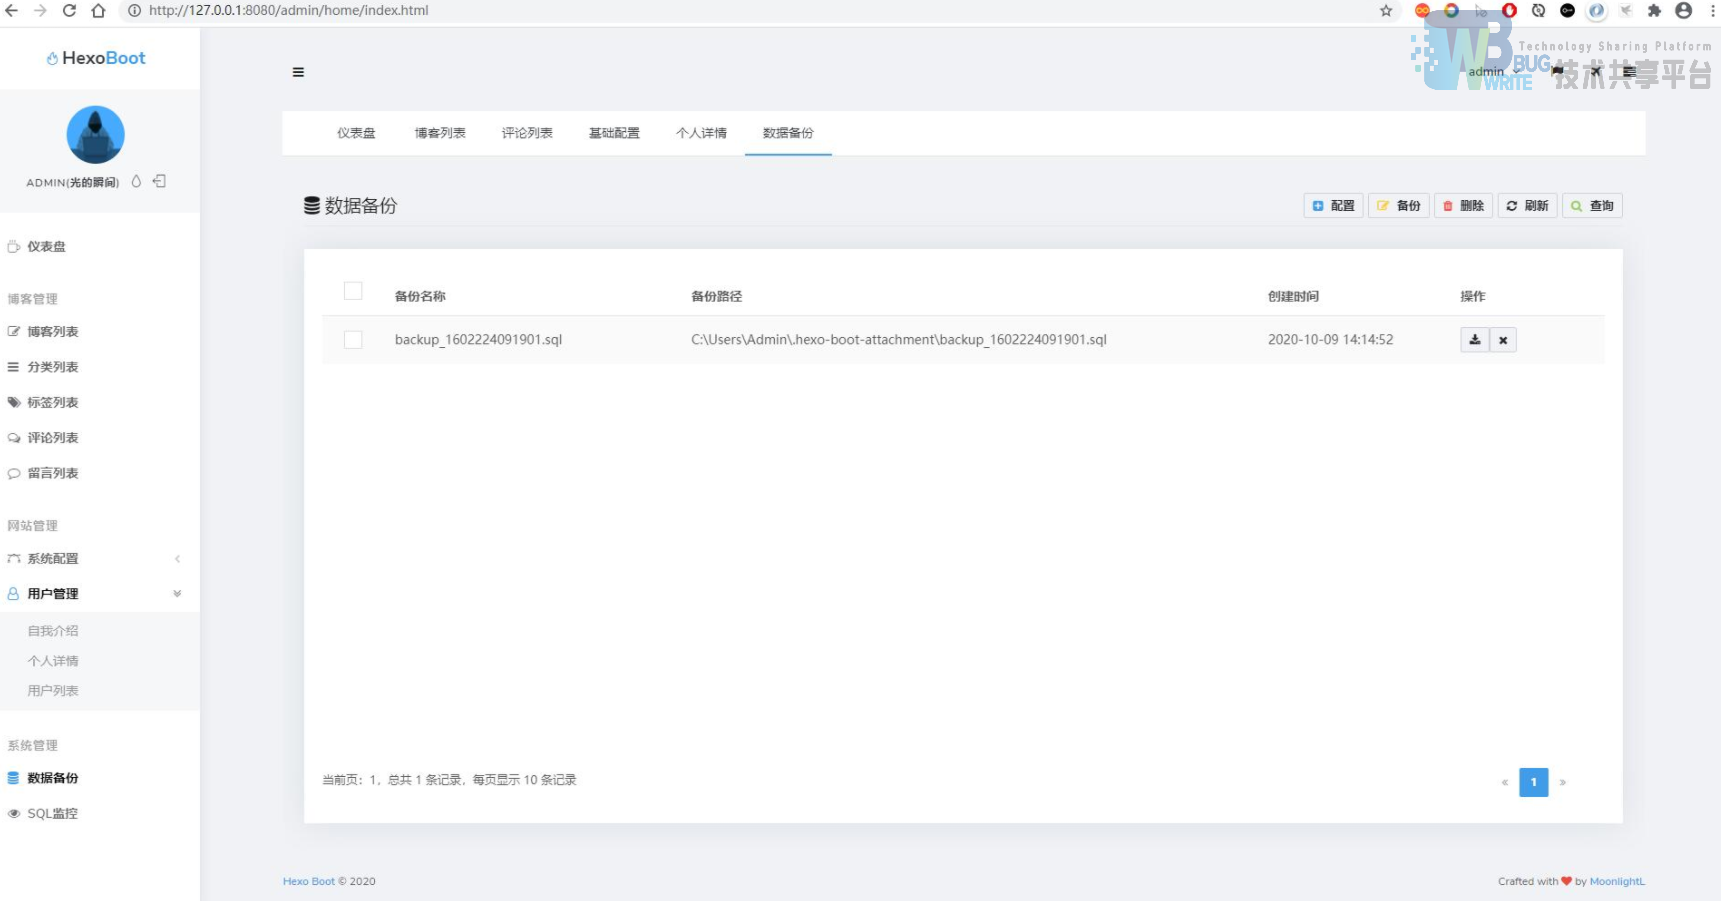
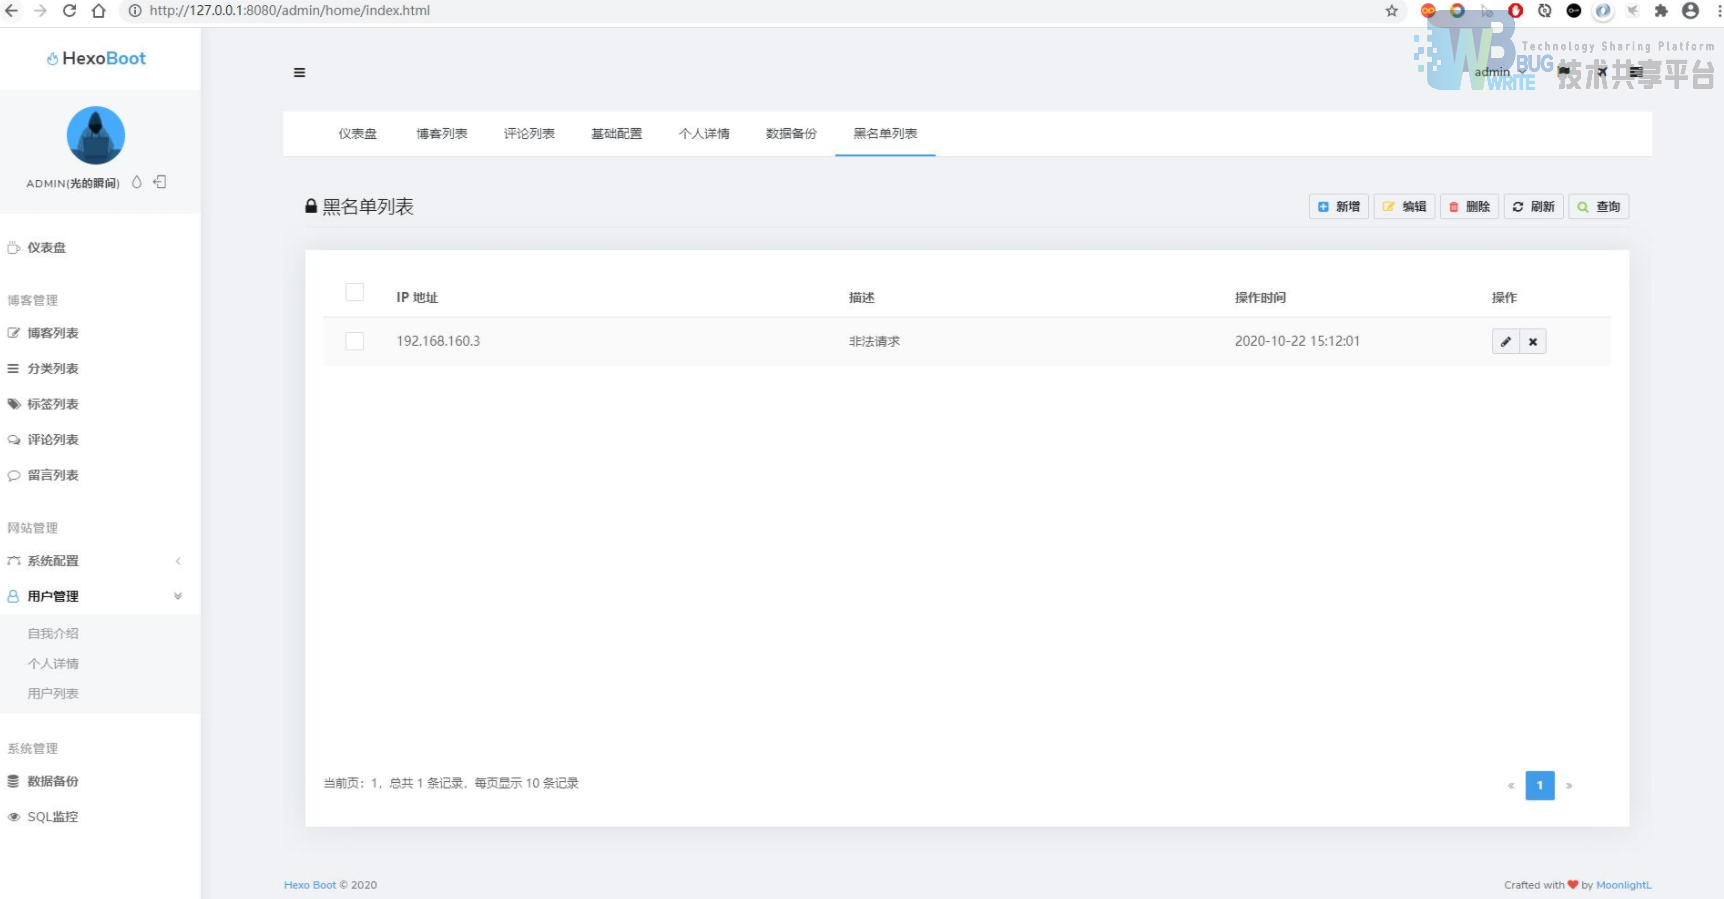
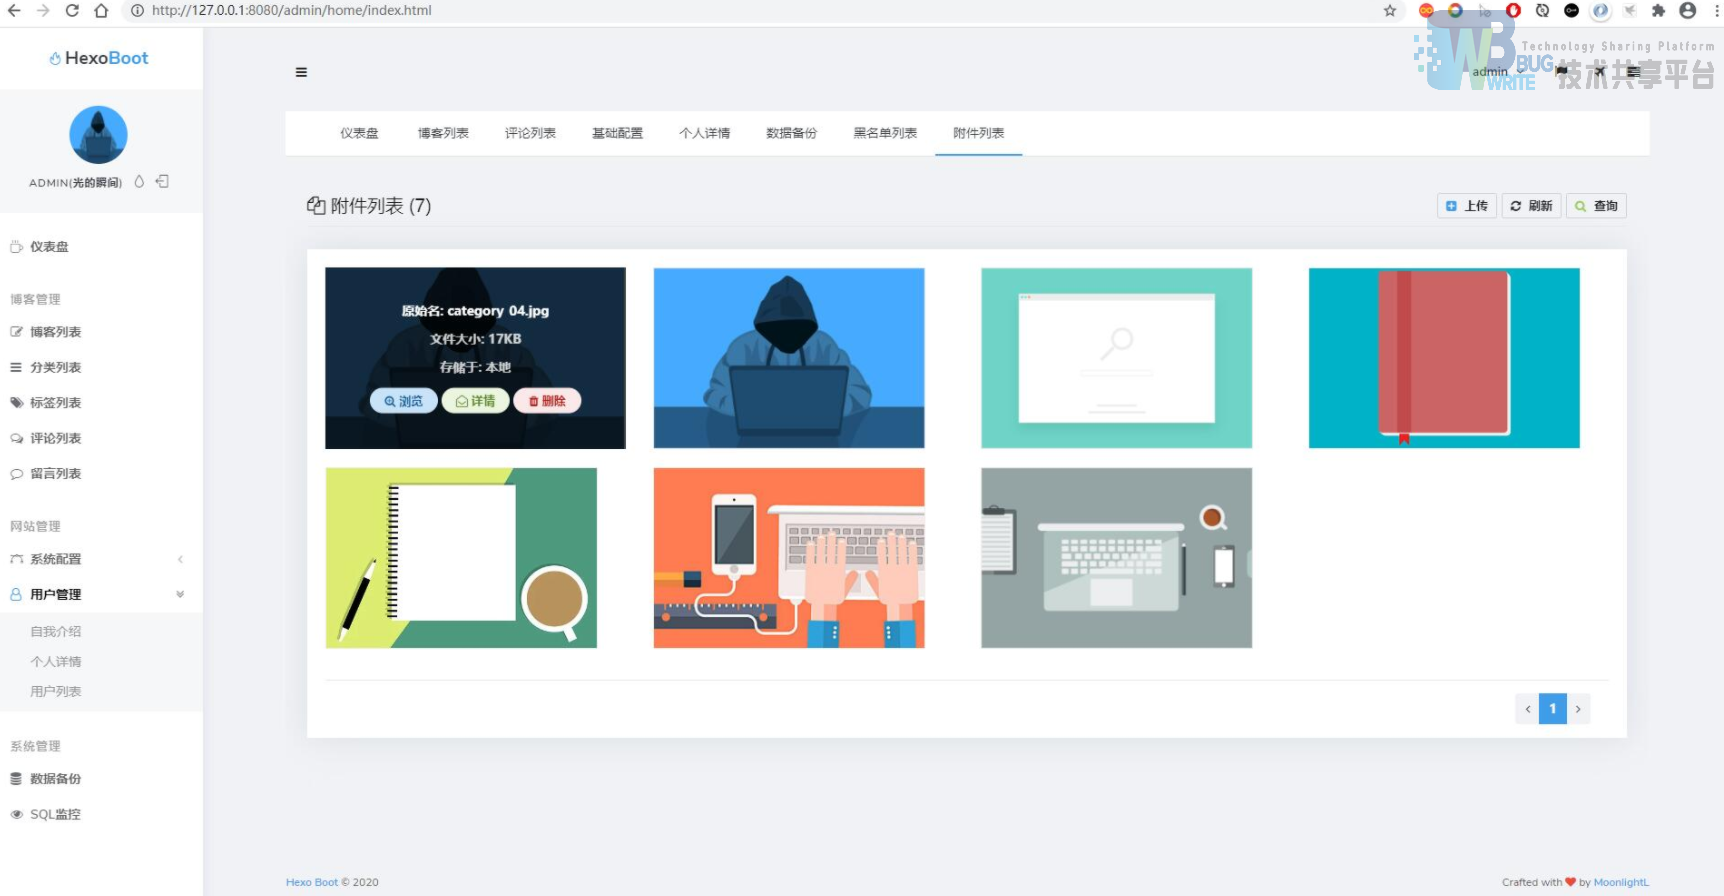
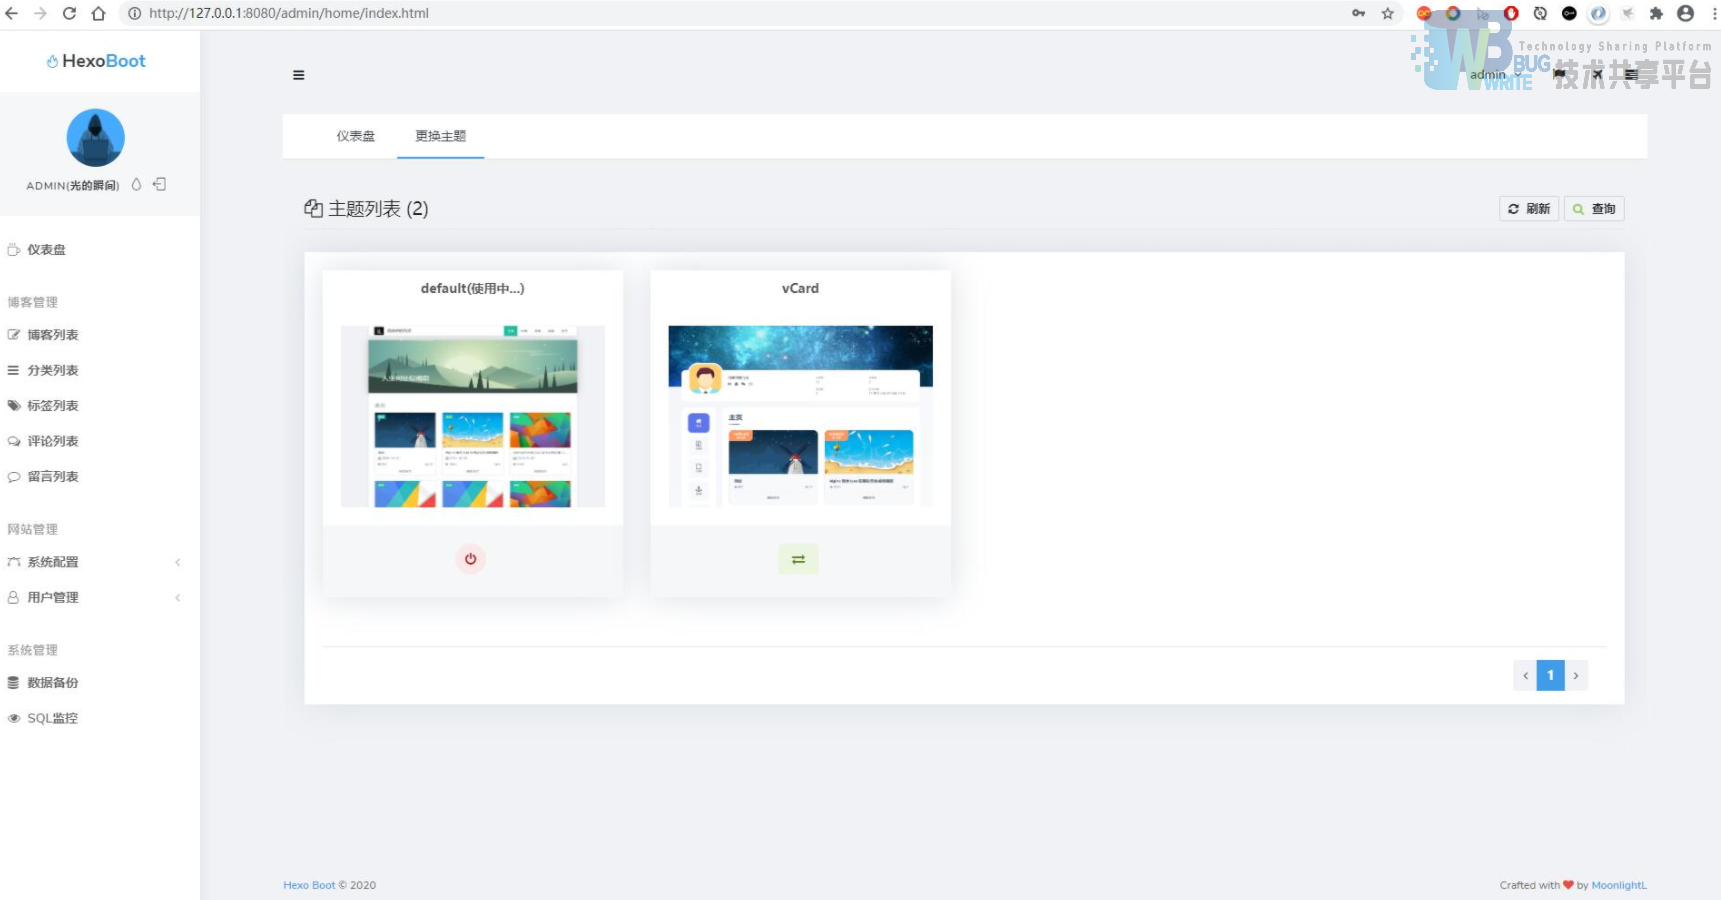
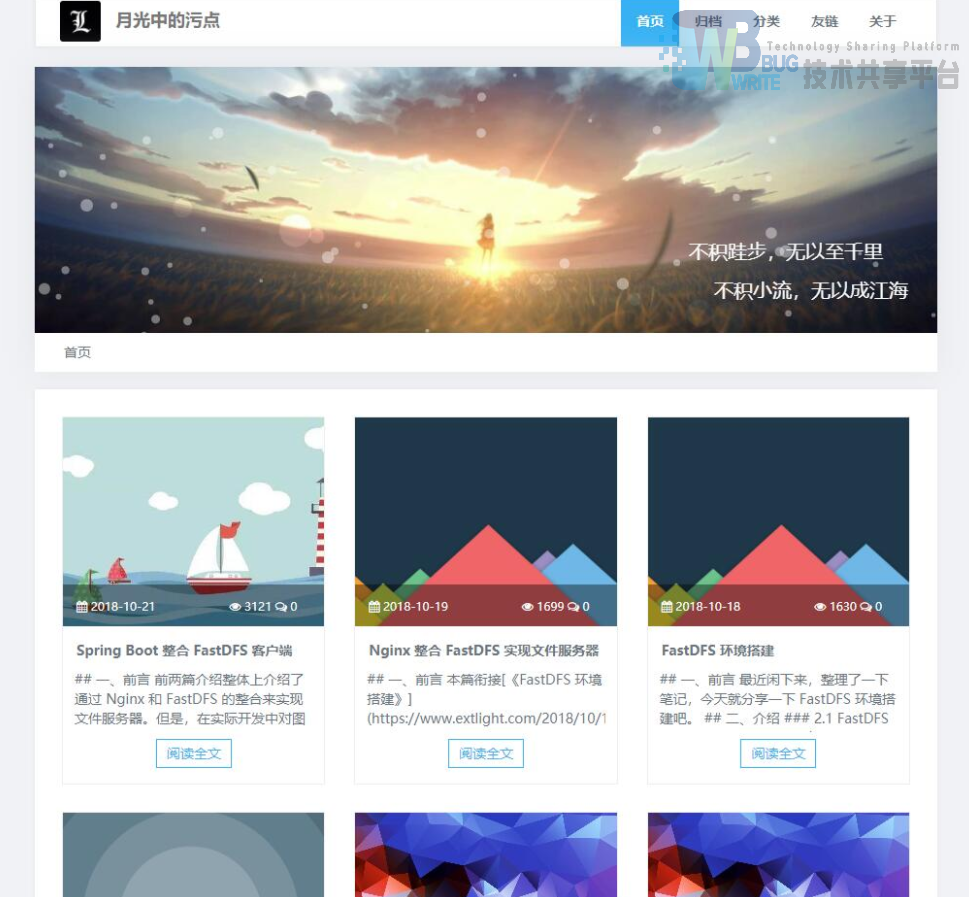
3.2 前端预览图(默认主题)
四、项目设计
4.1 数据库设计
4.1.1 表结构
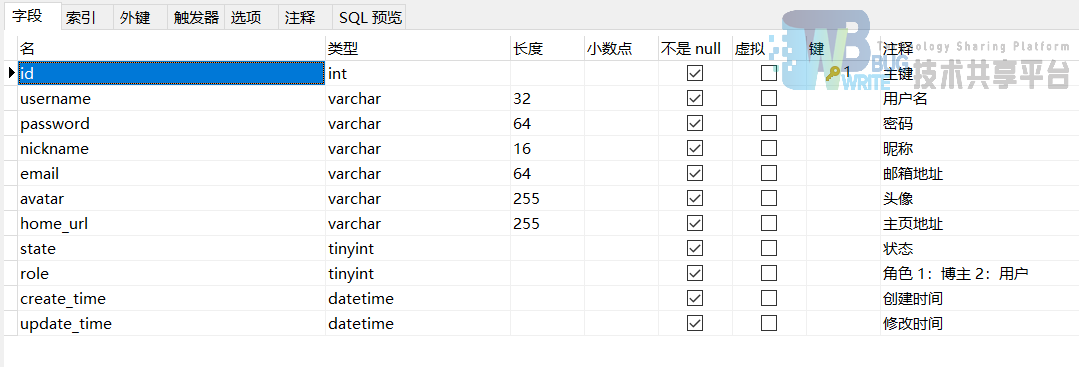
用户表
访客表

主题表

标签表

操作日志表

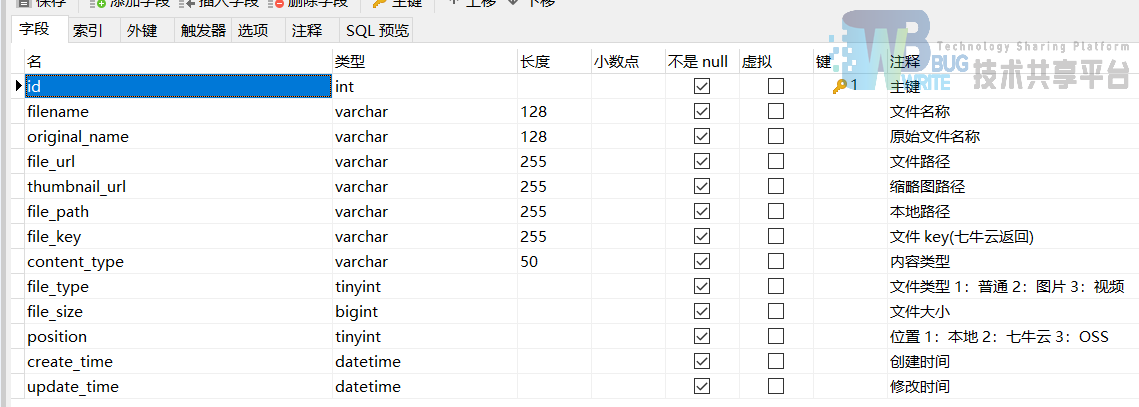
文件表
分类表

系统设计表

评论表

友情链接表

留言表
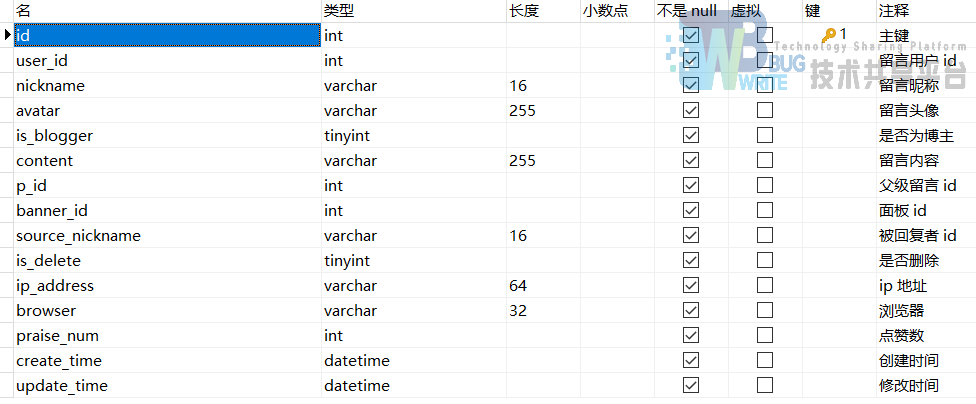
消息表

封面表
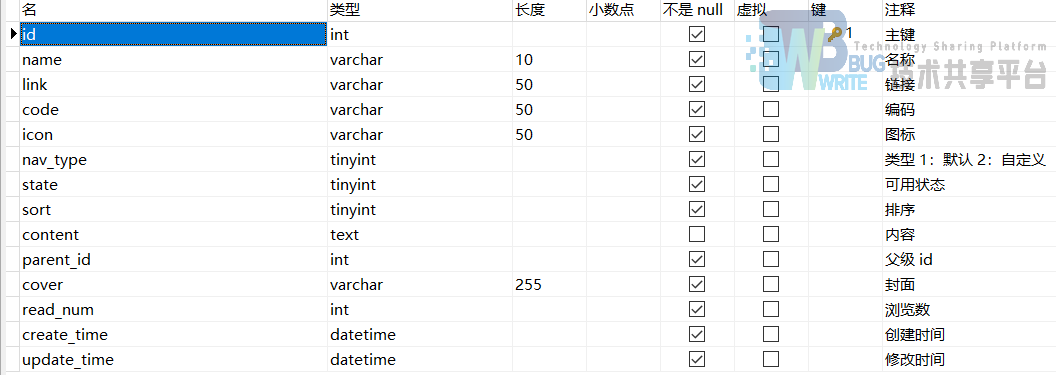
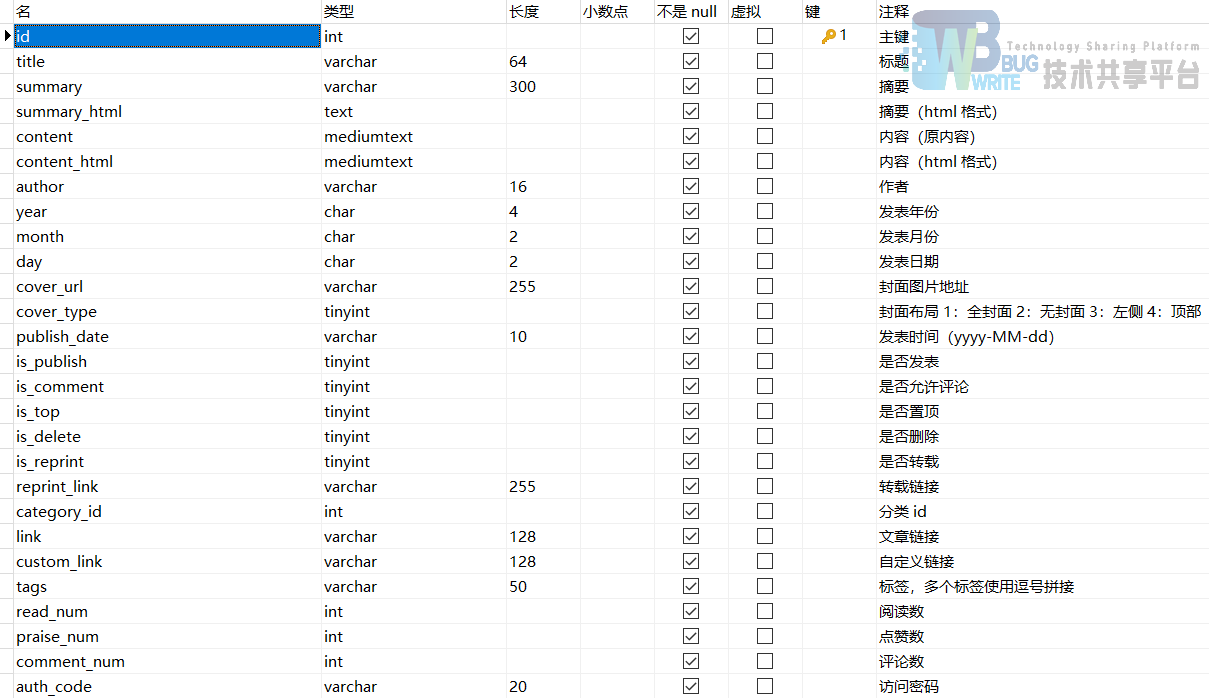
文章表
文章评论表
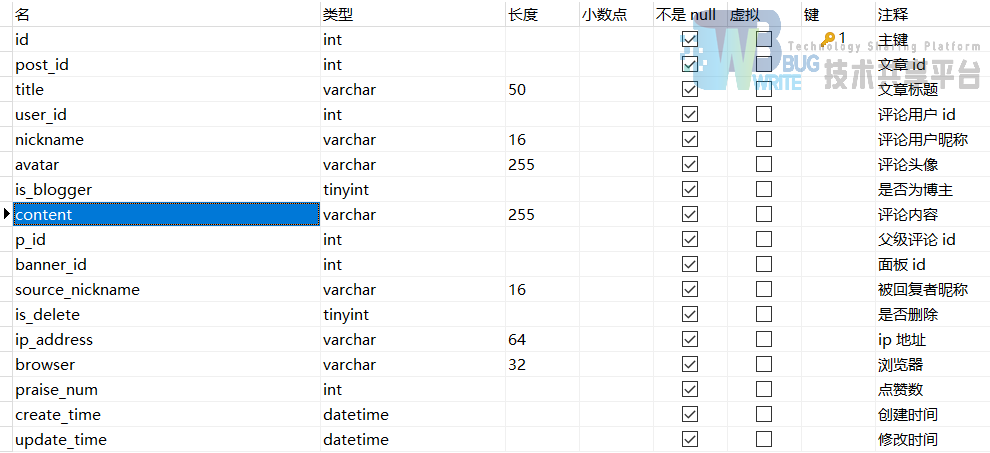
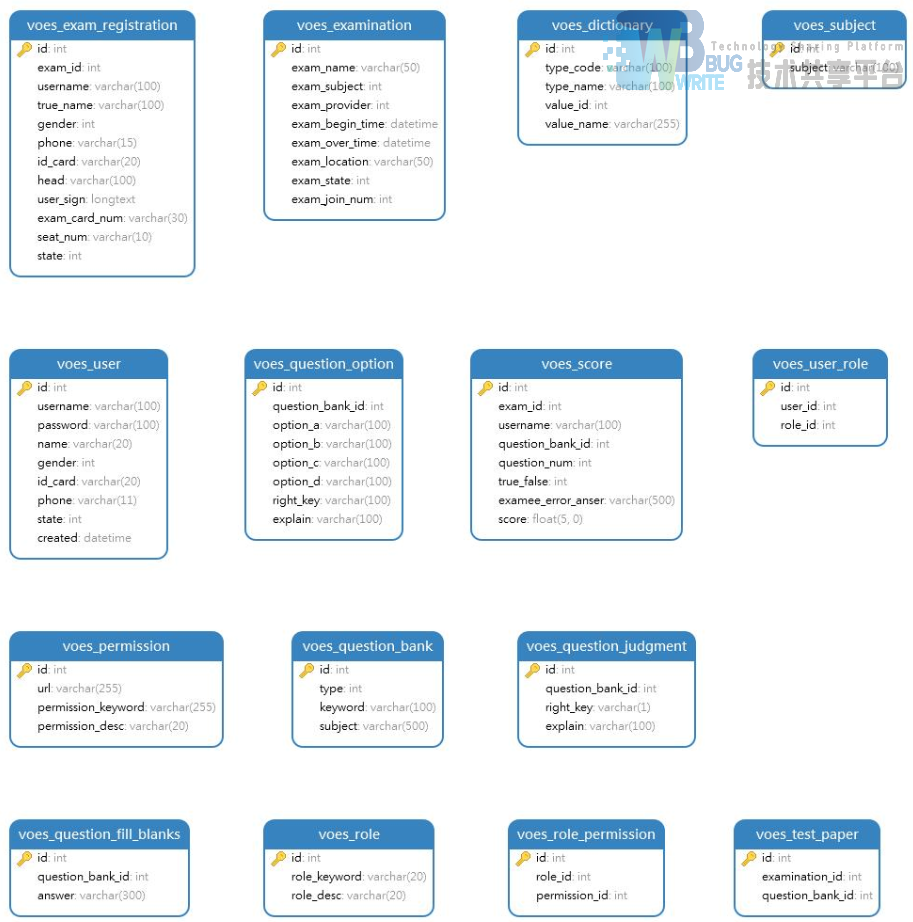
4.1.2 E-R图
4.2 系统设计
```java
/*
* 列表页
* @param resultMap
* @return
/
@RequestMapping("listUI.html")
public String listUI(Map
/**
 * 新增页
 * @param resultMap
 * @return
 */
@RequestMapping("addUI.html")
public String addUI(Map<String, Object> resultMap) {
    List<Category> categoryList = this.categoryService.findAll(true);
    resultMap.put("categoryList", categoryList);
    return this.render("addUI", resultMap);
}

/**
 * 编辑页
 * @param resultMap
 * @return
 */
@RequestMapping("editUI/{id}.html")
public String editUI(@PathVariable Integer id, Map<String, Object> resultMap) {
    Post post = this.postService.findById(id);
    resultMap.put("vo", post);
    List<Category> categoryList = this.categoryService.findAll(true);
    resultMap.put("categoryList", categoryList);
    PostTask postTask = this.postTaskService.getPostTask(post.getId());
    resultMap.put("jobTime", postTask != null ? postTask.getJobTime() : "");
    return this.render("editUI", resultMap);
}

/**
 * 导入页
 * @param resultMap
 * @return
 */
@RequestMapping("importUI.html")
public String importUI(Map<String, Object> resultMap) {
    return this.render("importUI", resultMap);
}

/**
 * 新增文章
 * @param request
 * @return
 */
@RequestMapping("add.json")
@ResponseBody
@OperateLog(value = "新增文章", actionType = ActionEnum.ADMIN_ADD)
public Result add(@Validated(BaseRequest.Save.class) PostRequest request) {
    Post post = request.toDoModel();
    this.postService.savePost(post);
    return Result.success();
}

/**
 * 编辑文章
 * @param request
 * @return
 */
@RequestMapping("edit.json")
@ResponseBody
@OperateLog(value = "编辑文章", actionType = ActionEnum.ADMIN_EDIT)
public Result edit(@Validated(BaseRequest.Update.class) PostRequest request) {
    Post post = request.toDoModel();
    this.postService.editPost(post);
    return Result.success();
}

/**
 * 导入文章
 * @param path
 * @return
 */
@RequestMapping("importPosts.json")
@ResponseBody
@OperateLog(value = "导入文章", actionType = ActionEnum.ADMIN_ADD)
public Result importPosts(@RequestParam String path, @RequestParam String type) {
    if ("md".equals(type)) {
        this.postService.importPostsByMd(path);
    } else if ("json".equals(type)) {
        this.postService.importPostsByJson(path);
    }
    return Result.success();
}

/**
 * 修改开关
 * @param request
 * @return
 */
@RequestMapping("updateSwitch.json")
@ResponseBody
@OperateLog(value = "修改文章状态", actionType = ActionEnum.ADMIN_EDIT)
public Result updateState(PostRequest request) {
    this.postService.updateState(request.toDoModel());
    return Result.success();
}

/**
 * 删除文章
 * @param idStr
 * @return
 */
@RequestMapping("remove.json")
@ResponseBody
@OperateLog(value = "删除文章", actionType = ActionEnum.ADMIN_REMOVE)
public Result remove(@RequestParam String idStr) {
    if (StringUtils.isBlank(idStr)) {
        ExceptionUtil.throwEx(GlobalExceptionEnum.ERROR_PARAM);
    }

    this.postService.removePostBatch(Arrays.asList(idStr.split(",")));
    return Result.success();
}

/**
 * 发表文章
 * @param id
 * @return
 */
@RequestMapping("publishPost.json")
@ResponseBody
@OperateLog(value = "发表文章", actionType = ActionEnum.ADMIN_EDIT)
public Result publishPost(Integer id) {
    this.postService.publishPost(id);
    return Result.success();
}

/**
 * 列表查询
 * @param request
 * @return
 */
@RequestMapping("list.json")
@ResponseBody
public Result list(PostRequest request) {
    PageInfo<Post> pageInfo = this.postService.findPage(request);
    return Result.success(pageInfo);
}
} ```
五、启动与部署
5.1 启动
下载源码,通过 Idea 工具打开项目,修改 resources 目录下的 application.yml 中的数据库配置(用户名和密码),运行项目即可。
-
前端主页访问地址 :http://127.0.0.1:8080
-
后端管理访问地址 :http://127.0.0.1:8080/admin/login.html
5.2 部署
该项目支持 war 包和 jar 包两种方式运行。
5.2.1 war 包形式
- 修改 pom.xml 文件的 2 处地方
-
将
war 注释放开 -
排除 spring-boot-starter-web 的内置 tomcat
-
mvn clean package,打出名为 ROOT.war 文件,将其上传至 tomcat 的 webapps 目录下(如已有 ROOT 文件,将其删掉),启动 tomcat 即可
5.2.2 jar 包形式
-
创建博客配置文件夹
mkdir ~/.hexo-boot -
mvn clean package,打出 jar 包后上传至 ~/.hexo-boot
-
将 application.yml 文件上传至 ~/.hexo-boot 目录中,根据自己的情况修改 application.yml 的数据库信息
-
创建 Service 服务 ```sh vim /etc/systemd/system/hexo-boot.service
编辑内容如下:
[Unit] Description=hexo-boot After=syslog.target
[Service] User=root ExecStart=/usr/java/jdk8/bin/java -server -Xms512m -Xmx1024m -jar /root/.hexo-boot/hexo-boot.jar --spring.config.additional-location=/root/.hexo-boot/ Restart=always
[Install] WantedBy=multi-user.target ``` 注意:内存分配和路径根据自己的情况进行修改,且路径必须是绝对路径!
- 服务命令 ```
启动
systemctl start hexo-boot
重启
systemctl restart hexo-boot
关闭
systemctl stop hexo-boot ```
- 补充
- 步骤1 和 步骤2 可以使用如下命令代替
- 注意 jar 版本号,请使用最新版本
下载安装包
  shell
curl -L https://github.com/moonlightL/hexo-boot/releases/download/2.3/hexo-boot-2.3.0.jar --output ~/.hexo-boot/hexo-boot.jar
下载 spring boot 配置文件 ,记得要修改数据库配置
  shell
curl -L -o ~/.hexo-boot/application.yml --create-dirs https://github.com/moonlightL/hexo-boot/releases/download/1.4.0/application.yml
六、添加主题
6.1 方式一
下载主题源码,修改名称(比如 hexo-boot-theme-abc 改成 abc),然后将整个文件夹复制到项目的 resources/templates/theme 下(与 default 目录同级),启动项目即可。
如若项目已经启动运行,也可复制到 classes/templates/theme 下即可
6.2 方式二
进入博客后端管理界面 -> 更换主题 -> 拉取安装,出现地址拉取框
输入主题的 git 地址,点击“拉取”按钮,即可等待下载安装
6.3 方式三
将主题文件(.zip)下载到本地,然后进入博客后端管理界面 -> 更换主题 -> 上传安装,出现上传文件框
选择需要上传的主题文件,点击“解压安装”按钮即可
目前已开源的主题:
参考文献
- 基于SSH框架模式的博客系统的设计与实现(西北师范大学·王刚成)
- 基于Spring Boot的校园轻博客系统的设计与实现(华中科技大学·邓笑)
- 基于Spring Boot的校园轻博客系统的设计与实现(华中科技大学·邓笑)
- 基于MVC设计模式的博客系统的设计与实现(大连理工大学·侯林)
- 基于Android平台的微博系统设计与开发(燕山大学·周彦超)
- 基于SSH2的轻博客系统的研究与实现(吉林大学·杨雪梅)
- 基于WEB2.0的教育博客应用与研究(北京化工大学·缪洪霞)
- 基于J2EE的手机博客系统设计与实现(江西师范大学·肖晓朋)
- 基于SSH框架的企业内博客系统的设计与实现(山东大学·柳青)
- 基于SSH框架的企业内博客系统的设计与实现(山东大学·柳青)
- 基于SeaweedFS的分布式文件管理系统的设计与实现(南京大学·管登荣)
- 基于SSH2的轻博客系统的研究与实现(吉林大学·杨雪梅)
- 基于OAuth2.0协议的企业分布式授权系统设计与实现(华中科技大学·支猛)
- 基于J2EE的手机博客系统设计与实现(江西师范大学·肖晓朋)
- 基于SSH2的轻博客系统的研究与实现(吉林大学·杨雪梅)
本文内容包括但不限于文字、数据、图表及超链接等)均来源于该信息及资料的相关主题。发布者:毕设导航 ,原文地址:https://m.bishedaima.com/yuanma/35568.html


