图片转化系统
一、图片管理系统亮点:本系统注重登录方式
1.1 登录方式一:
运用本地摄像头进行实时拍照登录,拍照得到的图片识别获取人脸与文件库里的人脸进行对比登录。
1.2 登录方式二:
登录者上传图片给系统,然后系统识别图片中的人脸与文件库里的人脸进行对比登录。
1.3 登录方式三:
输入账号密码登录,可以注册账号登录(运用数据库)
参考网址:
http://blog.csdn.net/xingchenbingbuyu/article/details/68482838
https://www.cnblogs.com/hanson1/p/7105265.html
1.4 前期准备:
安装模块:
- pip install dlib
- pip install numpy
- pip install install Image
- pip install scikit-image
-
pip install opencv-python 安装最新的 OpenCV3.3 开发包
-
pip install opencv-contrib-python 安装最新的 OpenCV3.3 扩展
如果你不想安装扩展模块,只运行第一行命令即可,安装完显然如下:
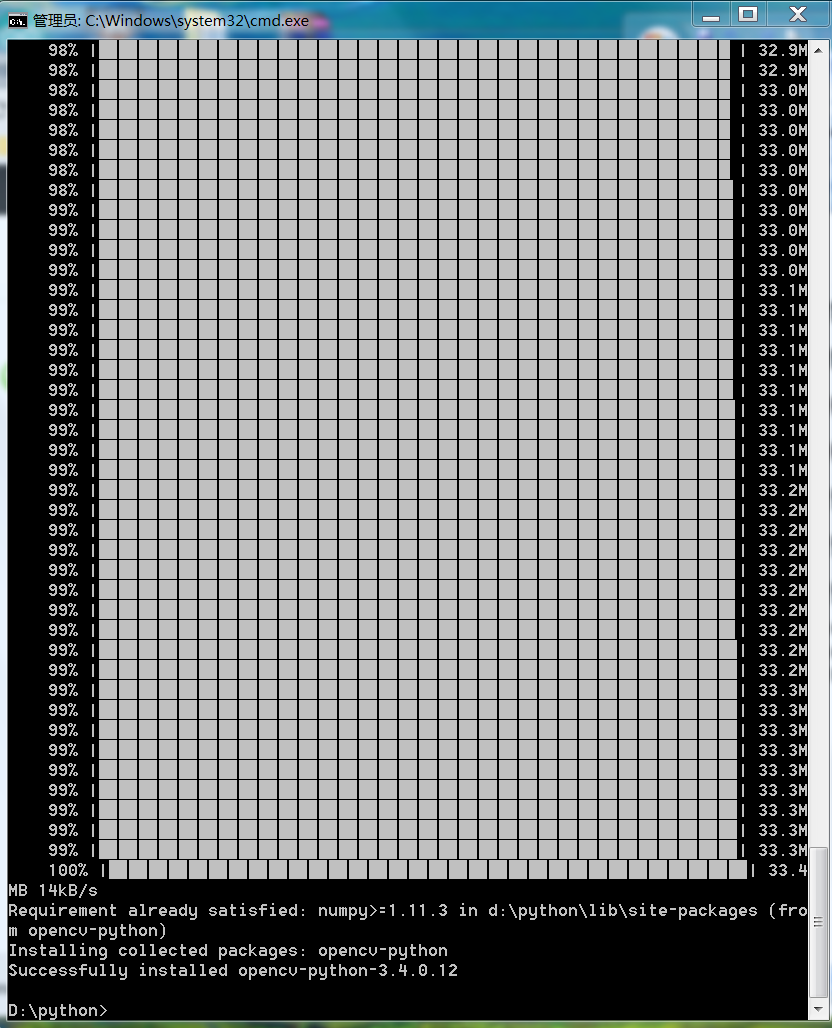
pip install 模块很麻烦我们可以下载:Anaconda,Anaconda 集成最多 python 模块的一个软件。
还需要下载下面的文件:
- dlib_face_recognition_resnet_model_v1.dat 是已经训练好的 resnet 人脸识别模型
- shape_predictor_68_face_landmarks.dat 是已经训练好的人脸关键点检测器
-
resnet 是何凯明在微软的时候提出的深度残差网络,获得了 ImageNet2015 冠军,通过让网络对残差进行学习,在深度和精度上做到了比 CNN 更加强大。
-
haarcascade_frontalface_alt2.xml 和 haarcascade_frontalface_default.xml 是 Opencv 检测中自带人脸检测器,可在 opencv 文件夹模块中找到。
我们需要在 D 盘创建 pythonface 的文件夹并把 haarcascade_frontalface_alt2.xml,haarcascade_frontalface_default.xml,shape_predictor_68_face_landmarks.dat 和 dlib_face_recognition_resnet_model_v1.dat 放进文件夹。
二、版本一
2.1 内容:
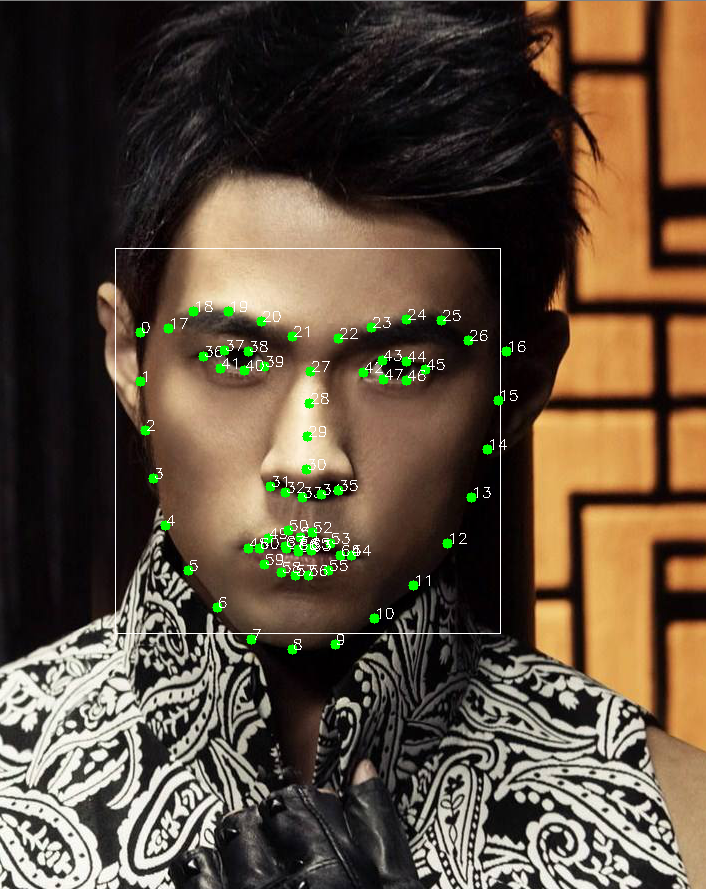
识别名称为:test.jpg 的图片,检测出人脸并描出子描述显示出来。test.jpg 图片如下

2.2 步骤:
将 test.jpg 图片放入 d:\pythonface 中然后运行以下代码即可得到结果。
2.3 代码:
```python import cv2 import dlib
加载人脸识别器分类器
detector = dlib.get_frontal_face_detector() landmark_predictor = dlib.shape_predictor('D://pythonface/shape_predictor_68_face_landmarks.dat')
导入图片
img = cv2.imread('D://pythonface/test.jpg')
获取图片人脸子描述
faces = detector(img,1) if (len(faces) > 0):#当检测人脸大于0时 for k,d in enumerate(faces): cv2.rectangle(img,(d.left(),d.top()),(d.right(),d.bottom()),(255,255,255)) shape = landmark_predictor(img,d) for i in range(68): cv2.circle(img, (shape.part(i).x, shape.part(i).y),5,(0,255,0), -1, 8) cv2.putText(img,str(i),(shape.part(i).x,shape.part(i).y),cv2.FONT_HERSHEY_SIMPLEX,0.5,(255,2555,255)) cv2.imshow('Frame',img)#窗口显示 cv2.waitKey(0)
```
本代码截图:

2.4 运行结果:
我们可以从弹窗中看到以下图片:----------------------------------------------------------------
三、版本二
3.1 内容:
打开摄像头,弹出 test 窗口检测到人脸系统会框出来,按 a 键然后拍照,系统会自动描出人脸的子描述并有 frame 弹窗显示出来。
3.2 步骤:
运行以下代码,等待摄像头开启,获取到人脸,然后按下 a 键拍照。
3.3 代码:
```c++ ''' 打开摄像头检测人脸框出来''' import numpy as np import cv2 import sys import dlib
cv2.namedWindow("test")
1调用摄像头
cap=cv2.VideoCapture(0)
2人脸识别器分类器
classfier=cv2.CascadeClassifier("D://pythonface/haarcascade_frontalface_default.xml")
sp = dlib.shape_predictor('D://pythonface/shape_predictor_68_face_landmarks.dat')#加载检测器
color=(0,255,0)
while cap.isOpened():#当摄像头打开时
ok,frame=cap.read()
if not ok:
break
#3灰度转换
grey=cv2.cvtColor(frame,cv2.COLOR_BGR2GRAY)
#4人脸检测,图片缩放比例和需要检测的有效点数
faceRects = classfier.detectMultiScale(grey, scaleFactor = 1.2, minNeighbors = 3, minSize = (32, 32))
if len(faceRects) > 0: #大于0则检测到人脸
print("检测到人脸")
for faceRect in faceRects: #单独框出每一张人脸
x, y, w, h = faceRect #5画图
cv2.rectangle(frame, (x - 10, y - 10), (x + w + 10, y + h + 10), color, 3)
cv2.imshow("test",frame)#显示窗口
print("检测中。。。。。。")
if cv2.waitKey(10)&0xFF==ord('a'):#输入a退出保存图片
cv2.imwrite("D://pythonface/tests.jpg", frame)#保存图片
detector = dlib.get_frontal_face_detector()#调用检测器
img = cv2.imread('D://pythonface/tests.jpg')
faces = detector(img,1)
if (len(faces) > 0):#大于0则检测到人脸
for k,d in enumerate(faces):
cv2.rectangle(img,(d.left(),d.top()),(d.right(),d.bottom()),(255,255,255))
shape = sp(img,d)
for i in range(68):
cv2.circle(img, (shape.part(i).x, shape.part(i).y),5,(0,255,0), -1, 8)
cv2.putText(img,str(i),(shape.part(i).x,shape.part(i).y),cv2.FONT_HERSHEY_SIMPLEX,0.5,(255,2555,255))
cv2.imshow('Frame',img)#显示窗口
cv2.waitKey(0)
cap.release() cv2.destroyAllWindows()#关闭窗口
```
本代码截图:
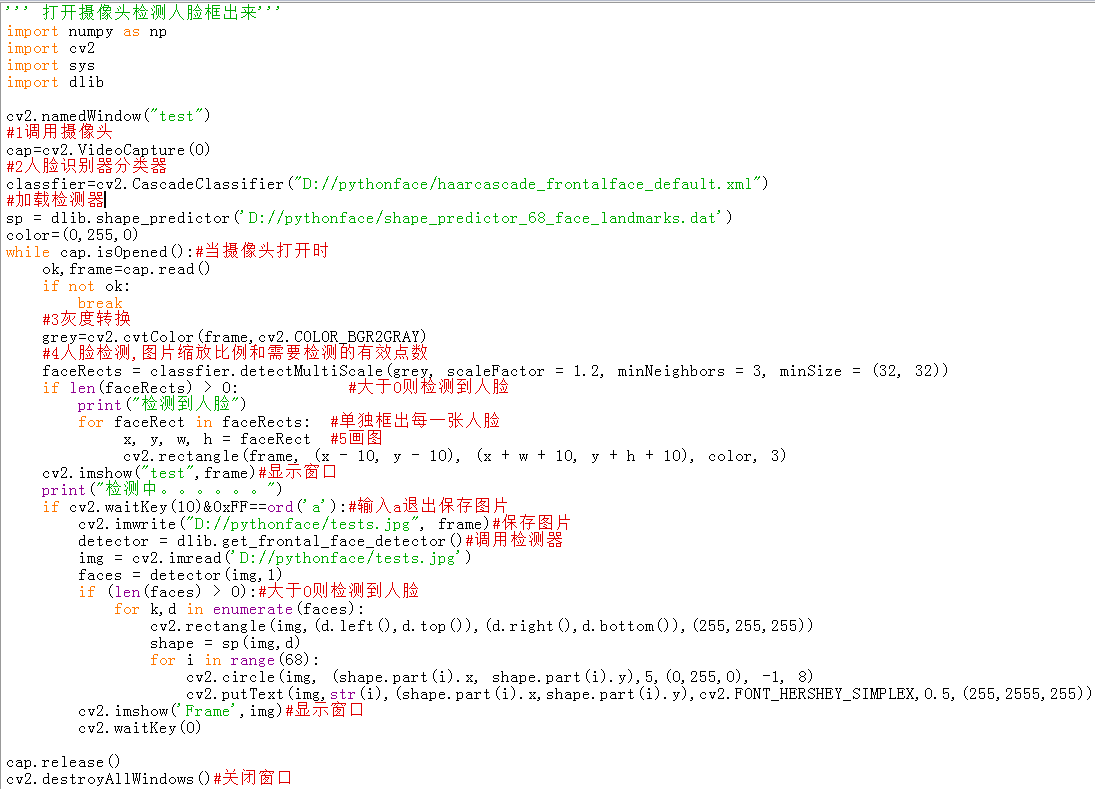
3.4 运行结果:
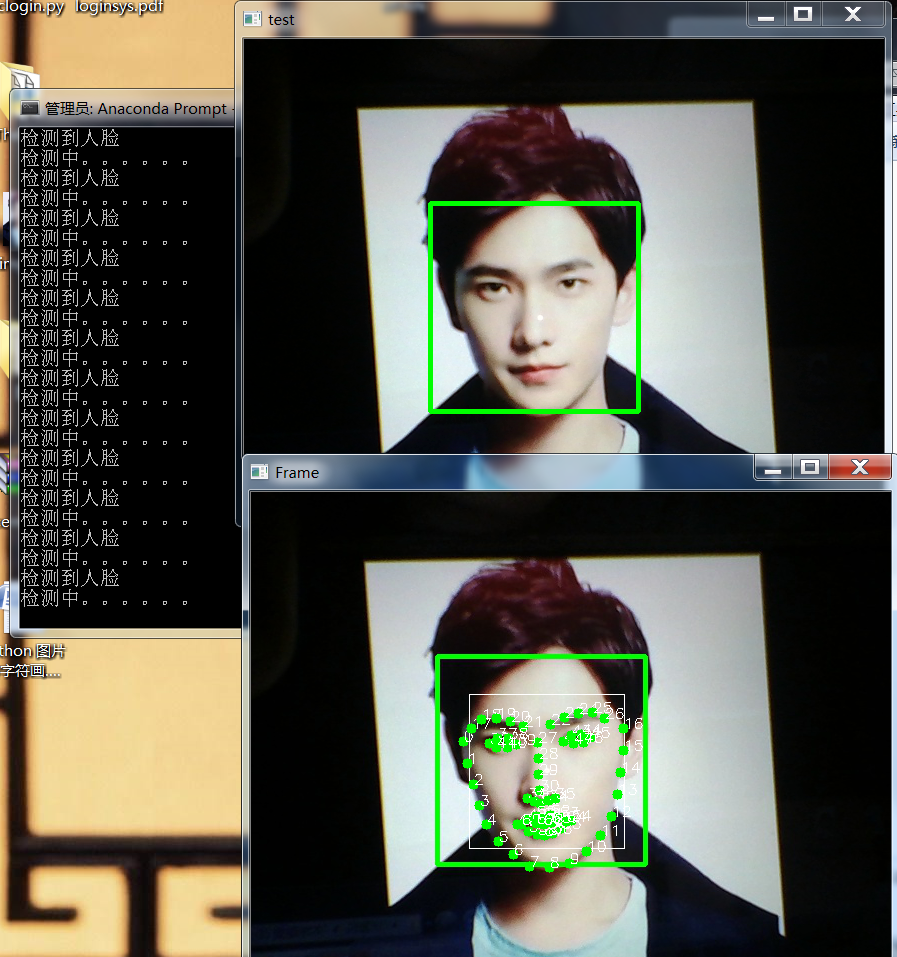
四、版本三
4.1 内容:
打开摄像头检测到人脸框出来按 a 键拍照,即刻检测与文件库里的 frist.jpg 的人脸对比计算出相似度。

frist.jpg
4.2 步骤:
运行下面代码,对准摄像头拍照,按下 a 键。
4.3 代码:
```c++
''' 打开摄像头检测人脸框出来按a即刻检测与文件里的frist.jpg的相似度'''
import numpy as np
import cv2
import sys
import dlib
import numpy
from skimage import io
def facedetec():
cv2.namedWindow("test")#1调用摄像头
cap=cv2.VideoCapture(0)#2人脸识别器分类器
classfier=cv2.CascadeClassifier("D://pythonface/haarcascade_frontalface_default.xml")
color=(0,255,0)
facerec = dlib.face_recognition_model_v1("D://pythonface/dlib_face_recognition_resnet_model_v1.dat")
sp = dlib.shape_predictor('D://pythonface/shape_predictor_68_face_landmarks.dat')#加载检测器
detector = dlib.get_frontal_face_detector()
while cap.isOpened():
    ok,frame=cap.read()
    if not ok:
        break
    #3灰度转换
    grey=cv2.cvtColor(frame,cv2.COLOR_BGR2GRAY)
    #4人脸检测,1.2和2分别为图片缩放比例和需要检测的有效点数
    faceRects = classfier.detectMultiScale(grey, scaleFactor = 1.2, minNeighbors = 3, minSize = (32, 32))
    if len(faceRects) > 0:            #大于0则检测到人脸
        print("检测到人脸")
        for faceRect in faceRects:  #单独框出每一张人脸
             x, y, w, h = faceRect  #5画图
             cv2.rectangle(frame, (x - 10, y - 10), (x + w + 10, y + h + 10), color, 3)#单独框出每一张人脸
    cv2.imshow("test",frame)#窗口显示
    if cv2.waitKey(10)&0xFF==ord('a'):#输入a截取图片并检测
        cv2.imwrite("D://pythonface/test.jpg", frame)#保存获取图片
        img = io.imread('D://pythonface/frist.jpg')#加载检测的图片
        print("ok")
        detss = detector(img,1)# 图片人脸子描述
        if (len(detss) > 0):#大于0则检测到人脸
            print("ok1")
            for k,d in enumerate(detss):
                shape = sp(img,d)
                face_descriptor = facerec.compute_face_descriptor(img, shape)
                v = numpy.array(face_descriptor) #本地图片子描述存进v
                print("ok2")
            img = io.imread("D://pythonface/test.jpg")
            dets = detector(img, 1)# 获取图片人脸子描述
            for k, d in enumerate(dets):
                shape = sp(img, d)
                face_descriptor = facerec.compute_face_descriptor(img, shape)
                d_test = numpy.array(face_descriptor) #boy.jpg子描述存进d_test
                print("ok3")
            # 计算欧式距离,算出人脸之间的差距
            dist = numpy.linalg.norm(v-d_test)
            dist=(1-dist)*100
            print("相似度:",dist,"%")
        cv2.waitKey(0)
cap.release()
cv2.destroyAllWindows()#关闭窗口
facedetec()
```
代码截图:
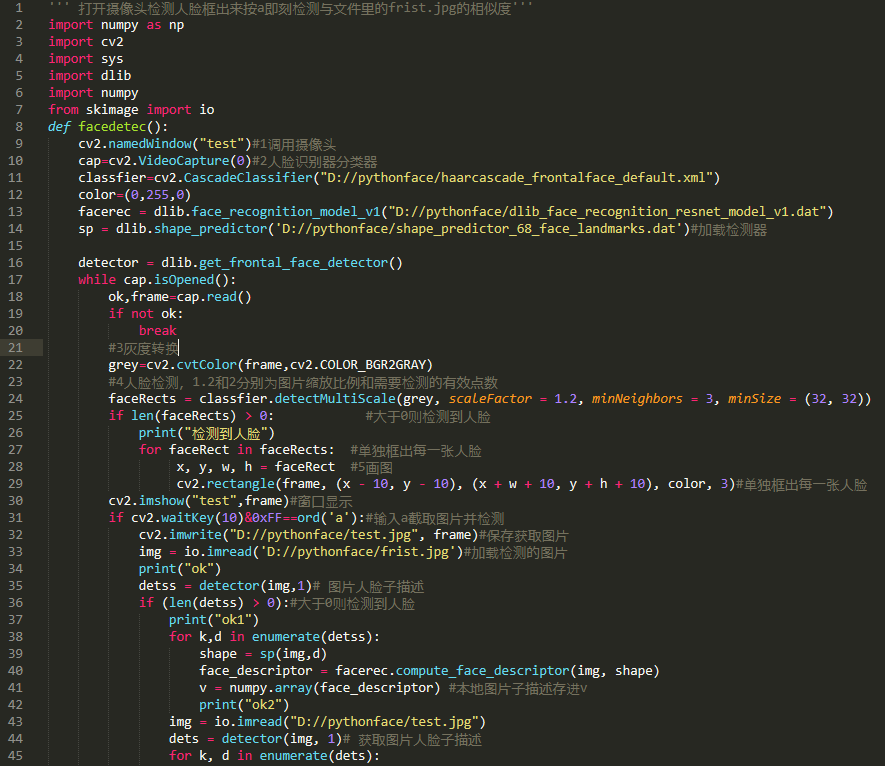

4.4 运行结果:
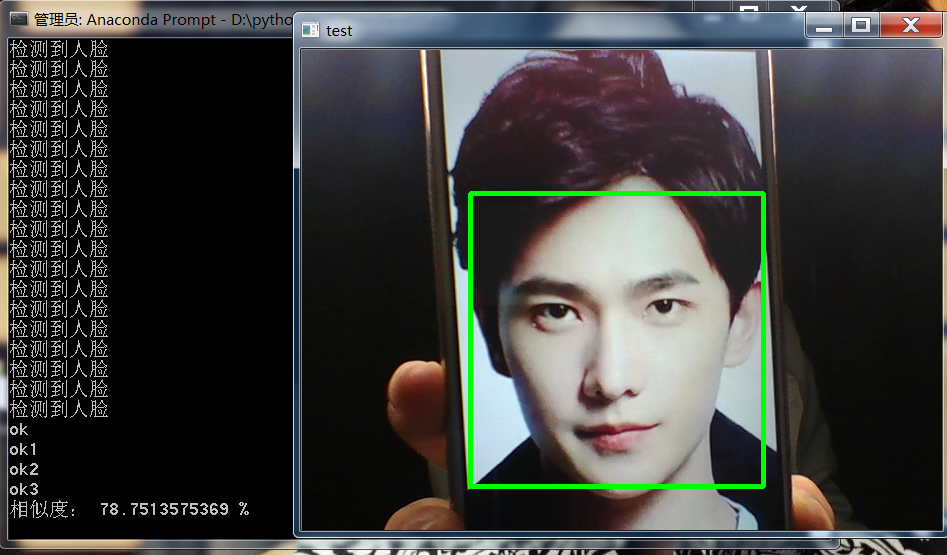
我们可以看出系统检测对比从摄像头获取的图片与 frist.jpg 文件相似度为 78% 左右
五、版本四
5.1 内容:
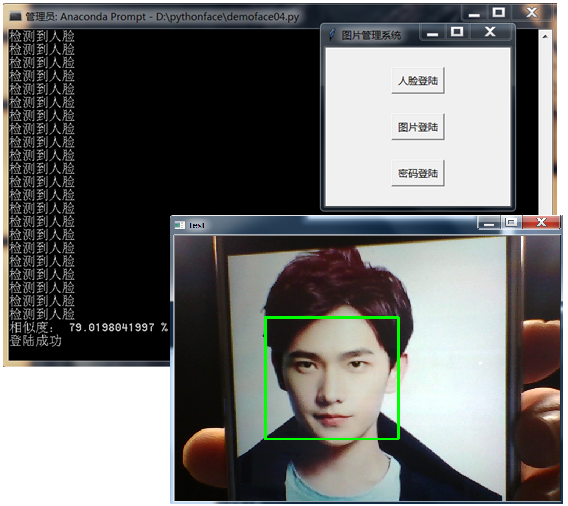
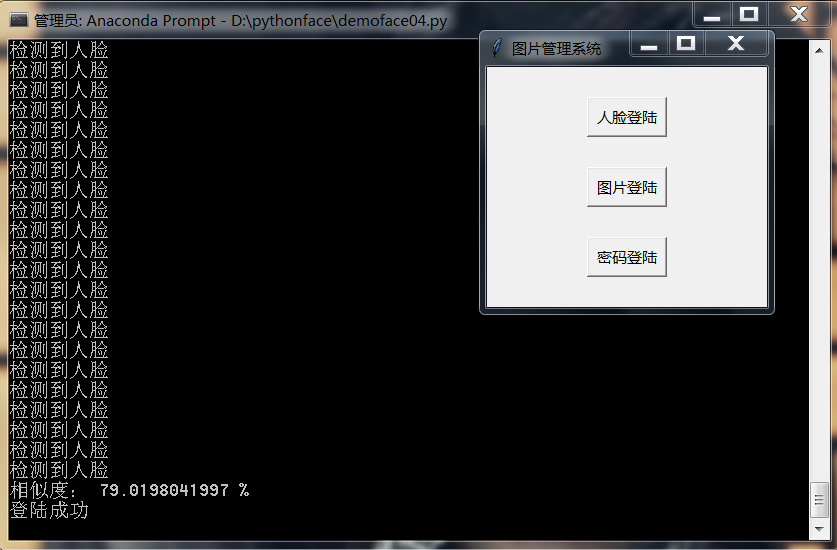
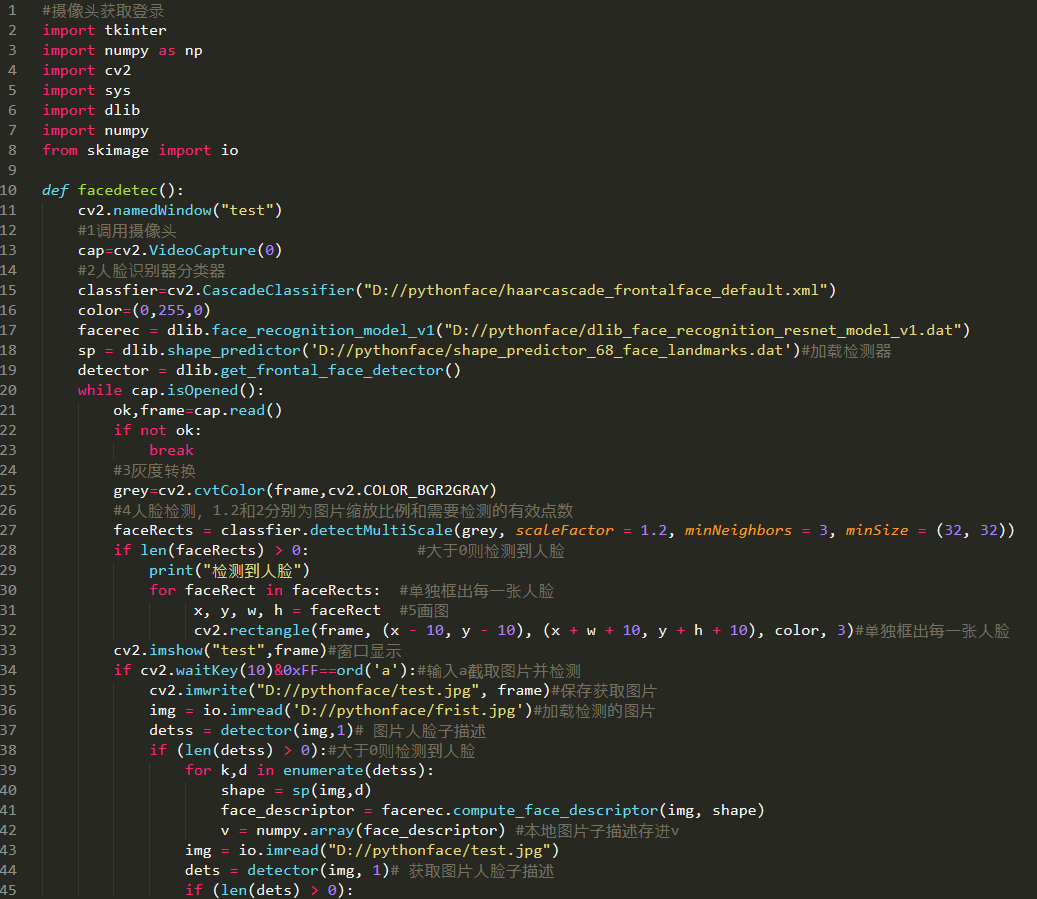
和前面几个版本比版本四加入了图形界面,是本系统的雏形。累加前面几个版本的经验版本四在登录方式上实现了人脸登录功能(打开摄像头检测到人脸框出来按 a 键拍照,即刻检测与文件库里的 frist.jpg 的人脸对比计算出相似度。当相似度大于或等于 72% 时即登录成功)
5.2 步骤:
(只测试本版本增加内容)运行代码会出现登陆界面————
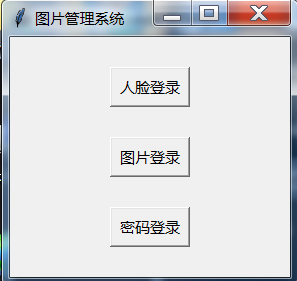
点击人脸登录————> 系统会开启摄像头,检测到人脸会有提示

按 a 键————> 如果摄像头没有识别到人脸会显示出
“没有检测出人脸”
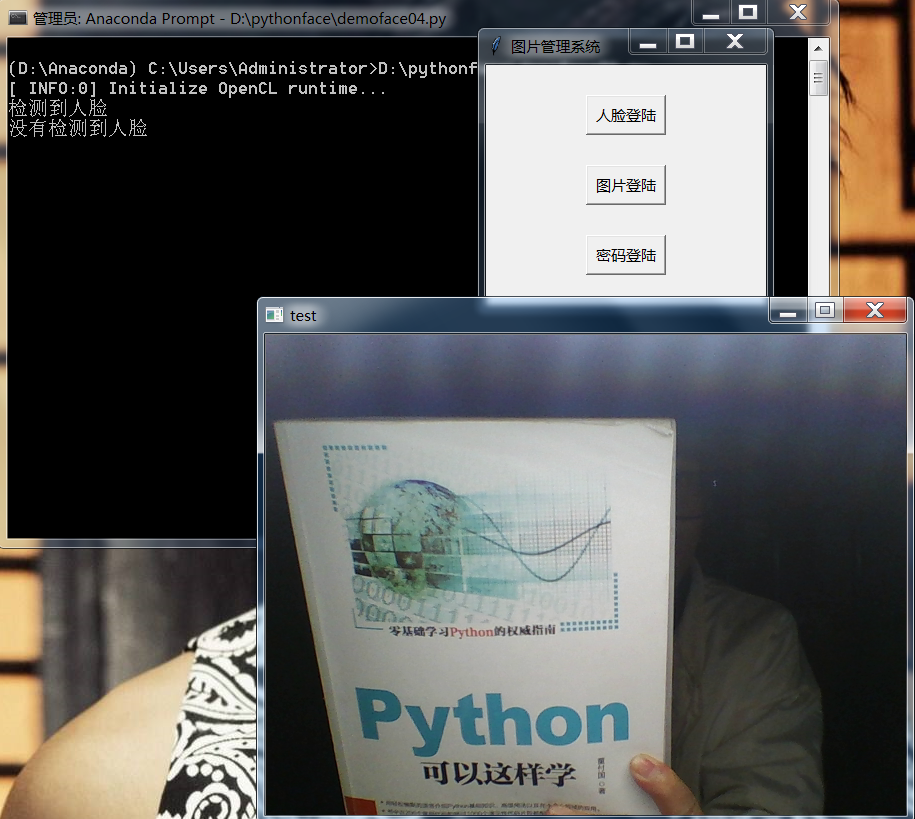
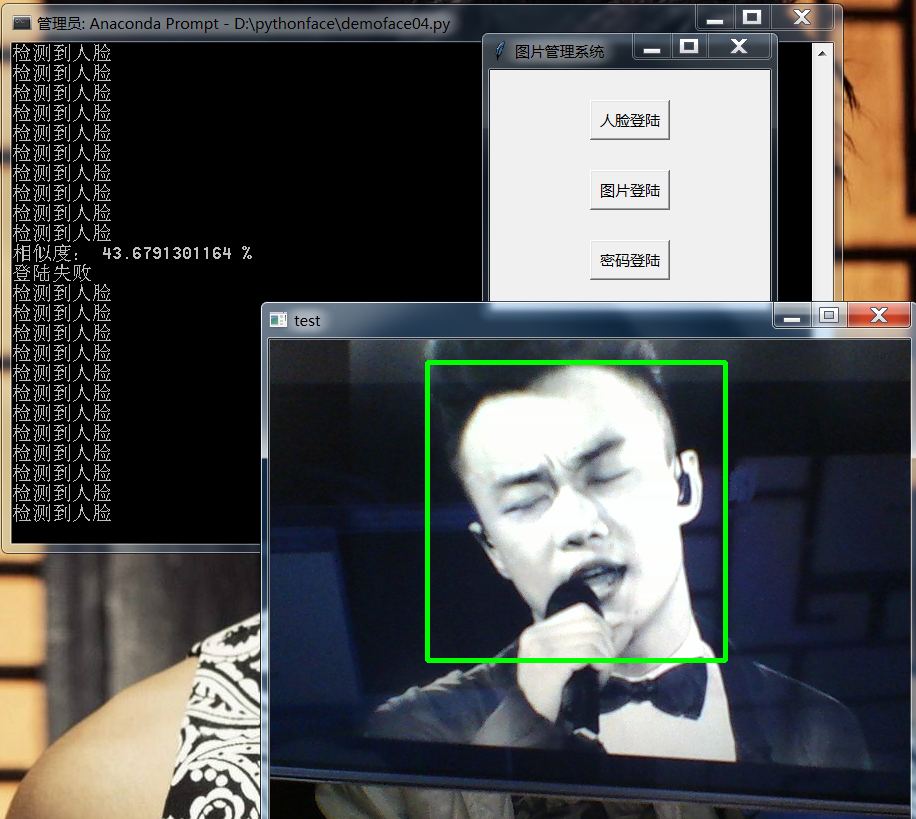
如果检测到人脸会计算相似度并提示是否登录成功———
登录失败:
登录成功:
5.3 代码:
```c++ import tkinter import numpy as np import cv2 import sys import dlib import numpy from skimage import io
def facedetec():
cv2.namedWindow("test")
#1调用摄像头
cap=cv2.VideoCapture(0)
#2人脸识别器分类器
classfier=cv2.CascadeClassifier("D://pythonface/haarcascade_frontalface_default.xml")
color=(0,255,0)
facerec = dlib.face_recognition_model_v1("D://pythonface/dlib_face_recognition_resnet_model_v1.dat")
sp = dlib.shape_predictor('D://pythonface/shape_predictor_68_face_landmarks.dat')#加载检测器
detector = dlib.get_frontal_face_detector()
while cap.isOpened():
ok,frame=cap.read()
if not ok:
break
#3灰度转换
grey=cv2.cvtColor(frame,cv2.COLOR_BGR2GRAY)
#4人脸检测,1.2和2分别为图片缩放比例和需要检测的有效点数
faceRects = classfier.detectMultiScale(grey, scaleFactor = 1.2, minNeighbors = 3, minSize = (32, 32))
if len(faceRects) > 0: #大于0则检测到人脸
print("检测到人脸")
for faceRect in faceRects: #单独框出每一张人脸
x, y, w, h = faceRect #5画图
cv2.rectangle(frame, (x - 10, y - 10), (x + w + 10, y + h + 10), color, 3)#单独框出每一张人脸
cv2.imshow("test",frame)#窗口显示
if cv2.waitKey(10)&0xFF==ord('a'):#输入a截取图片并检测
cv2.imwrite("D://pythonface/test.jpg", frame)#保存获取图片
img = io.imread('D://pythonface/frist.jpg')#加载检测的图片
detss = detector(img,1)# 图片人脸子描述
if (len(detss) > 0):#大于0则检测到人脸
for k,d in enumerate(detss):
shape = sp(img,d)
face_descriptor = facerec.compute_face_descriptor(img, shape)
v = numpy.array(face_descriptor) #本地图片子描述存进v
img = io.imread("D://pythonface/test.jpg")
dets = detector(img, 1)# 获取图片人脸子描述
if (len(dets) > 0):
for k, d in enumerate(dets):
shape = sp(img, d)
face_descriptor = facerec.compute_face_descriptor(img, shape)
d_test = numpy.array(face_descriptor) #boy.jpg子描述存进d_test
# 计算欧式距离,算出人脸之间的差距
dist = numpy.linalg.norm(v-d_test)
dist=(1-dist)*100
print("相似度:",dist,"%")
if dist>=72:
cap.release()
cv2.destroyAllWindows()#关闭窗口
break
else:
print("登录失败")
else :
print("没有检测到人脸")
root=tkinter.Tk()#创建窗口
root.title("图片管理系统")
root['height']=240#窗口大小
root['width']=280
定义实时登录函数
def sslogin(): facedetec() print("登录成功") ssbutton=tkinter.Button(root,text='人脸登录',command=sslogin) ssbutton.place(x=100,y=30,width=80,height=40)
定义图片登录函数
def tplogin():
print("tploginok")
tpbutton=tkinter.Button(root,text='图片登录',command=tplogin)
tpbutton.place(x=100,y=100,width=80,height=40)
定义密码登录函数
def mmlogin():
print("mmloginok")
mmbutton=tkinter.Button(root,text='密码登录',command=mmlogin)
mmbutton.place(x=100,y=170,width=80,height=40)
root.mainloop()
```
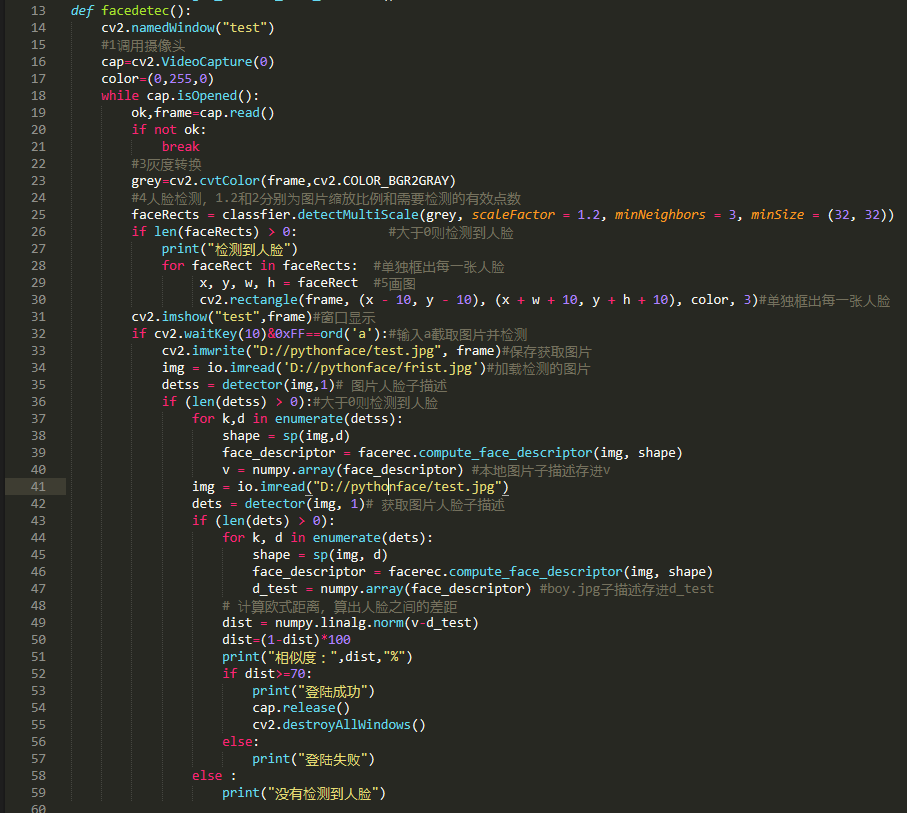
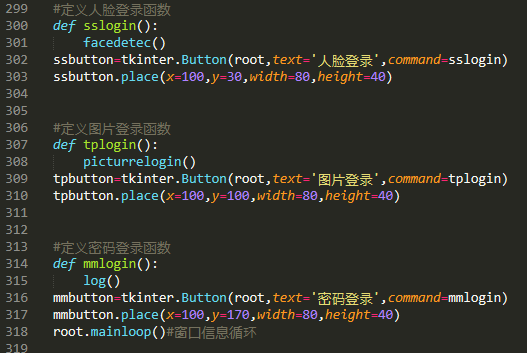
代码截图:

六、版本五
6.1 内容:
版本五是在版本四的基础上加上了图片登陆的功能代码块,检验方法是系统检测文件夹中的 mydec.jpg 照片中的人脸和文件库里的 frist.jpg 照片的人脸相比较,相识度大于 72% 即可登陆成功。

frist.jpg

  c++
mydec.jpg
6.2 步骤:
(只测试本版本增加内容)运行代码---
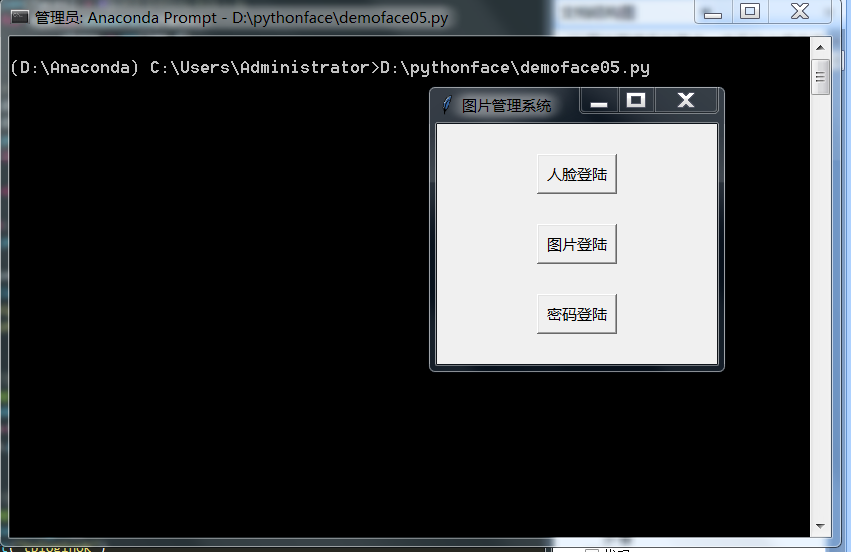
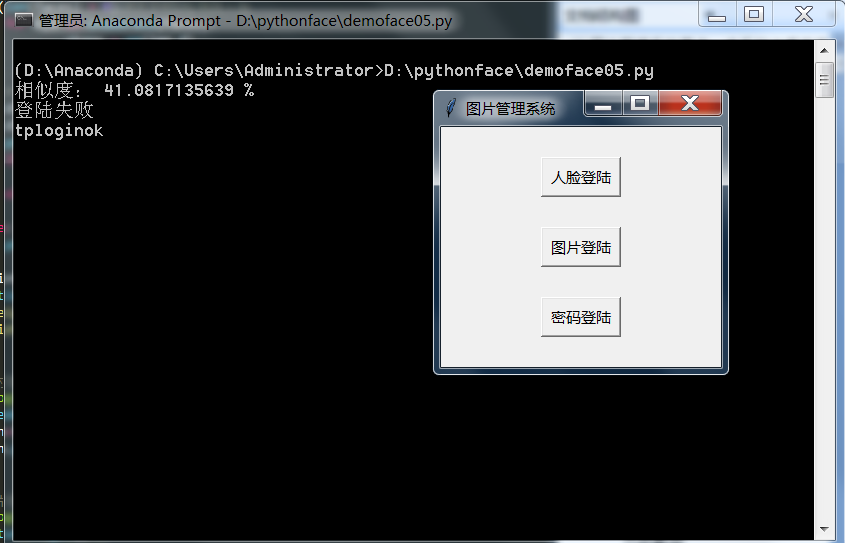
点击图片登陆-----
当图片人脸 mydec.jpg 和文件库里 test.jpg 图片人脸相似度小于 72% 时登录失败
我们把 mydec.jpg 换为下面的图片

  c++
mydec.jpg
再运行代码点击图片登陆:
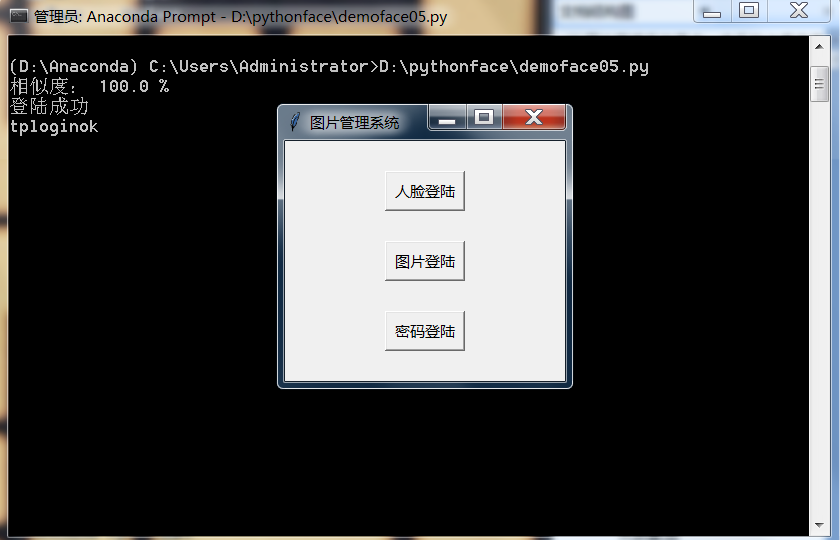
可以看出登陆成功
6.3 代码:
(字体蓝色为上一个版本增加的代码)
```c++
import tkinter
import numpy as np
import cv2
import sys
import dlib
import numpy
from skimage import io
#2人脸识别器分类器
classfier=cv2.CascadeClassifier("D://pythonface/facemiaodian/haarcascade_frontalface_default.xml")
facerec = dlib.face_recognition_model_v1("D://pythonface/dlib_face_recognition_resnet_model_v1.dat")
sp = dlib.shape_predictor('D://pythonface/shape_predictor_68_face_landmarks.dat')#加载检测器
detector = dlib.get_frontal_face_detector()
def facedetec():
cv2.namedWindow("test")
#1调用摄像头
cap=cv2.VideoCapture(0)
color=(0,255,0)
while cap.isOpened():
ok,frame=cap.read()
if not ok:
break
#3灰度转换
grey=cv2.cvtColor(frame,cv2.COLOR_BGR2GRAY)
#4人脸检测,1.2和2分别为图片缩放比例和需要检测的有效点数
faceRects = classfier.detectMultiScale(grey, scaleFactor = 1.2, minNeighbors = 3, minSize = (32, 32))
if len(faceRects) > 0: #大于0则检测到人脸
print("检测到人脸")
for faceRect in faceRects: #单独框出每一张人脸
x, y, w, h = faceRect #5画图
cv2.rectangle(frame, (x - 10, y - 10), (x + w + 10, y + h + 10), color, 3)#单独框出每一张人脸
cv2.imshow("test",frame)#窗口显示
if cv2.waitKey(10)&0xFF==ord('a'):#输入a截取图片并检测
cv2.imwrite("D://pythonface/test.jpg", frame)#保存获取图片
img = io.imread('D://pythonface/frist.jpg')#加载检测的图片
detss = detector(img,1)# 图片人脸子描述
if (len(detss) > 0):#大于0则检测到人脸
for k,d in enumerate(detss):
shape = sp(img,d)
face_descriptor = facerec.compute_face_descriptor(img, shape)
v = numpy.array(face_descriptor) #本地图片子描述存进v
img = io.imread("D://pythonface/test.jpg")
dets = detector(img, 1)# 获取图片人脸子描述
if (len(dets) > 0):
for k, d in enumerate(dets):
shape = sp(img, d)
face_descriptor = facerec.compute_face_descriptor(img, shape)
d_test = numpy.array(face_descriptor) #boy.jpg子描述存进d_test
# 计算欧式距离,算出人脸之间的差距
dist = numpy.linalg.norm(v-d_test)
dist=(1-dist)*100
print("相似度:",dist,"%")
if dist>=70:
print("登录成功")
cap.release()
cv2.destroyAllWindows()
else:
print("登录失败")
else :
print("没有检测到人脸")
def picturrelogin():
img = io.imread('D://pythonface/frist.jpg')#加载检测的图片
# 获取图片人脸子描述
faces = detector(img,1)# 图片人脸子描述
for k,d in enumerate(faces):
shape= sp(img,d)
face_descriptor = facerec.compute_face_descriptor(img, shape)
des= numpy.array(face_descriptor) #本地图片子描述存进des
img = io.imread('D://pythonface/mydec.jpg')#加载检测的图片
# 获取图片人脸子描述
faces = detector(img,1)# 图片人脸子描述
if (len(faces) > 0):#大于0则检测到人脸
for k,d in enumerate(faces):
shape = sp(img,d)
face_descriptor = facerec.compute_face_descriptor(img, shape)
mypicdes= numpy.array(face_descriptor) #d登陆图片子描述存进mypicdes
# 计算欧式距离,算出人脸之间的差距
dist = numpy.linalg.norm(des-mypicdes)
dist=(1-dist)*100
print("相似度:",dist,"%")
if dist>=72:
print("登录成功")
else:
print("登录失败")
else:
print("没有检测到人脸")
root=tkinter.Tk()#创建窗口 root.title("图片管理系统") root['height']=240#窗口大小 root['width']=280
定义实时登录函数
def sslogin(): facedetec() ssbutton=tkinter.Button(root,text='人脸登录',command=sslogin) ssbutton.place(x=100,y=30,width=80,height=40)
定义图片登录函数
def tplogin():
picturrelogin()
print("tploginok")
tpbutton=tkinter.Button(root,text='图片登录',command=tplogin)
tpbutton.place(x=100,y=100,width=80,height=40)
定义密码登录函数
def mmlogin():
print("mmloginok")
mmbutton=tkinter.Button(root,text='密码登录',command=mmlogin)
mmbutton.place(x=100,y=170,width=80,height=40)
root.mainloop()
```
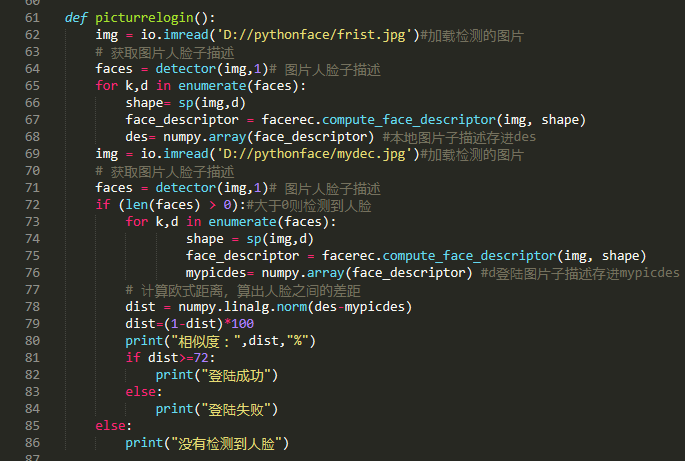
代码截图:


七、版本六
7.1 内容:
版本六是上个版本中加了账号密码登陆(运用数据库)功能
7.2 步骤
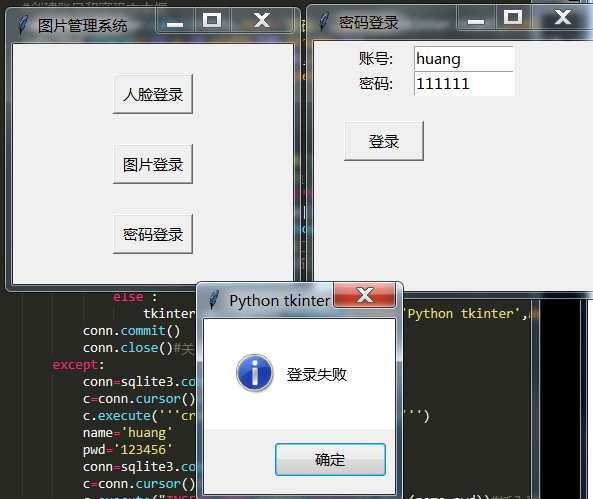
(只测试本版本增加内容)运行下面代码点击密码登陆
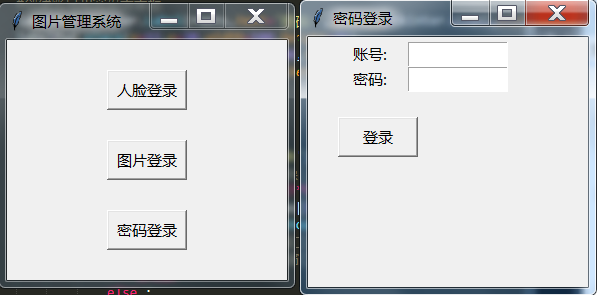
初始账号为:huang 密码为:123456 点击登陆
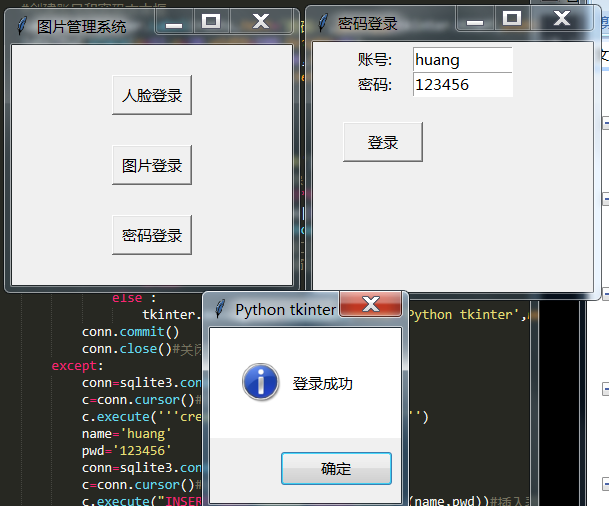
当输入错误的密码时会提示登陆失败
7.3 代码:
```c++
import tkinter
import numpy as np
import cv2
import sys
import dlib
import numpy
from skimage import io
import sqlite3
import tkinter
import tkinter.messagebox
#2人脸识别器分类器
classfier=cv2.CascadeClassifier("D://pythonface/haarcascade_frontalface_default.xml")
facerec = dlib.face_recognition_model_v1("D://pythonface/dlib_face_recognition_resnet_model_v1.dat")
sp = dlib.shape_predictor('D://pythonface/shape_predictor_68_face_landmarks.dat')#加载检测器
detector = dlib.get_frontal_face_detector()
def facedetec():
cv2.namedWindow("test")
#1调用摄像头
cap=cv2.VideoCapture(0)
color=(0,255,0)
while cap.isOpened():
ok,frame=cap.read()
if not ok:
break
#3灰度转换
grey=cv2.cvtColor(frame,cv2.COLOR_BGR2GRAY)
#4人脸检测,1.2和2分别为图片缩放比例和需要检测的有效点数
faceRects = classfier.detectMultiScale(grey, scaleFactor = 1.2, minNeighbors = 3, minSize = (32, 32))
if len(faceRects) > 0: #大于0则检测到人脸
print("检测到人脸")
for faceRect in faceRects: #单独框出每一张人脸
x, y, w, h = faceRect #5画图
cv2.rectangle(frame, (x - 10, y - 10), (x + w + 10, y + h + 10), color, 3)#单独框出每一张人脸
cv2.imshow("test",frame)#窗口显示
if cv2.waitKey(10)&0xFF==ord('a'):#输入a截取图片并检测
cv2.imwrite("D://pythonface/test.jpg", frame)#保存获取图片
img = io.imread('D://pythonface/frist.jpg')#加载检测的图片
detss = detector(img,1)# 图片人脸子描述
if (len(detss) > 0):#大于0则检测到人脸
for k,d in enumerate(detss):
shape = sp(img,d)
face_descriptor = facerec.compute_face_descriptor(img, shape)
v = numpy.array(face_descriptor) #本地图片子描述存进v
img = io.imread("D://pythonface/test.jpg")
dets = detector(img, 1)# 获取图片人脸子描述
if (len(dets) > 0):
for k, d in enumerate(dets):
shape = sp(img, d)
face_descriptor = facerec.compute_face_descriptor(img, shape)
d_test = numpy.array(face_descriptor) #boy.jpg子描述存进d_test
# 计算欧式距离,算出人脸之间的差距
dist = numpy.linalg.norm(v-d_test)
dist=(1-dist)
100
print("相似度:",dist,"%")
if dist>=70:
print("登陆成功")
cap.release()
cv2.destroyAllWindows()#关闭窗口
else:
print("登陆失败")
else :
print("没有检测到人脸")
def picturrelogin():
img = io.imread('D://pythonface/frist.jpg')#加载检测的图片
# 获取图片人脸子描述
faces = detector(img,1)# 图片人脸子描述
for k,d in enumerate(faces):
shape= sp(img,d)
face_descriptor = facerec.compute_face_descriptor(img, shape)
des= numpy.array(face_descriptor) #本地图片子描述存进des
img = io.imread('D://pythonface/mydec.jpg')#加载检测的图片
# 获取图片人脸子描述
faces = detector(img,1)# 图片人脸子描述
if (len(faces) > 0):#大于0则检测到人脸
for k,d in enumerate(faces):
shape = sp(img,d)
face_descriptor = facerec.compute_face_descriptor(img, shape)
mypicdes= numpy.array(face_descriptor) #d登陆图片子描述存进mypicdes
# 计算欧式距离,算出人脸之间的差距
dist = numpy.linalg.norm(des-mypicdes)
dist=(1-dist)
100
print("相似度:",dist,"%")
if dist>=70:
print("登录成功")
else:
print("登录失败")
else:
print("没有检测到人脸")
root=tkinter.Tk()#创建窗口
root.title("图片管理系统")
root['height']=240#窗口大小
root['width']=280
定义实时登录函数
def sslogin(): facedetec() ssbutton=tkinter.Button(root,text='人脸登录',command=sslogin) ssbutton.place(x=100,y=30,width=80,height=40)
定义图片登录函数
def tplogin():
picturrelogin()
print("tploginok")
tpbutton=tkinter.Button(root,text='图片登录',command=tplogin)
tpbutton.place(x=100,y=100,width=80,height=40)
定义密码登录函数
def mmlogin(): roots=tkinter.Tk()#创建新窗口 roots.title('密码登陆') roots['height']=250 roots['width']=280 varName=tkinter.StringVar('') varName.set('') varPwd=tkinter.StringVar('') varPwd.set('') labelName=tkinter.Label(roots,text='账号:',justify=tkinter.RIGHT,width=100) labelName.place(x=12,y=5,width=100,height=25) entryName=tkinter.Entry(roots,width=100,textvariable=varName) entryName.place(x=100,y=5,width=100,height=25) #创建账号和密码文本框 labelPwd=tkinter.Label(roots,text='密码:',justify=tkinter.RIGHT,width=100) labelPwd.place(x=12,y=30,width=100,height=25) entryPwd=tkinter.Entry(roots,width=80,textvariable=varPwd) entryPwd.place(x=100,y=30,width=100,height=25) def mmlogins(): try: name=entryName.get() pwd=entryPwd.get() conn=sqlite3.connect('data.db')#连接数据库 c=conn.cursor()#创建cousor对象 for rows in c.execute('SELECT FROM namepa'): if rows[0]==name and rows[1]==pwd: tkinter.messagebox.showinfo(title='Python tkinter',message='登录成功') root.destroy()#关闭窗口 roots.destroy()#关闭窗口 break else : tkinter.messagebox.showinfo(title='Python tkinter',message='登录失败') conn.commit() conn.close()#关闭数据库 except: conn=sqlite3.connect('data.db')#连接数据库 c=conn.cursor()#创建cousor对象 c.execute('''create table namepa(name,pwd)''') name='huang' pwd='123456' conn=sqlite3.connect('data.db')#连接数据库 c=conn.cursor()#创建cousor对象 c.execute("INSERT INTO namepa values(?,?)",(name,pwd))#插入表数据 for rows in c.execute('SELECT FROM namepa'): print("账号:",rows[0],end=" ") print("密码:",rows[1]) conn.commit() conn.close()#关闭数据库连接 tkinter.messagebox.showinfo(title='Python tkinter',message='这是第一次运行数据库,账号密码已创建。') buttoninpasswdss=tkinter.Button(roots,text='登陆',command=mmlogins) buttoninpasswdss.place(x=30,y=80,width=80,height=40) print("mmloginok") mmbutton=tkinter.Button(root,text='密码登录',command=mmlogin) mmbutton.place(x=100,y=170,width=80,height=40) root.mainloop()
```
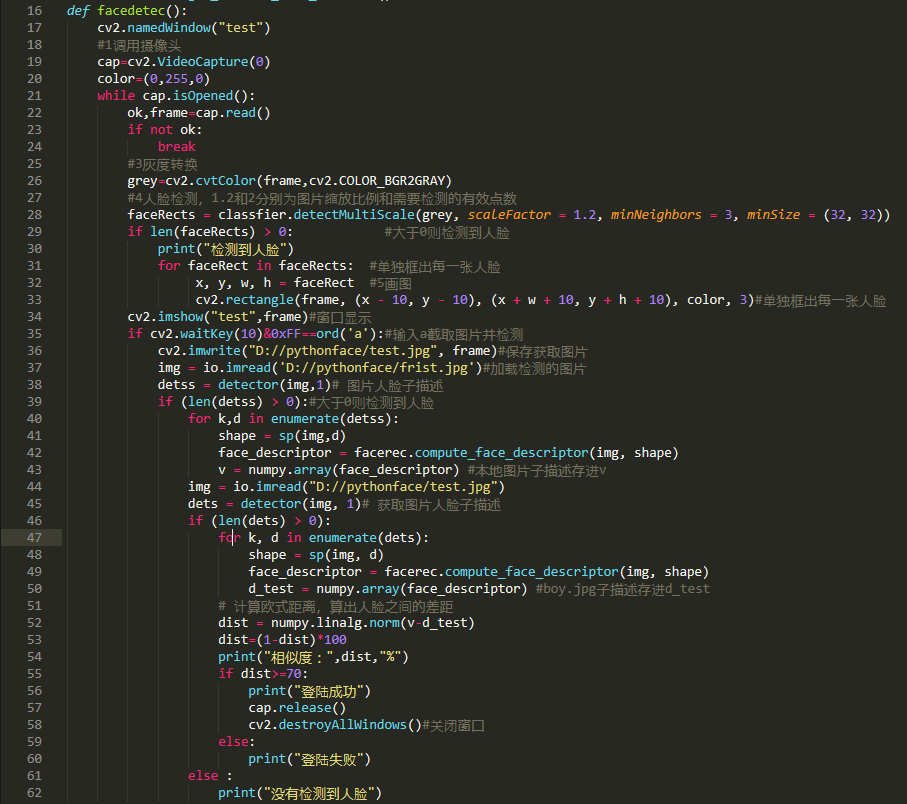
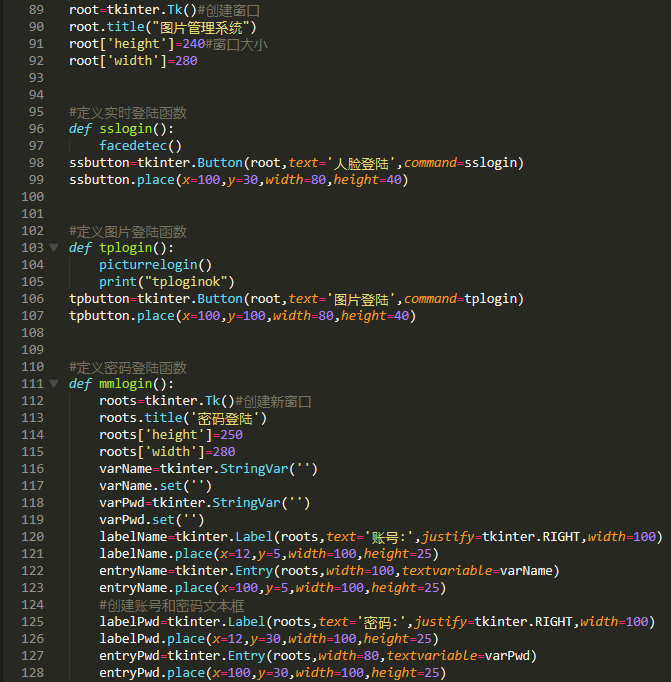
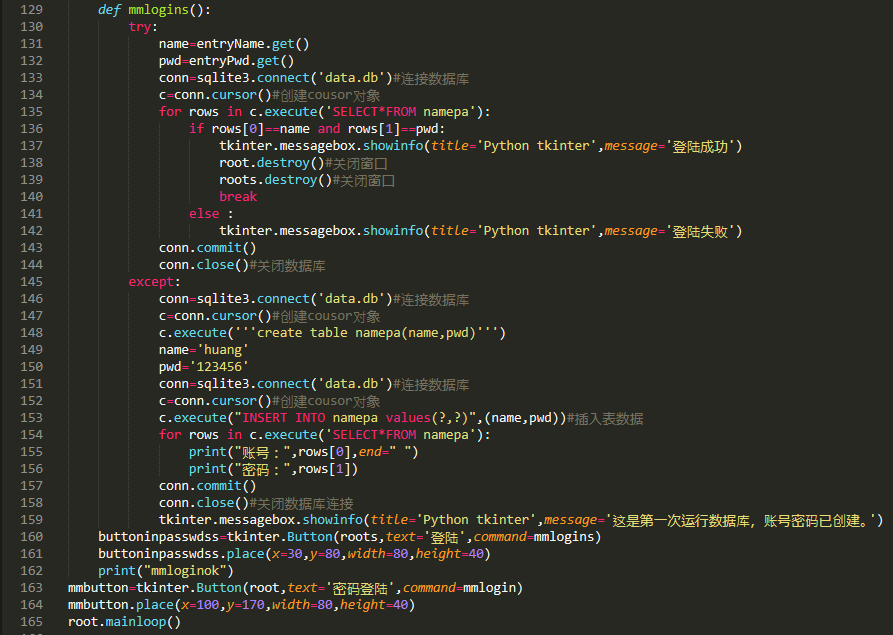
代码截图:


八、版本七
8.1 内容:
本版本在上个版本的基础上在密码登录增加了注册新账号的功能。
8.2 步骤:
(只测试本版本增加内容)运行代码点击密码登录
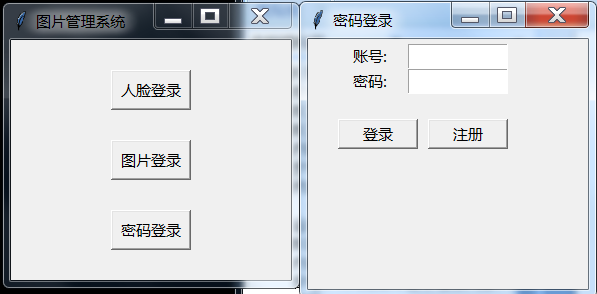
点击注册

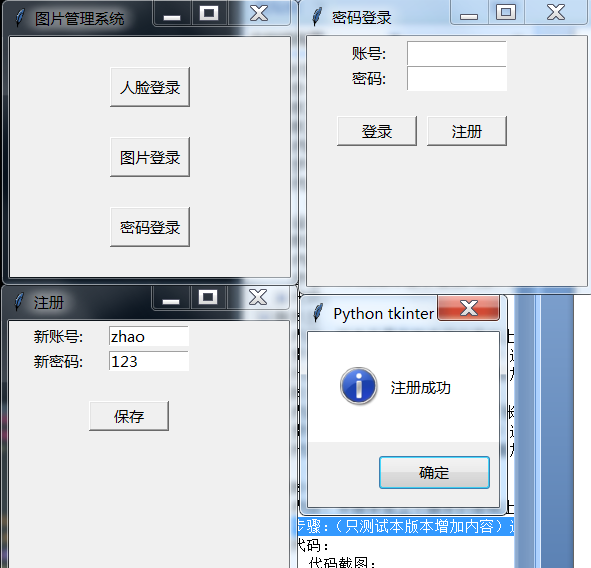
保存后可以用这个账号密码登录
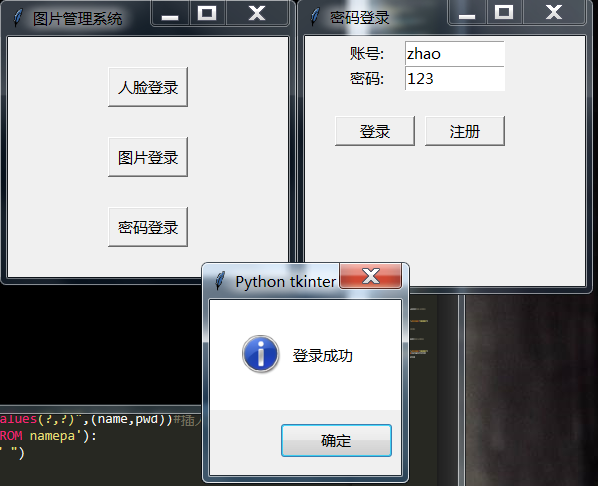
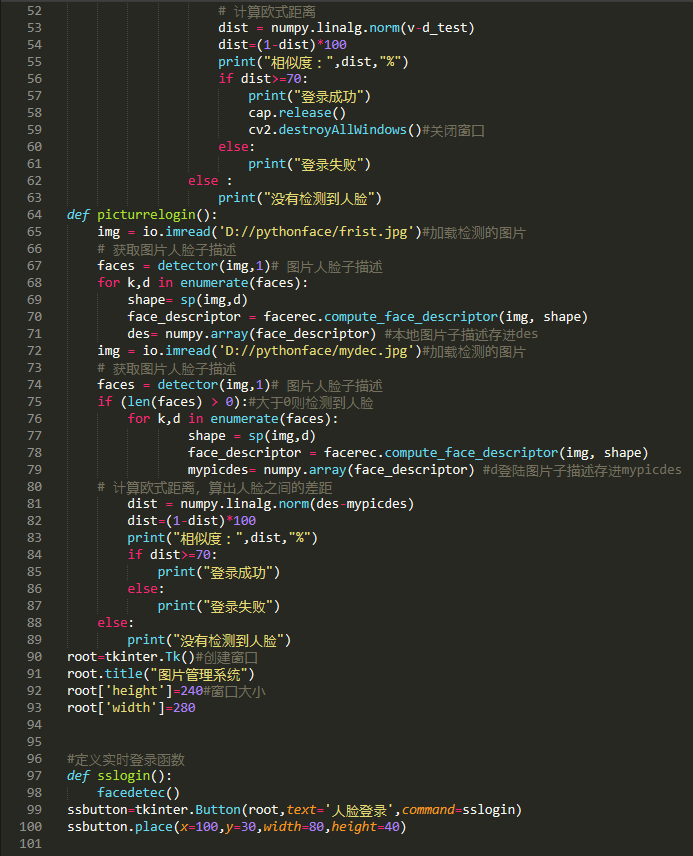
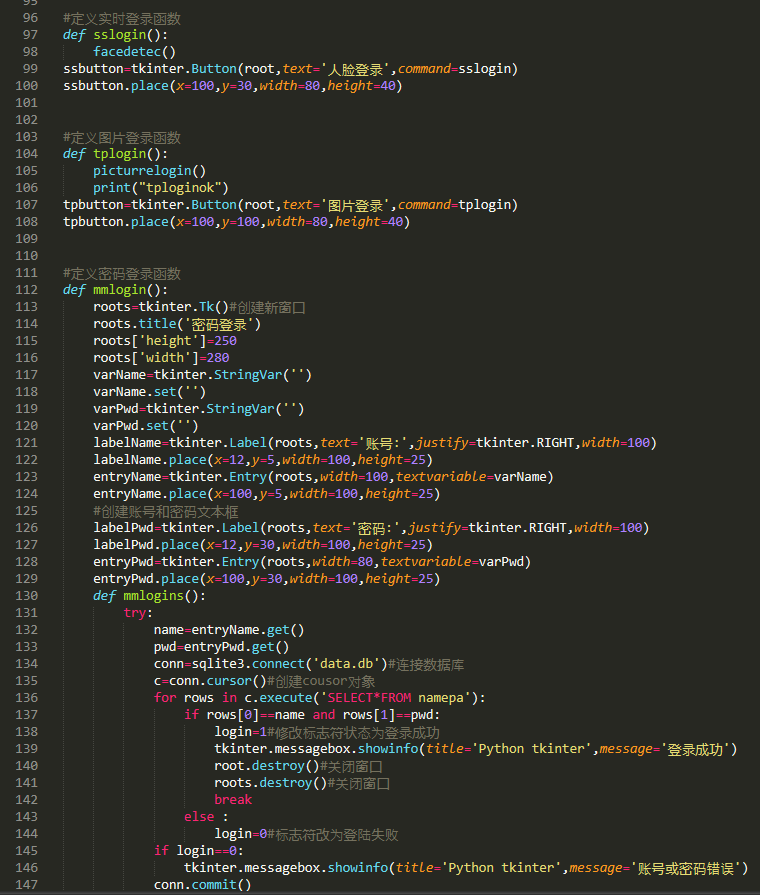
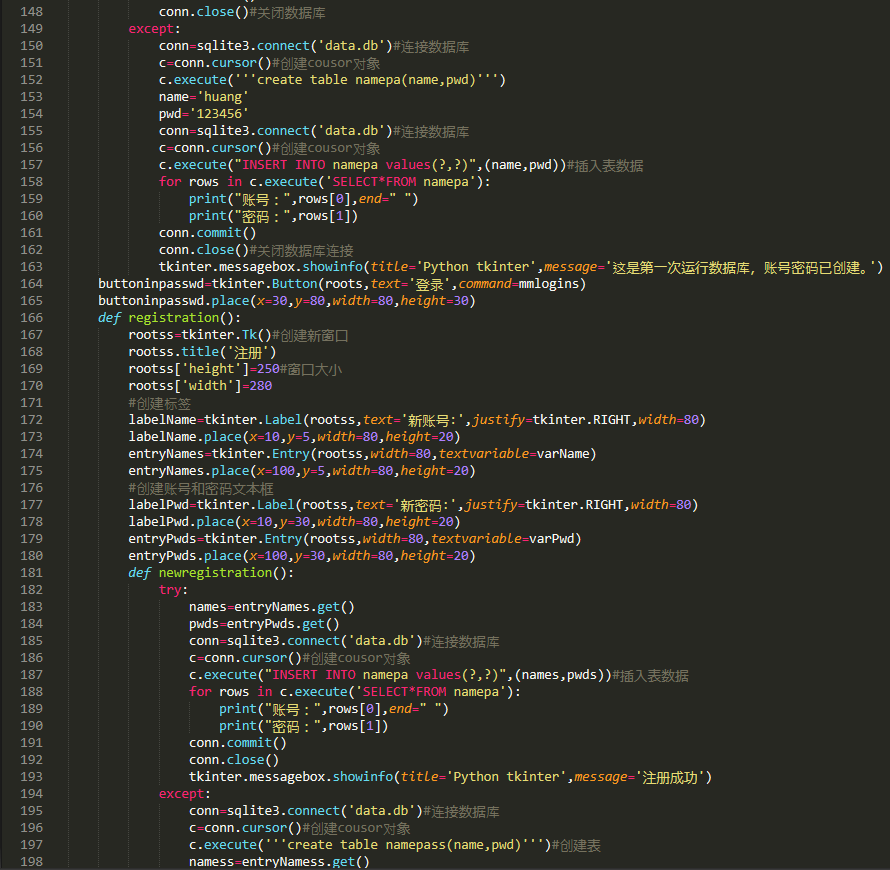
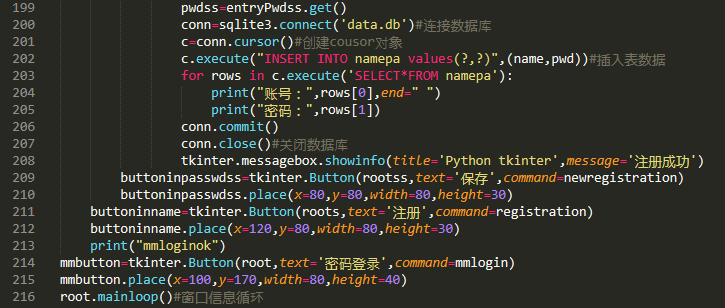
8.3 代码:
```c++
import pyautogui
import tkinter import numpy as np import cv2 import sys import dlib import numpy from skimage import io import sqlite3 import tkinter import tkinter.messagebox
人脸识别器分类器
classfier=cv2.CascadeClassifier("D://pythonface/haarcascade_frontalface_default.xml")
facerec = dlib.face_recognition_model_v1("D://pythonface/dlib_face_recognition_resnet_model_v1.dat")
sp = dlib.shape_predictor('D://pythonface/shape_predictor_68_face_landmarks.dat')#加载检测器
detector = dlib.get_frontal_face_detector()
login=0
def facedetec():
cv2.namedWindow("test")
#1调用摄像头
cap=cv2.VideoCapture(0)
color=(0,255,0)
while cap.isOpened():
ok,frame=cap.read()
if not ok:
break
#3灰度转换
grey=cv2.cvtColor(frame,cv2.COLOR_BGR2GRAY)
#4人脸检测,1.2和2分别为图片缩放比例和需要检测的有效点数
faceRects = classfier.detectMultiScale(grey, scaleFactor = 1.2, minNeighbors = 3, minSize = (32, 32))
if len(faceRects) > 0: #大于0则检测到人脸
print("检测到人脸")
for faceRect in faceRects: #单独框出每一张人脸
x, y, w, h = faceRect #5画图
cv2.rectangle(frame, (x - 10, y - 10), (x + w + 10, y + h + 10), color, 3)#单独框出每一张人脸
cv2.imshow("test",frame)#窗口显示
if cv2.waitKey(10)&0xFF==ord('a'):#输入a截取图片并检测
cv2.imwrite("D://pythonface/test.jpg", frame)#保存获取图片
img = io.imread('D://pythonface/frist.jpg')#加载检测的图片
detss = detector(img,1)# 图片人脸子描述
if (len(detss) > 0):#大于0则检测到人脸
for k,d in enumerate(detss):
shape = sp(img,d)
face_descriptor = facerec.compute_face_descriptor(img, shape)
v = numpy.array(face_descriptor) #本地图片子描述存进v
img = io.imread("D://pythonface/test.jpg")
dets = detector(img, 1)# 获取图片人脸子描述
if (len(dets) > 0):
for k, d in enumerate(dets):
shape = sp(img, d)
face_descriptor = facerec.compute_face_descriptor(img, shape)
d_test = numpy.array(face_descriptor) #boy.jpg子描述存进d_test
# 计算欧式距离
dist = numpy.linalg.norm(v-d_test)
dist=(1-dist)
100
print("相似度:",dist,"%")
if dist>=70:
print("登录成功")
cap.release()
cv2.destroyAllWindows()#关闭窗口
else:
print("登录失败")
else :
print("没有检测到人脸")
def picturrelogin():
img = io.imread('D://pythonface/frist.jpg')#加载检测的图片
# 获取图片人脸子描述
faces = detector(img,1)# 图片人脸子描述
for k,d in enumerate(faces):
shape= sp(img,d)
face_descriptor = facerec.compute_face_descriptor(img, shape)
des= numpy.array(face_descriptor) #本地图片子描述存进des
img = io.imread('D://pythonface/mydec.jpg')#加载检测的图片
# 获取图片人脸子描述
faces = detector(img,1)# 图片人脸子描述
if (len(faces) > 0):#大于0则检测到人脸
for k,d in enumerate(faces):
shape = sp(img,d)
face_descriptor = facerec.compute_face_descriptor(img, shape)
mypicdes= numpy.array(face_descriptor) #d登陆图片子描述存进mypicdes
# 计算欧式距离,算出人脸之间的差距
dist = numpy.linalg.norm(des-mypicdes)
dist=(1-dist)
100
print("相似度:",dist,"%")
if dist>=70:
print("登录成功")
else:
print("登录失败")
else:
print("没有检测到人脸")
root=tkinter.Tk()#创建窗口
root.title("图片管理系统")
root['height']=240#窗口大小
root['width']=280
定义实时登录函数
def sslogin(): facedetec() ssbutton=tkinter.Button(root,text='人脸登录',command=sslogin) ssbutton.place(x=100,y=30,width=80,height=40)
定义图片登录函数
def tplogin():
picturrelogin()
print("tploginok")
tpbutton=tkinter.Button(root,text='图片登录',command=tplogin)
tpbutton.place(x=100,y=100,width=80,height=40)
定义密码登录函数
def mmlogin(): roots=tkinter.Tk()#创建新窗口 roots.title('密码登录') roots['height']=250 roots['width']=280 varName=tkinter.StringVar('') varName.set('') varPwd=tkinter.StringVar('') varPwd.set('') labelName=tkinter.Label(roots,text='账号:',justify=tkinter.RIGHT,width=100) labelName.place(x=12,y=5,width=100,height=25) entryName=tkinter.Entry(roots,width=100,textvariable=varName) entryName.place(x=100,y=5,width=100,height=25) #创建账号和密码文本框 labelPwd=tkinter.Label(roots,text='密码:',justify=tkinter.RIGHT,width=100) labelPwd.place(x=12,y=30,width=100,height=25) entryPwd=tkinter.Entry(roots,width=80,textvariable=varPwd) entryPwd.place(x=100,y=30,width=100,height=25) def mmlogins(): try: name=entryName.get() pwd=entryPwd.get() conn=sqlite3.connect('data.db')#连接数据库 c=conn.cursor()#创建cousor对象 for rows in c.execute('SELECT FROM namepa'): if rows[0]==name and rows[1]==pwd: login=1#修改标志符状态为登录成功 tkinter.messagebox.showinfo(title='Python tkinter',message='登录成功') root.destroy()#关闭窗口 roots.destroy()#关闭窗口 break else : login=0#标志符改为登陆失败 if login==0: tkinter.messagebox.showinfo(title='Python tkinter',message='账号或密码错误') conn.commit() conn.close()#关闭数据库 except: conn=sqlite3.connect('data.db')#连接数据库 c=conn.cursor()#创建cousor对象 c.execute('''create table namepa(name,pwd)''') name='huang' pwd='123456' conn=sqlite3.connect('data.db')#连接数据库 c=conn.cursor()#创建cousor对象 c.execute("INSERT INTO namepa values(?,?)",(name,pwd))#插入表数据 for rows in c.execute('SELECT FROM namepa'): print("账号:",rows[0],end=" ") print("密码:",rows[1]) conn.commit() conn.close()#关闭数据库连接 tkinter.messagebox.showinfo(title='Python tkinter',message='这是第一次运行数据库,账号密码已创建。') buttoninpasswd=tkinter.Button(roots,text='登录',command=mmlogins) buttoninpasswd.place(x=30,y=80,width=80,height=30) def registration(): rootss=tkinter.Tk()#创建新窗口 rootss.title('注册') rootss['height']=250#窗口大小 rootss['width']=280 #创建标签 labelName=tkinter.Label(rootss,text='新账号:',justify=tkinter.RIGHT,width=80) labelName.place(x=10,y=5,width=80,height=20) entryNames=tkinter.Entry(rootss,width=80,textvariable=varName) entryNames.place(x=100,y=5,width=80,height=20) #创建账号和密码文本框 labelPwd=tkinter.Label(rootss,text='新密码:',justify=tkinter.RIGHT,width=80) labelPwd.place(x=10,y=30,width=80,height=20) entryPwds=tkinter.Entry(rootss,width=80,textvariable=varPwd) entryPwds.place(x=100,y=30,width=80,height=20) def newregistration(): try: names=entryNames.get() pwds=entryPwds.get() conn=sqlite3.connect('data.db')#连接数据库 c=conn.cursor()#创建cousor对象 c.execute("INSERT INTO namepa values(?,?)",(names,pwds))#插入表数据 for rows in c.execute('SELECT FROM namepa'): print("账号:",rows[0],end=" ") print("密码:",rows[1]) conn.commit() conn.close() tkinter.messagebox.showinfo(title='Python tkinter',message='注册成功') except: conn=sqlite3.connect('data.db')#连接数据库 c=conn.cursor()#创建cousor对象 c.execute('''create table namepass(name,pwd)''')#创建表 namess=entryNamess.get() pwdss=entryPwdss.get() conn=sqlite3.connect('data.db')#连接数据库 c=conn.cursor()#创建cousor对象 c.execute("INSERT INTO namepa values(?,?)",(name,pwd))#插入表数据 for rows in c.execute('SELECT FROM namepa'): print("账号:",rows[0],end=" ") print("密码:",rows[1]) conn.commit() conn.close()#关闭数据库 tkinter.messagebox.showinfo(title='Python tkinter',message='注册成功') buttoninpasswdss=tkinter.Button(rootss,text='保存',command=newregistration) buttoninpasswdss.place(x=80,y=80,width=80,height=30) buttoninname=tkinter.Button(roots,text='注册',command=registration) buttoninname.place(x=120,y=80,width=80,height=30) print("mmloginok") mmbutton=tkinter.Button(root,text='密码登录',command=mmlogin) mmbutton.place(x=100,y=170,width=80,height=40) root.mainloop()#窗口信息循环
```
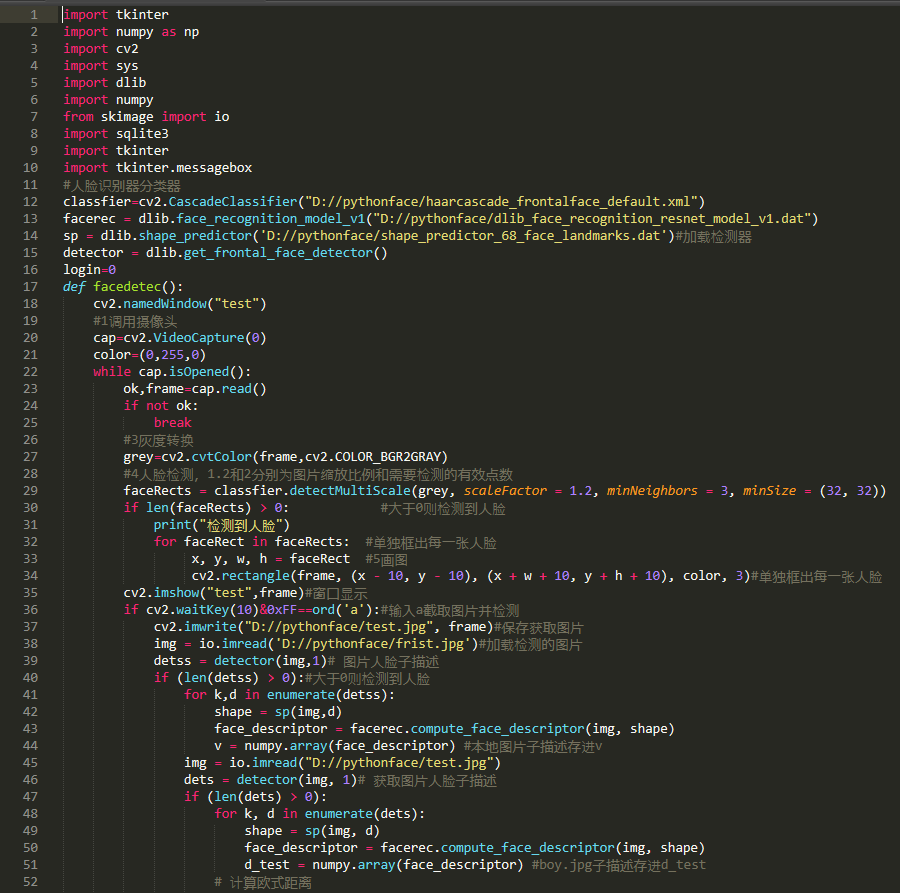
代码截图:
九、版本八
9.1 内容:
本版本在上个版本的基础上增加了登录成功之后的将图片转化为字符画的功能,并在代码中做了部分的优化。在图片登录中可以自主选择图片登录不用放在文件夹中。
9.2 步骤:
从图片登录————
点击图片登录
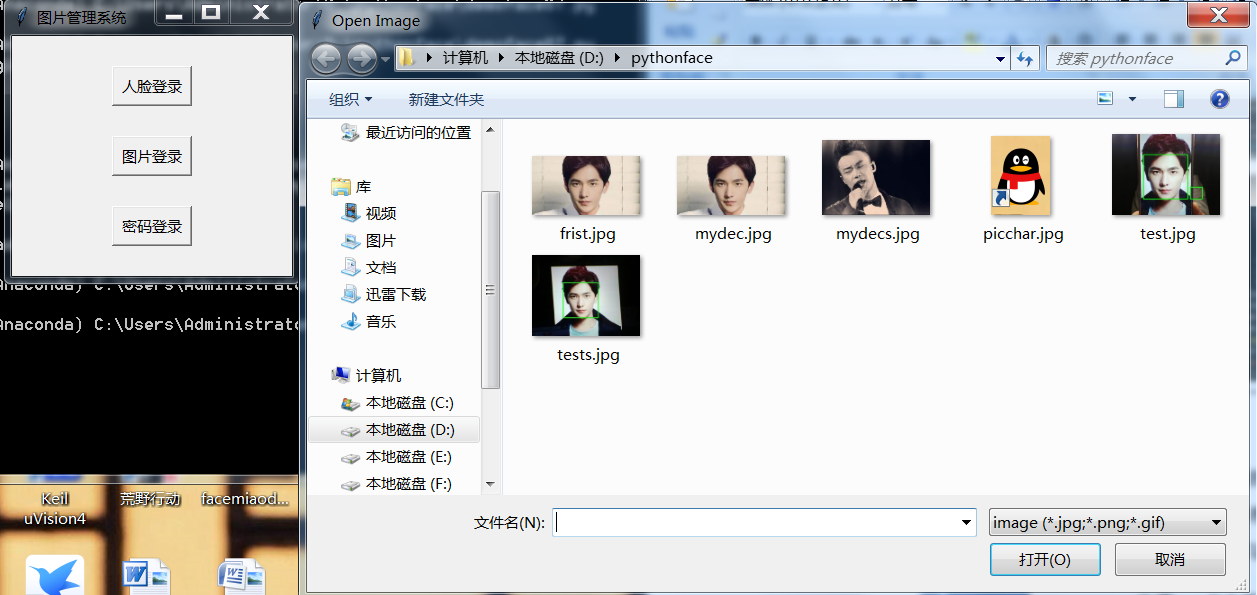
选择要验证登录的图片,点击打开
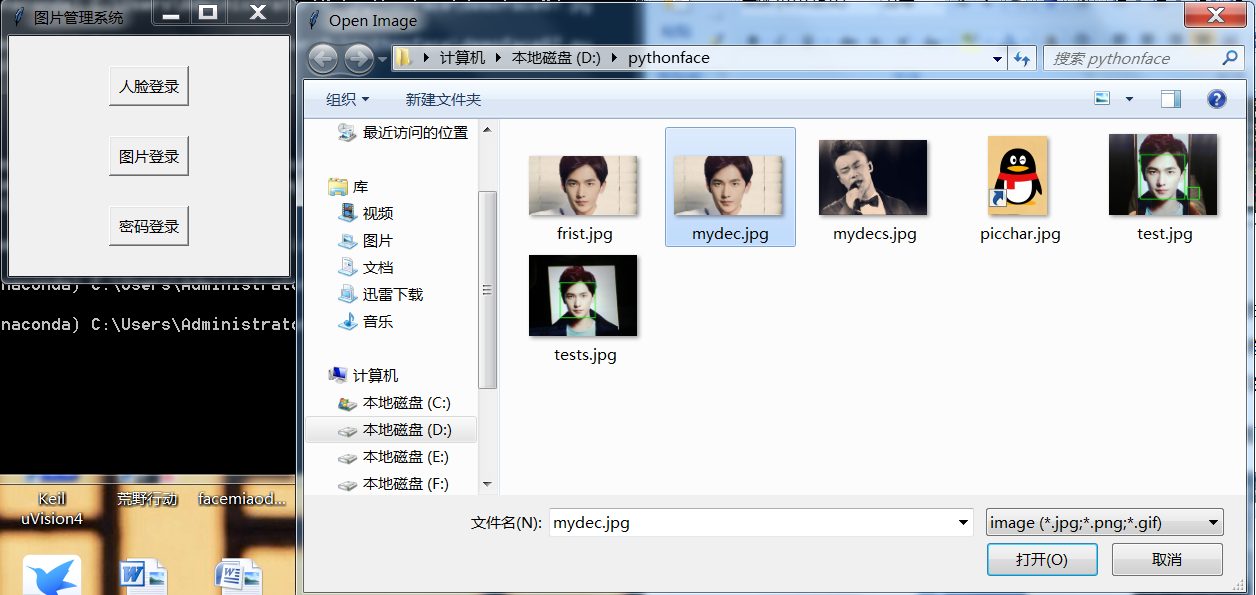

登录成功后进入图片转化系统

点击字符画功能
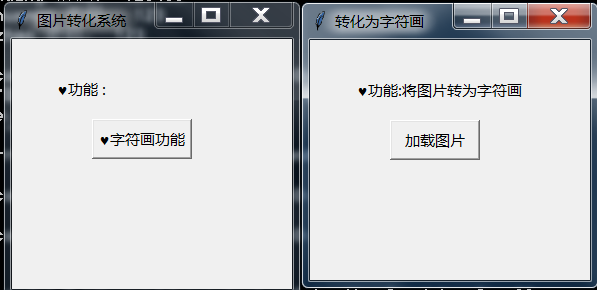
点击加载图片,选择 picchar.jpg

打开

成功后可在 d://pythonface/output.txt 中看到得到的字符画

9.3 代码:
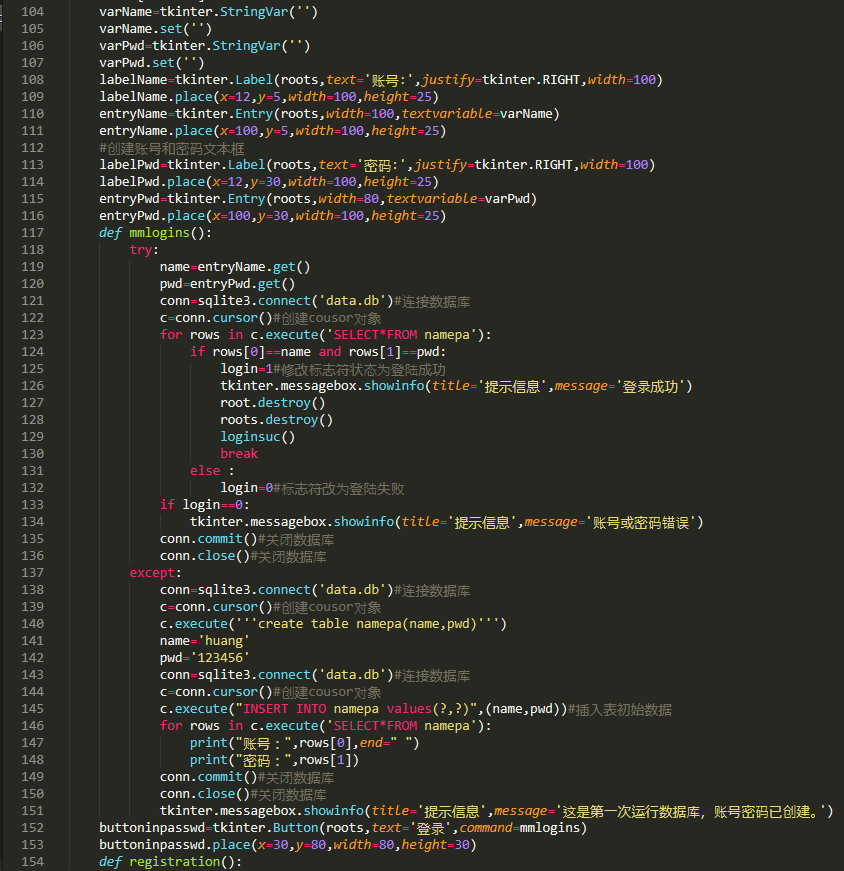
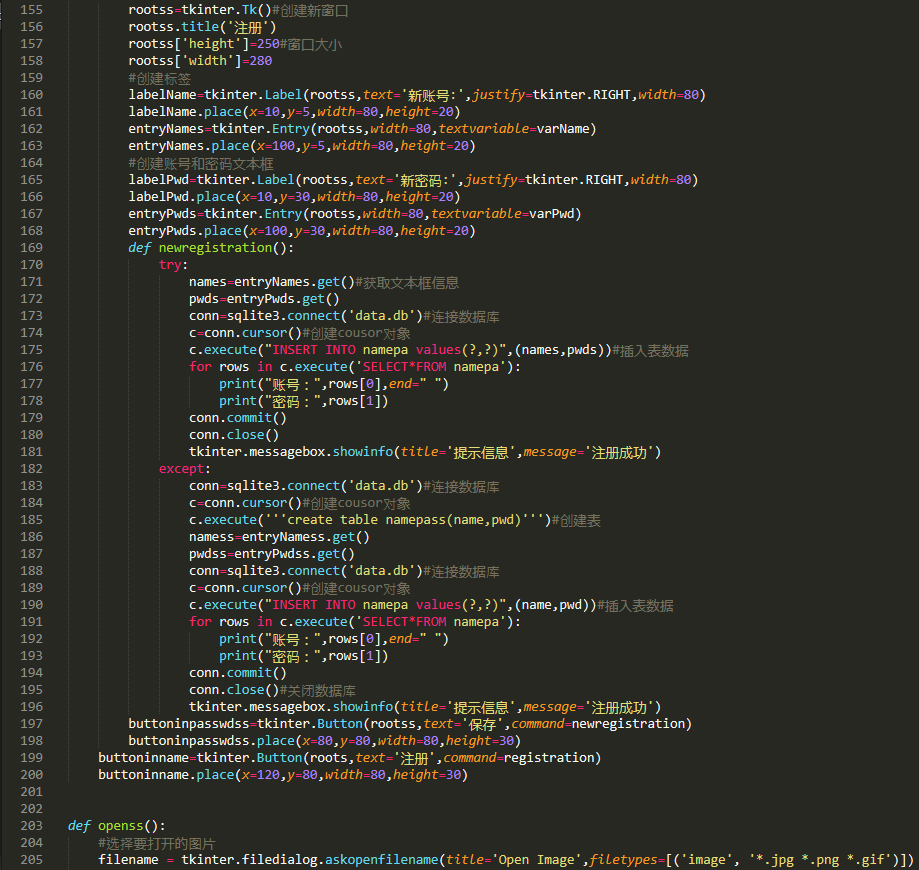
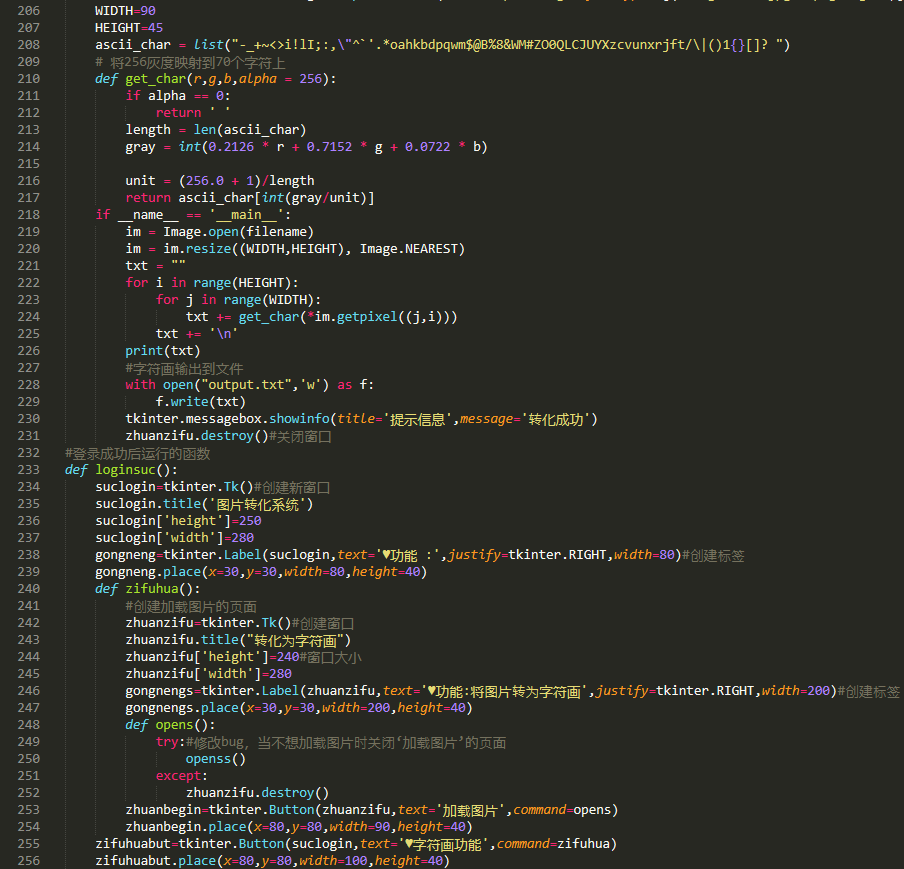
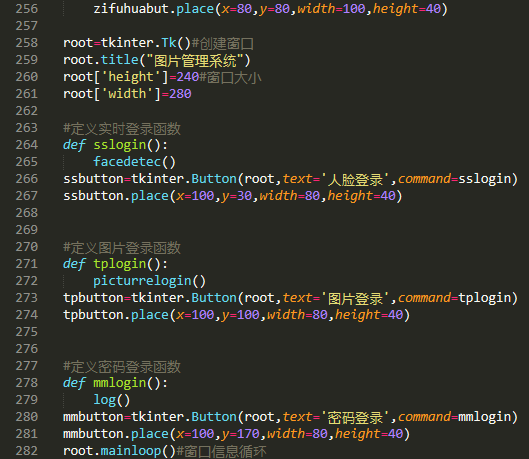
```c++ import numpy as np import cv2 import sys import dlib import numpy from skimage import io import sqlite3 import tkinter import tkinter.messagebox from PIL import Image from tkinter import filedialog
人脸识别器分类器
classfier=cv2.CascadeClassifier("D://pythonface/haarcascade_frontalface_default.xml")
facerec = dlib.face_recognition_model_v1("D://pythonface/dlib_face_recognition_resnet_model_v1.dat")
sp = dlib.shape_predictor('D://pythonface/shape_predictor_68_face_landmarks.dat')#加载检测器
detector = dlib.get_frontal_face_detector()
login=0
def facedetec():
cv2.namedWindow("test")
#1调用摄像头
cap=cv2.VideoCapture(0)
color=(0,255,0)
while cap.isOpened():
ok,frame=cap.read()
if not ok:
break
#3灰度转换
grey=cv2.cvtColor(frame,cv2.COLOR_BGR2GRAY)
#人脸检测,图片缩放比例和需要检测的有效点数
faceRects = classfier.detectMultiScale(grey, scaleFactor = 1.2, minNeighbors = 3, minSize = (32, 32))
if len(faceRects) > 0: #大于0则检测到人脸
print("检测到人脸")
for faceRect in faceRects: #单独框出每一张人脸
x, y, w, h = faceRect #5画图
cv2.rectangle(frame, (x - 10, y - 10), (x + w + 10, y + h + 10), color, 3)#单独框出每一张人脸
cv2.imshow("test",frame)#窗口显示
if cv2.waitKey(10)&0xFF==ord('a'):#输入a截取图片并检测
cv2.imwrite("D://pythonface/test.jpg", frame)#保存获取图片
img = io.imread('D://pythonface/frist.jpg')#加载检测的图片
detss = detector(img,1)# 图片人脸子描述
if (len(detss) > 0):#大于0则检测到人脸
for k,d in enumerate(detss):
shape = sp(img,d)
face_descriptor = facerec.compute_face_descriptor(img, shape)
v = numpy.array(face_descriptor) #本地图片子描述存进v
img = io.imread("D://pythonface/test.jpg")
dets = detector(img, 1)# 获取图片人脸子描述
if (len(dets) > 0):
for k, d in enumerate(dets):
shape = sp(img, d)
face_descriptor = facerec.compute_face_descriptor(img, shape)
d_test = numpy.array(face_descriptor) #boy.jpg子描述存进d_test
# 计算欧式距离
dist = numpy.linalg.norm(v-d_test)
dist=(1-dist)
100
print("相似度:",dist,"%")
if dist>=70:
tkinter.messagebox.showinfo(title='提示信息',message='登录成功')
cap.release()
cv2.destroyAllWindows()#关闭窗口
root.destroy()#关闭登录窗口
loginsuc()#调用登录成功的函数
else:
tkinter.messagebox.showinfo(title='提示信息',message='登录失败')
else:
tkinter.messagebox.showinfo(title='提示信息',message='没有检测到人脸')
def picturrelogin():
try:
img = io.imread('D://pythonface/frist.jpg')#加载检测的图片
# 获取图片人脸子描述
faces = detector(img,1)# 图片人脸子描述
for k,d in enumerate(faces):
shape= sp(img,d)
face_descriptor = facerec.compute_face_descriptor(img, shape)
des= numpy.array(face_descriptor) #本地图片子描述存进des
#打开需要检测的图片
mypicture=tkinter.filedialog.askopenfilename(title='Open Image',filetypes=[('image', '
.jpg
.png
.gif')])
img = io.imread(mypicture)#加载检测的图片
# 获取图片人脸子描述
faces = detector(img,1)# 图片人脸子描述
if (len(faces) > 0):#大于0则检测到人脸
for k,d in enumerate(faces):
shape = sp(img,d)
face_descriptor = facerec.compute_face_descriptor(img, shape)
mypicdes= numpy.array(face_descriptor) #d登陆图片子描述存进mypicdes
# 计算欧式距离,算出人脸之间的差距
dist = numpy.linalg.norm(des-mypicdes)
dist=(1-dist)*100
print("相似度:",dist,"%")
if dist>=70:
tkinter.messagebox.showinfo(title='提示信息',message='登录成功')
root.destroy()
loginsuc()
else:
tkinter.messagebox.showinfo(title='提示信息',message='登录失败')
except:
tkinter.messagebox.showinfo(title='提示信息',message='图片识别有错误没有或者大于一张人脸')
def log(): roots=tkinter.Tk()#创建新窗口 roots.title('密码登录') roots['height']=250 roots['width']=280 varName=tkinter.StringVar('') varName.set('') varPwd=tkinter.StringVar('') varPwd.set('') labelName=tkinter.Label(roots,text='账号:',justify=tkinter.RIGHT,width=100) labelName.place(x=12,y=5,width=100,height=25) entryName=tkinter.Entry(roots,width=100,textvariable=varName) entryName.place(x=100,y=5,width=100,height=25) #创建账号和密码文本框 labelPwd=tkinter.Label(roots,text='密码:',justify=tkinter.RIGHT,width=100) labelPwd.place(x=12,y=30,width=100,height=25) entryPwd=tkinter.Entry(roots,width=80,textvariable=varPwd) entryPwd.place(x=100,y=30,width=100,height=25) def mmlogins(): try: name=entryName.get() pwd=entryPwd.get() conn=sqlite3.connect('data.db')#连接数据库 c=conn.cursor()#创建cousor对象 for rows in c.execute('SELECT FROM namepa'): if rows[0]==name and rows[1]==pwd: login=1#修改标志符状态为登陆成功 tkinter.messagebox.showinfo(title='提示信息',message='登录成功') root.destroy() roots.destroy() loginsuc() break else : login=0#标志符改为登陆失败 if login==0: tkinter.messagebox.showinfo(title='提示信息',message='账号或密码错误') conn.commit()#关闭数据库 conn.close()#关闭数据库 except: conn=sqlite3.connect('data.db')#连接数据库 c=conn.cursor()#创建cousor对象 c.execute('''create table namepa(name,pwd)''') name='huang' pwd='123456' conn=sqlite3.connect('data.db')#连接数据库 c=conn.cursor()#创建cousor对象 c.execute("INSERT INTO namepa values(?,?)",(name,pwd))#插入表初始数据 for rows in c.execute('SELECT FROM namepa'): print("账号:",rows[0],end=" ") print("密码:",rows[1]) conn.commit()#关闭数据库 conn.close()#关闭数据库 tkinter.messagebox.showinfo(title='提示信息',message='这是第一次运行数据库,账号密码已创建。') buttoninpasswd=tkinter.Button(roots,text='登录',command=mmlogins) buttoninpasswd.place(x=30,y=80,width=80,height=30) def registration(): rootss=tkinter.Tk()#创建新窗口 rootss.title('注册') rootss['height']=250#窗口大小 rootss['width']=280 #创建标签 labelName=tkinter.Label(rootss,text='新账号:',justify=tkinter.RIGHT,width=80) labelName.place(x=10,y=5,width=80,height=20) entryNames=tkinter.Entry(rootss,width=80,textvariable=varName) entryNames.place(x=100,y=5,width=80,height=20) #创建账号和密码文本框 labelPwd=tkinter.Label(rootss,text='新密码:',justify=tkinter.RIGHT,width=80) labelPwd.place(x=10,y=30,width=80,height=20) entryPwds=tkinter.Entry(rootss,width=80,textvariable=varPwd) entryPwds.place(x=100,y=30,width=80,height=20) def newregistration(): try: names=entryNames.get()#获取文本框信息 pwds=entryPwds.get() conn=sqlite3.connect('data.db')#连接数据库 c=conn.cursor()#创建cousor对象 c.execute("INSERT INTO namepa values(?,?)",(names,pwds))#插入表数据 for rows in c.execute('SELECT FROM namepa'): print("账号:",rows[0],end=" ") print("密码:",rows[1]) conn.commit() conn.close() tkinter.messagebox.showinfo(title='提示信息',message='注册成功') except: conn=sqlite3.connect('data.db')#连接数据库 c=conn.cursor()#创建cousor对象 c.execute('''create table namepass(name,pwd)''')#创建表 namess=entryNamess.get() pwdss=entryPwdss.get() conn=sqlite3.connect('data.db')#连接数据库 c=conn.cursor()#创建cousor对象 c.execute("INSERT INTO namepa values(?,?)",(name,pwd))#插入表数据 for rows in c.execute('SELECT FROM namepa'): print("账号:",rows[0],end=" ") print("密码:",rows[1]) conn.commit() conn.close()#关闭数据库 tkinter.messagebox.showinfo(title='提示信息',message='注册成功') buttoninpasswdss=tkinter.Button(rootss,text='保存',command=newregistration) buttoninpasswdss.place(x=80,y=80,width=80,height=30) buttoninname=tkinter.Button(roots,text='注册',command=registration) buttoninname.place(x=120,y=80,width=80,height=30)
def openss(): #选择要打开的图片 filename = tkinter.filedialog.askopenfilename(title='Open Image',filetypes=[('image', ' .jpg .png .gif')]) WIDTH=90 HEIGHT=45 ascii_char = list("-_+~<>i!lI;:,\"^`'. oahkbdpqwm$@B%8&WM#ZO0QLCJUYXzcvunxrjft/|()1{}[]? ") # 将256灰度映射到70个字符上 def get_char(r,g,b,alpha = 256): if alpha == 0: return ' ' length = len(ascii_char) gray = int(0.2126 * r + 0.7152 * g + 0.0722 * b)
    unit = (256.0 + 1)/length
    return ascii_char[int(gray/unit)]
if __name__ == '__main__':
    im = Image.open(filename)
    im = im.resize((WIDTH,HEIGHT), Image.NEAREST)
    txt = ""
    for i in range(HEIGHT):
        for j in range(WIDTH):
            txt += get_char(*im.getpixel((j,i)))
        txt += '\n'
    print(txt)
    #字符画输出到文件
    with open("output.txt",'w') as f:
        f.write(txt)
    tkinter.messagebox.showinfo(title='提示信息',message='转化成功')
    zhuanzifu.destroy()#关闭窗口
登录成功后运行的函数
def loginsuc(): suclogin=tkinter.Tk()#创建新窗口 suclogin.title('图片转化系统') suclogin['height']=250 suclogin['width']=280 gongneng=tkinter.Label(suclogin,text='♥功能 :',justify=tkinter.RIGHT,width=80)#创建标签 gongneng.place(x=30,y=30,width=80,height=40) def zifuhua(): #创建加载图片的页面 zhuanzifu=tkinter.Tk()#创建窗口 zhuanzifu.title("转化为字符画") zhuanzifu['height']=240#窗口大小 zhuanzifu['width']=280 gongnengs=tkinter.Label(zhuanzifu,text='♥功能:将图片转为字符画',justify=tkinter.RIGHT,width=200)#创建标签 gongnengs.place(x=30,y=30,width=200,height=40) def opens(): try:#修改bug,当不想加载图片时关闭‘加载图片’的页面 openss() except: zhuanzifu.destroy() zhuanbegin=tkinter.Button(zhuanzifu,text='加载图片',command=opens) zhuanbegin.place(x=80,y=80,width=90,height=40) zifuhuabut=tkinter.Button(suclogin,text='♥字符画功能',command=zifuhua) zifuhuabut.place(x=80,y=80,width=100,height=40)
root=tkinter.Tk()#创建窗口 root.title("图片管理系统") root['height']=240#窗口大小 root['width']=280
定义实时登录函数
def sslogin(): facedetec() ssbutton=tkinter.Button(root,text='人脸登录',command=sslogin) ssbutton.place(x=100,y=30,width=80,height=40)
定义图片登录函数
def tplogin():
picturrelogin()
tpbutton=tkinter.Button(root,text='图片登录',command=tplogin)
tpbutton.place(x=100,y=100,width=80,height=40)
定义密码登录函数
def mmlogin(): log() mmbutton=tkinter.Button(root,text='密码登录',command=mmlogin) mmbutton.place(x=100,y=170,width=80,height=40) root.mainloop()#窗口信息循环
```
代码截图:
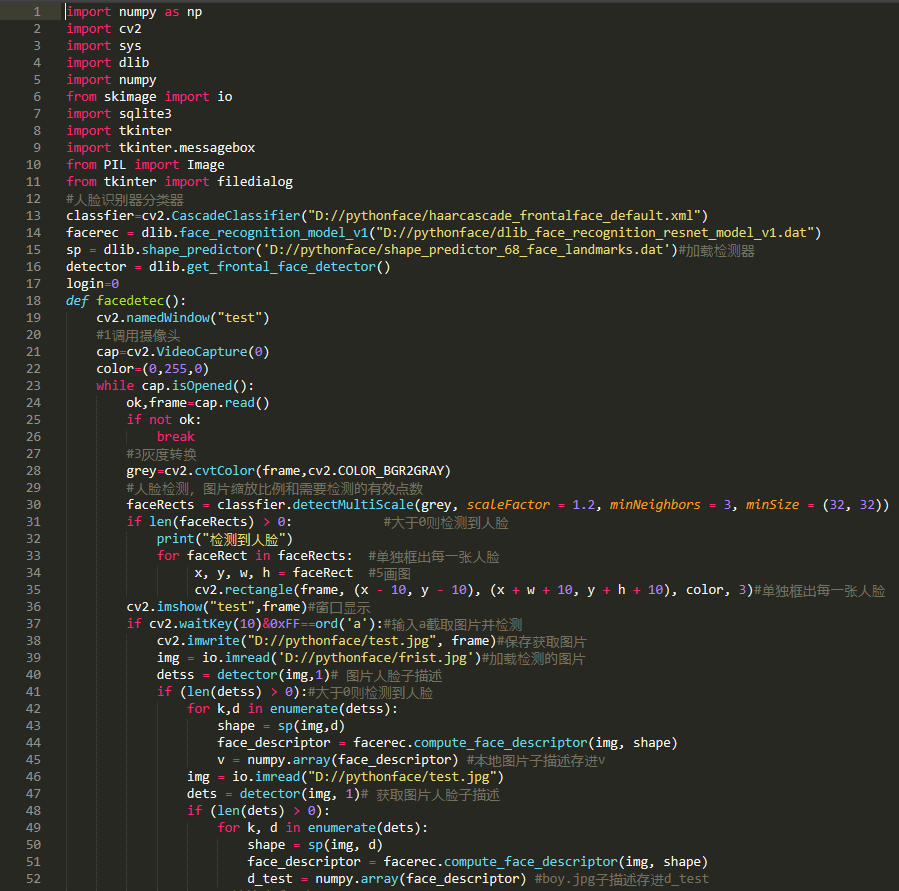

十、版本九
10.1 内容:
本版本将测试所有内容。完整测试。

  c++
frist.jpg

  c++
mydecs.jpg

  c++
picchar.jpg
10.2 步骤:
运行下面代码
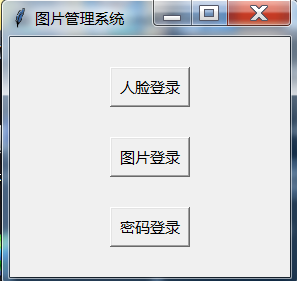
- 选择人脸登录(按 e 键可退出人脸登录)
- 按下 a 键拍照
- 当摄像头没有检测到人脸是会有提示
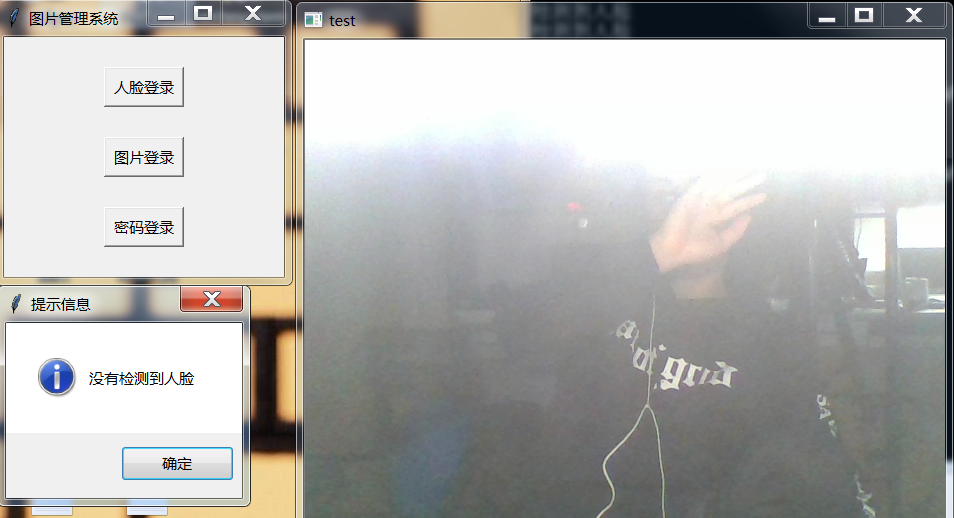
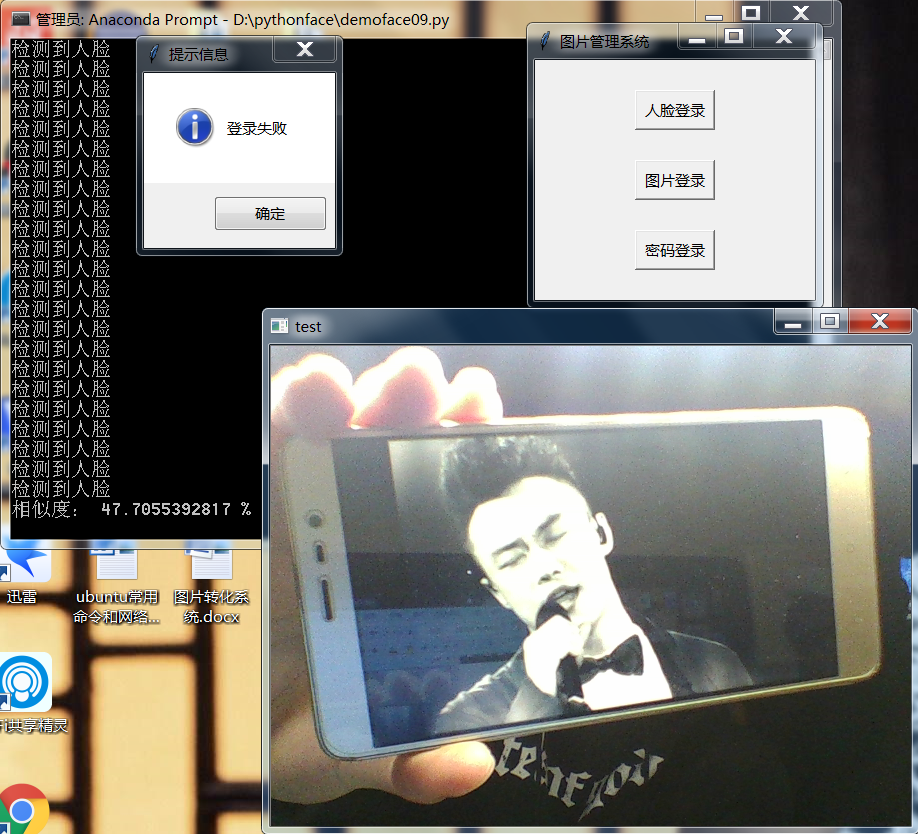
人脸相似度小于 72% 登录失败
相似度大于 72% 登录成功

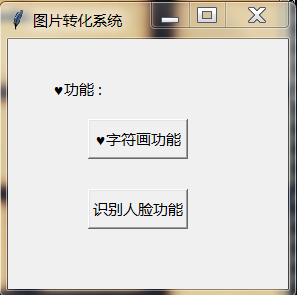
成功后进入系统
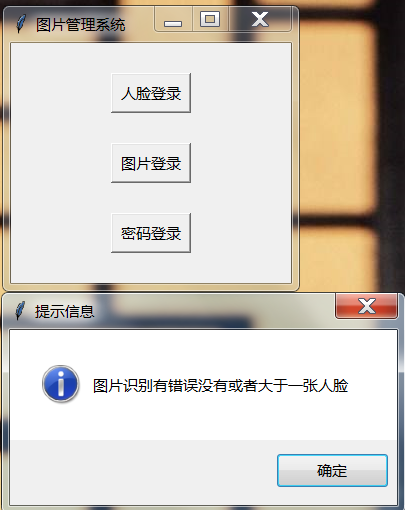
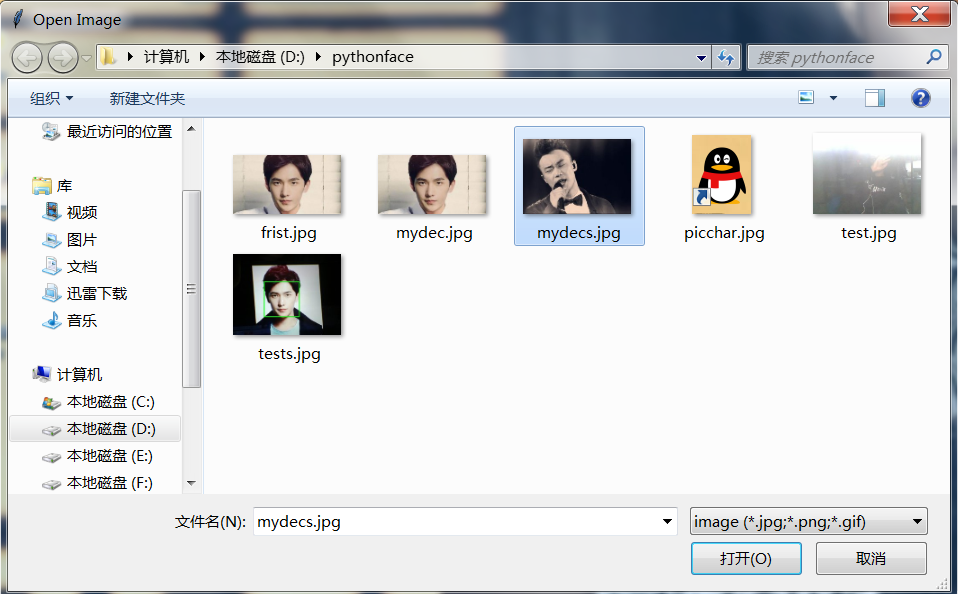
选择图片登陆(系统会让你选择一张图片进行登录)

选择 picchar.jpg(小企鹅)

系统会提示错误
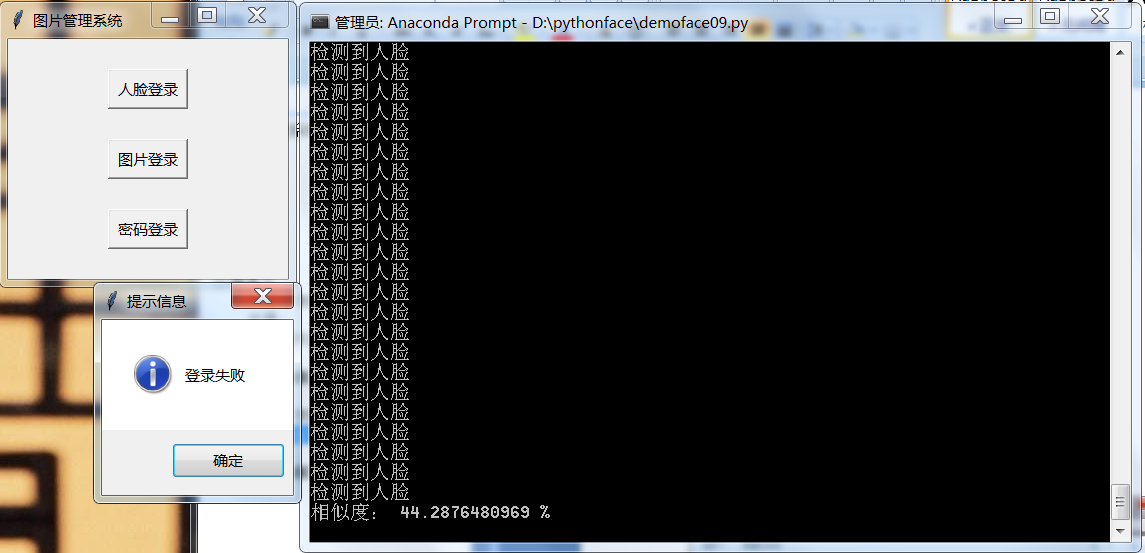
选择 mydecs.jpg(陈奕迅)
登录失败
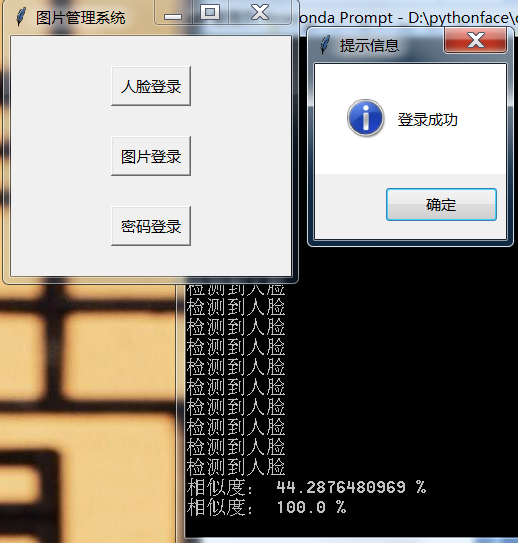
选择 frist.jpg(杨洋)

登陆成功并给出 100% 的相似度(文件库的图片就是 frist.jpg)
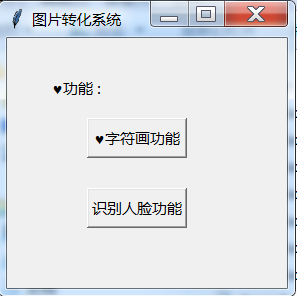
登录成功后进入系统
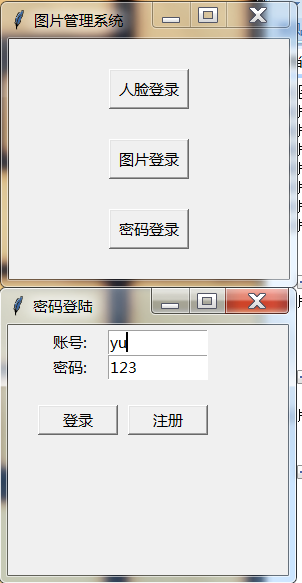
点击密码登录,随便写一个不存在的账号登录
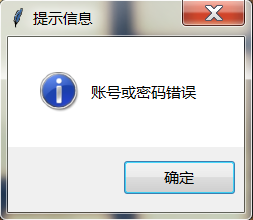
提示错误
点击注册
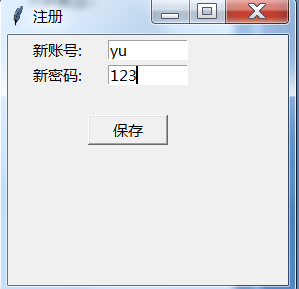

注册成功后会有所有账号密码打印出来

输入账号密码登陆
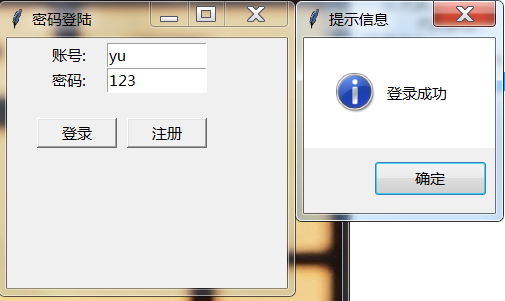
登陆成功后会进入系统并把登陆界面清除
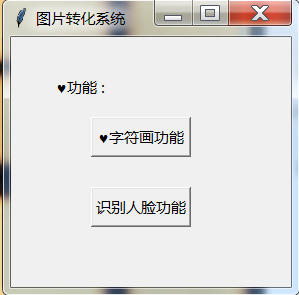
下面是登录成功后的功能介绍
点击字符画功能
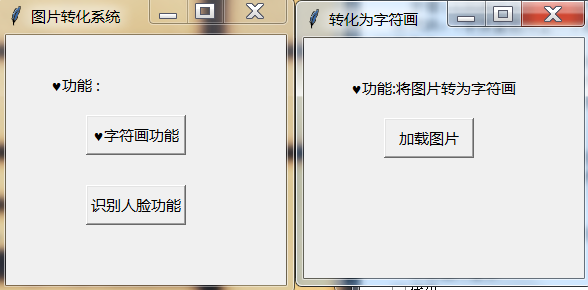
点击加载图片,选择 picchar.jpg

打开
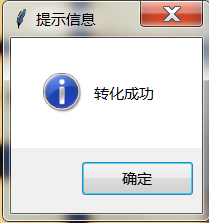
成功后可在 d://pythonface/output.txt 中看到得到的字符画

点击识别人脸功能
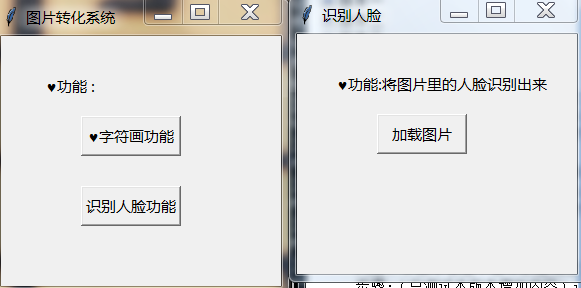
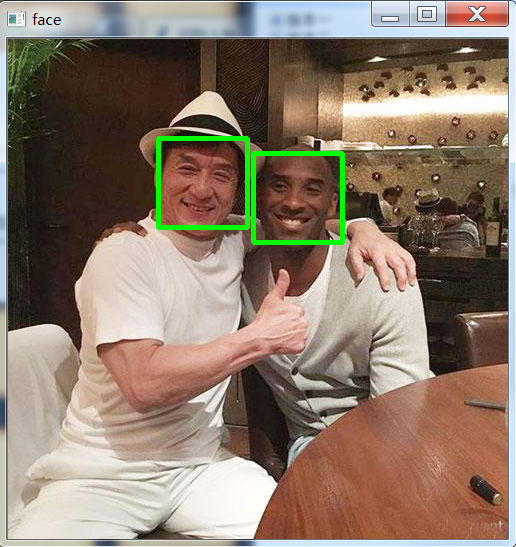
加载 face.jpg

系统自动识别人脸并框出来
10.3 代码:
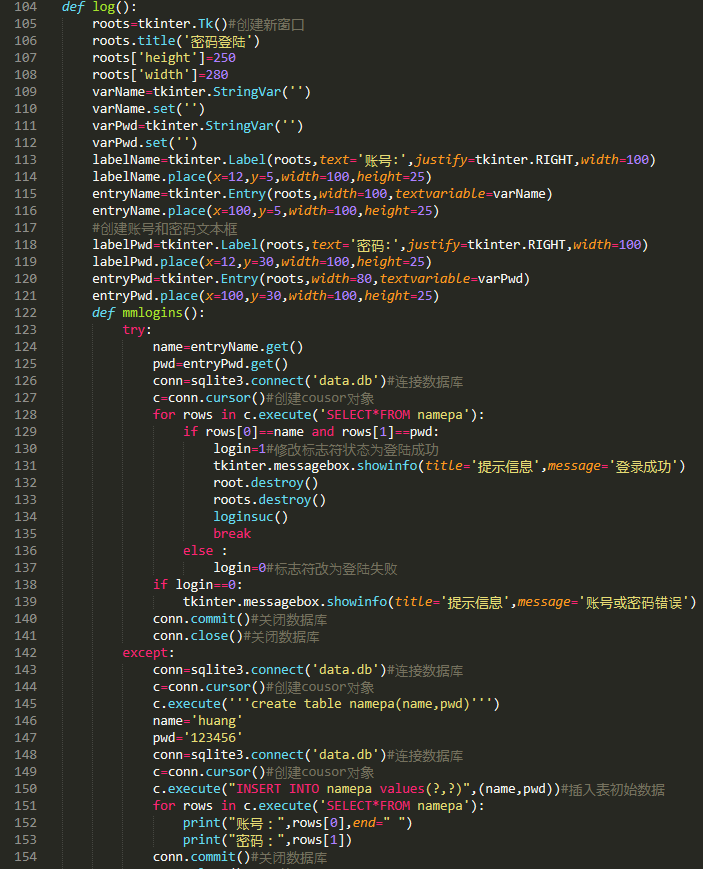
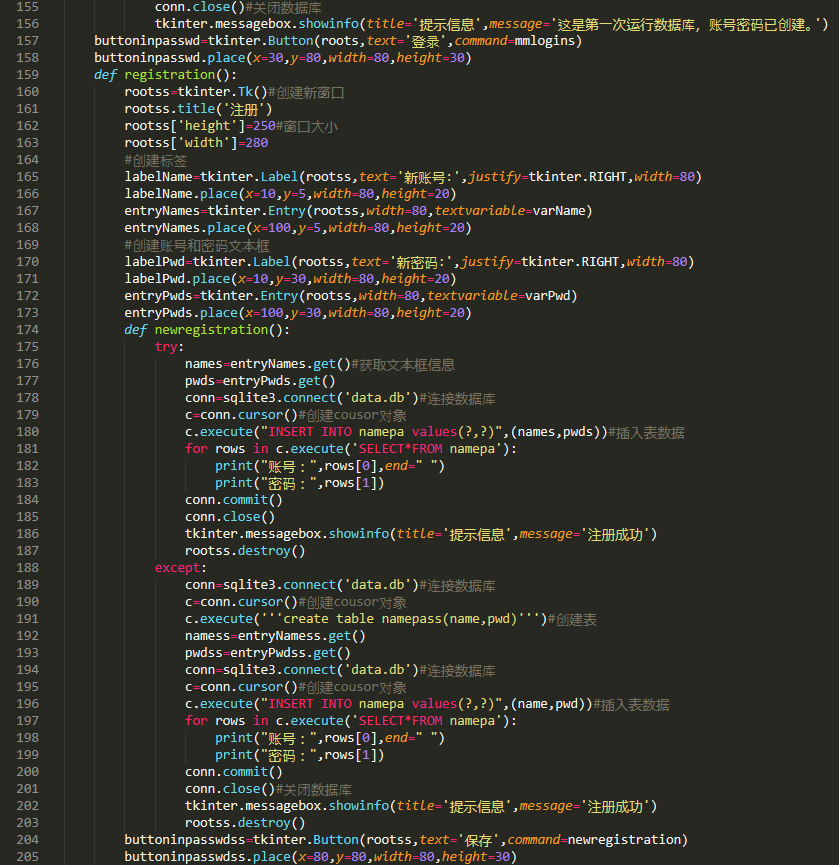
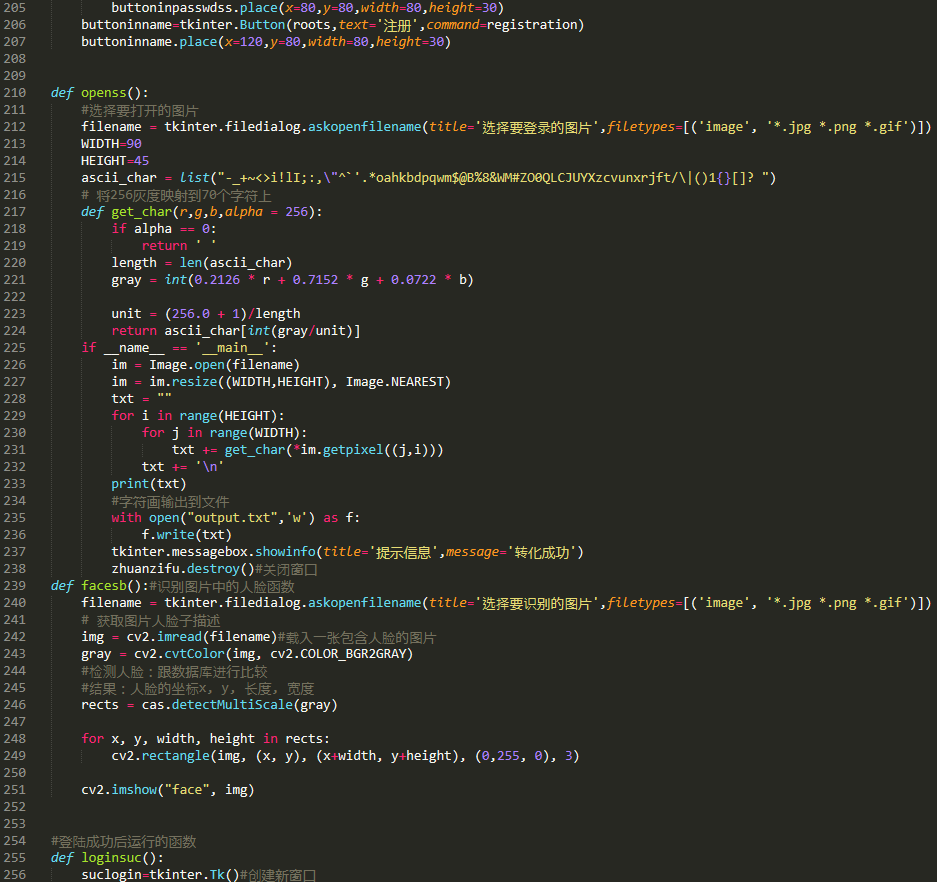
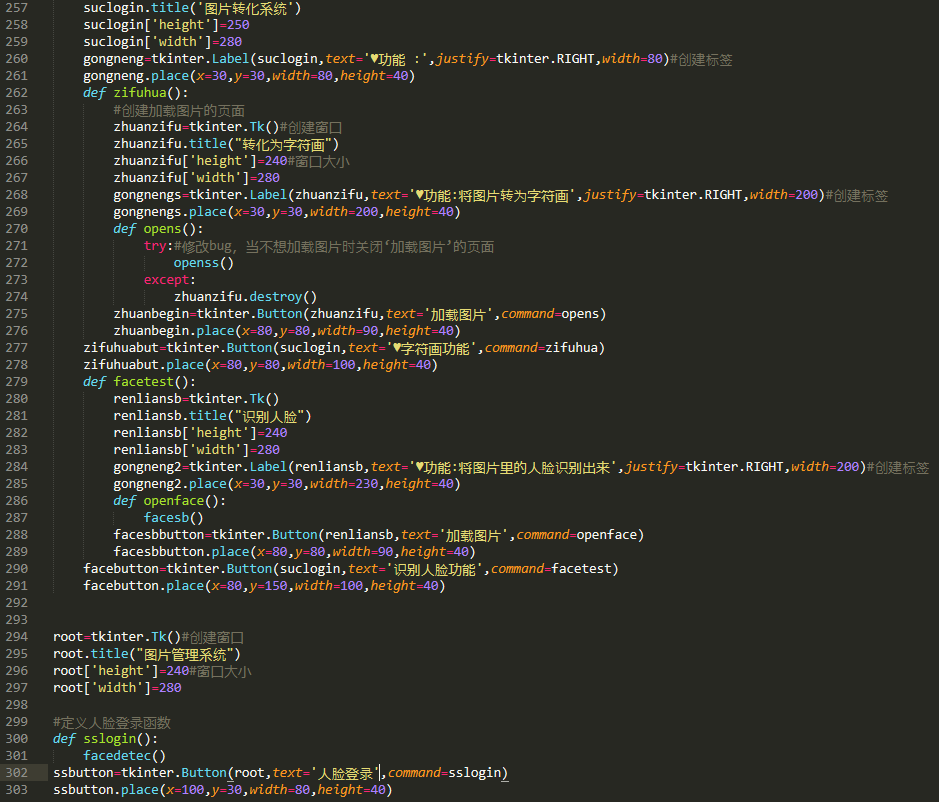
(代码进行了优化更改)
```c++ import numpy as np import cv2 import sys import dlib import numpy from skimage import io import sqlite3 import tkinter import tkinter.messagebox from PIL import Image from tkinter import filedialog
人脸识别器分类器
cas = cv2.CascadeClassifier("D://pythonface/haarcascade_frontalface_alt2.xml") #载入级联分类器,即人脸数据库
classfier=cv2.CascadeClassifier("D://pythonface/haarcascade_frontalface_default.xml")
facerec = dlib.face_recognition_model_v1("D://pythonface/dlib_face_recognition_resnet_model_v1.dat")
sp = dlib.shape_predictor('D://pythonface/shape_predictor_68_face_landmarks.dat')#加载检测器
detector = dlib.get_frontal_face_detector()
login=0
def facedetec():
cv2.namedWindow("test")
#1调用摄像头
cap=cv2.VideoCapture(0)
color=(0,255,0)
while cap.isOpened():
ok,frame=cap.read()
if not ok:
break
#3灰度转换
grey=cv2.cvtColor(frame,cv2.COLOR_BGR2GRAY)
#人脸检测,图片缩放比例和需要检测的有效点数
faceRects = classfier.detectMultiScale(grey, scaleFactor = 1.2, minNeighbors = 3, minSize = (32, 32))
if len(faceRects) > 0: #大于0则检测到人脸
print("检测到人脸")
for faceRect in faceRects: #单独框出每一张人脸
x, y, w, h = faceRect #5画图
cv2.rectangle(frame, (x - 10, y - 10), (x + w + 10, y + h + 10), color, 3)#单独框出每一张人脸
cv2.imshow("test",frame)#窗口显示
if cv2.waitKey(10)&0xFF==ord('a'):#输入a截取图片并检测
cv2.imwrite("D://pythonface/test.jpg", frame)#保存获取图片
img = io.imread('D://pythonface/frist.jpg')#加载检测的图片
detss = detector(img,1)# 图片人脸子描述
if (len(detss) > 0):#大于0则检测到人脸
for k,d in enumerate(detss):
shape = sp(img,d)
face_descriptor = facerec.compute_face_descriptor(img, shape)
v = numpy.array(face_descriptor) #本地图片子描述存进v
img = io.imread("D://pythonface/test.jpg")
dets = detector(img, 1)# 获取图片人脸子描述
if (len(dets) > 0):
for k, d in enumerate(dets):
shape = sp(img, d)
face_descriptor = facerec.compute_face_descriptor(img, shape)
d_test = numpy.array(face_descriptor) #boy.jpg子描述存进d_test
# 计算欧式距离
dist = numpy.linalg.norm(v-d_test)
dist=(1-dist)*100
print("相似度:",dist,"%")
if dist>=70:
tkinter.messagebox.showinfo(title='提示信息',message='登录成功')
cap.release()
cv2.destroyAllWindows()#关闭窗口
root.destroy()#关闭登陆窗口
loginsuc()#调用登陆成功的函数
else:
tkinter.messagebox.showinfo(title='提示信息',message='登录失败')
else:
tkinter.messagebox.showinfo(title='提示信息',message='没有检测到人脸')
if cv2.waitKey(10)&0xFF==ord('e'):
cv2.destroyAllWindows()#关闭窗口
break
def picturrelogin():
try:
img = io.imread('D://pythonface/frist.jpg')#加载检测的图片
# 获取图片人脸子描述
faces = detector(img,1)# 图片人脸子描述
for k,d in enumerate(faces):
shape= sp(img,d)
face_descriptor = facerec.compute_face_descriptor(img, shape)
des= numpy.array(face_descriptor) #本地图片子描述存进des
#打开需要检测的图片
mypicture=tkinter.filedialog.askopenfilename(title='Open Image',filetypes=[('image', '
.jpg
.png
.gif')])
img = io.imread(mypicture)#加载检测的图片
# 获取图片人脸子描述
faces = detector(img,1)# 图片人脸子描述
if (len(faces) > 0):#大于0则检测到人脸
for k,d in enumerate(faces):
shape = sp(img,d)
face_descriptor = facerec.compute_face_descriptor(img, shape)
mypicdes= numpy.array(face_descriptor) #d登录图片子描述存进mypicdes
# 计算欧式距离,算出人脸之间的差距
dist = numpy.linalg.norm(des-mypicdes)
dist=(1-dist)
100
print("相似度:",dist,"%")
if dist>=70:
tkinter.messagebox.showinfo(title='提示信息',message='登录成功')
root.destroy()
loginsuc()
else:
tkinter.messagebox.showinfo(title='提示信息',message='登录失败')
except:
tkinter.messagebox.showinfo(title='提示信息',message='图片识别有错误没有或者大于一张人脸')
def log(): roots=tkinter.Tk()#创建新窗口 roots.title('密码登陆') roots['height']=250 roots['width']=280 varName=tkinter.StringVar('') varName.set('') varPwd=tkinter.StringVar('') varPwd.set('') labelName=tkinter.Label(roots,text='账号:',justify=tkinter.RIGHT,width=100) labelName.place(x=12,y=5,width=100,height=25) entryName=tkinter.Entry(roots,width=100,textvariable=varName) entryName.place(x=100,y=5,width=100,height=25) #创建账号和密码文本框 labelPwd=tkinter.Label(roots,text='密码:',justify=tkinter.RIGHT,width=100) labelPwd.place(x=12,y=30,width=100,height=25) entryPwd=tkinter.Entry(roots,width=80,textvariable=varPwd) entryPwd.place(x=100,y=30,width=100,height=25) def mmlogins(): try: name=entryName.get() pwd=entryPwd.get() conn=sqlite3.connect('data.db')#连接数据库 c=conn.cursor()#创建cousor对象 for rows in c.execute('SELECT FROM namepa'): if rows[0]==name and rows[1]==pwd: login=1#修改标志符状态为登陆成功 tkinter.messagebox.showinfo(title='提示信息',message='登录成功') root.destroy() roots.destroy() loginsuc() break else : login=0#标志符改为登陆失败 if login==0: tkinter.messagebox.showinfo(title='提示信息',message='账号或密码错误') conn.commit()#关闭数据库 conn.close()#关闭数据库 except: conn=sqlite3.connect('data.db')#连接数据库 c=conn.cursor()#创建cousor对象 c.execute('''create table namepa(name,pwd)''') name='huang' pwd='123456' conn=sqlite3.connect('data.db')#连接数据库 c=conn.cursor()#创建cousor对象 c.execute("INSERT INTO namepa values(?,?)",(name,pwd))#插入表初始数据 for rows in c.execute('SELECT FROM namepa'): print("账号:",rows[0],end=" ") print("密码:",rows[1]) conn.commit()#关闭数据库 conn.close()#关闭数据库 tkinter.messagebox.showinfo(title='提示信息',message='这是第一次运行数据库,账号密码已创建。') buttoninpasswd=tkinter.Button(roots,text='登录',command=mmlogins) buttoninpasswd.place(x=30,y=80,width=80,height=30) def registration(): rootss=tkinter.Tk()#创建新窗口 rootss.title('注册') rootss['height']=250#窗口大小 rootss['width']=280 #创建标签 labelName=tkinter.Label(rootss,text='新账号:',justify=tkinter.RIGHT,width=80) labelName.place(x=10,y=5,width=80,height=20) entryNames=tkinter.Entry(rootss,width=80,textvariable=varName) entryNames.place(x=100,y=5,width=80,height=20) #创建账号和密码文本框 labelPwd=tkinter.Label(rootss,text='新密码:',justify=tkinter.RIGHT,width=80) labelPwd.place(x=10,y=30,width=80,height=20) entryPwds=tkinter.Entry(rootss,width=80,textvariable=varPwd) entryPwds.place(x=100,y=30,width=80,height=20) def newregistration(): try: names=entryNames.get()#获取文本框信息 pwds=entryPwds.get() conn=sqlite3.connect('data.db')#连接数据库 c=conn.cursor()#创建cousor对象 c.execute("INSERT INTO namepa values(?,?)",(names,pwds))#插入表数据 for rows in c.execute('SELECT FROM namepa'): print("账号:",rows[0],end=" ") print("密码:",rows[1]) conn.commit() conn.close() tkinter.messagebox.showinfo(title='提示信息',message='注册成功') rootss.destroy() except: conn=sqlite3.connect('data.db')#连接数据库 c=conn.cursor()#创建cousor对象 c.execute('''create table namepass(name,pwd)''')#创建表 namess=entryNamess.get() pwdss=entryPwdss.get() conn=sqlite3.connect('data.db')#连接数据库 c=conn.cursor()#创建cousor对象 c.execute("INSERT INTO namepa values(?,?)",(name,pwd))#插入表数据 for rows in c.execute('SELECT FROM namepa'): print("账号:",rows[0],end=" ") print("密码:",rows[1]) conn.commit() conn.close()#关闭数据库 tkinter.messagebox.showinfo(title='提示信息',message='注册成功') rootss.destroy() buttoninpasswdss=tkinter.Button(rootss,text='保存',command=newregistration) buttoninpasswdss.place(x=80,y=80,width=80,height=30) buttoninname=tkinter.Button(roots,text='注册',command=registration) buttoninname.place(x=120,y=80,width=80,height=30)
def openss(): #选择要打开的图片 filename = tkinter.filedialog.askopenfilename(title='选择要登录的图片',filetypes=[('image', ' .jpg .png .gif')]) WIDTH=90 HEIGHT=45 ascii_char = list("-_+~<>i!lI;:,\"^`'. oahkbdpqwm$@B%8&WM#ZO0QLCJUYXzcvunxrjft/|()1{}[]? ") # 将256灰度映射到70个字符上 def get_char(r,g,b,alpha = 256): if alpha == 0: return ' ' length = len(ascii_char) gray = int(0.2126 * r + 0.7152 * g + 0.0722 * b)
    unit = (256.0 + 1)/length
    return ascii_char[int(gray/unit)]
if __name__ == '__main__':
    im = Image.open(filename)
    im = im.resize((WIDTH,HEIGHT), Image.NEAREST)
    txt = ""
    for i in range(HEIGHT):
        for j in range(WIDTH):
            txt += get_char(*im.getpixel((j,i)))
        txt += '\n'
    print(txt)
    #字符画输出到文件
    with open("output.txt",'w') as f:
        f.write(txt)
    tkinter.messagebox.showinfo(title='提示信息',message='转化成功')
    zhuanzifu.destroy()#关闭窗口
def facesb():#识别图片中的人脸函数
filename = tkinter.filedialog.askopenfilename(title='选择要识别的图片',filetypes=[('image', '
.jpg
.png *.gif')])
# 获取图片人脸子描述
img = cv2.imread(filename)#载入一张包含人脸的图片
gray = cv2.cvtColor(img, cv2.COLOR_BGR2GRAY)
#检测人脸:跟数据库进行比较
#结果:人脸的坐标x, y, 长度, 宽度
rects = cas.detectMultiScale(gray)
for x, y, width, height in rects:
    cv2.rectangle(img, (x, y), (x+width, y+height), (0,255, 0), 3)

cv2.imshow("face", img)
登陆成功后运行的函数
def loginsuc(): suclogin=tkinter.Tk()#创建新窗口 suclogin.title('图片转化系统') suclogin['height']=250 suclogin['width']=280 gongneng=tkinter.Label(suclogin,text='♥功能 :',justify=tkinter.RIGHT,width=80)#创建标签 gongneng.place(x=30,y=30,width=80,height=40) def zifuhua(): #创建加载图片的页面 zhuanzifu=tkinter.Tk()#创建窗口 zhuanzifu.title("转化为字符画") zhuanzifu['height']=240#窗口大小 zhuanzifu['width']=280 gongnengs=tkinter.Label(zhuanzifu,text='♥功能:将图片转为字符画',justify=tkinter.RIGHT,width=200)#创建标签 gongnengs.place(x=30,y=30,width=200,height=40) def opens(): try:#修改bug,当不想加载图片时关闭‘加载图片’的页面 openss() except: zhuanzifu.destroy() zhuanbegin=tkinter.Button(zhuanzifu,text='加载图片',command=opens) zhuanbegin.place(x=80,y=80,width=90,height=40) zifuhuabut=tkinter.Button(suclogin,text='♥字符画功能',command=zifuhua) zifuhuabut.place(x=80,y=80,width=100,height=40) def facetest(): renliansb=tkinter.Tk() renliansb.title("识别人脸") renliansb['height']=240 renliansb['width']=280 gongneng2=tkinter.Label(renliansb,text='♥功能:将图片里的人脸识别出来',justify=tkinter.RIGHT,width=200)#创建标签 gongneng2.place(x=30,y=30,width=230,height=40) def openface(): facesb() facesbbutton=tkinter.Button(renliansb,text='加载图片',command=openface) facesbbutton.place(x=80,y=80,width=90,height=40) facebutton=tkinter.Button(suclogin,text='识别人脸功能',command=facetest) facebutton.place(x=80,y=150,width=100,height=40)
root=tkinter.Tk()#创建窗口 root.title("图片管理系统") root['height']=240#窗口大小 root['width']=280
定义人脸登录函数
def sslogin(): facedetec() ssbutton=tkinter.Button(root,text='人脸登录',command=sslogin) ssbutton.place(x=100,y=30,width=80,height=40)
定义图片登录函数
def tplogin():
picturrelogin()
tpbutton=tkinter.Button(root,text='图片登录',command=tplogin)
tpbutton.place(x=100,y=100,width=80,height=40)
定义密码登录函数
def mmlogin(): log() mmbutton=tkinter.Button(root,text='密码登录',command=mmlogin) mmbutton.place(x=100,y=170,width=80,height=40) root.mainloop()#窗口信息循环
```
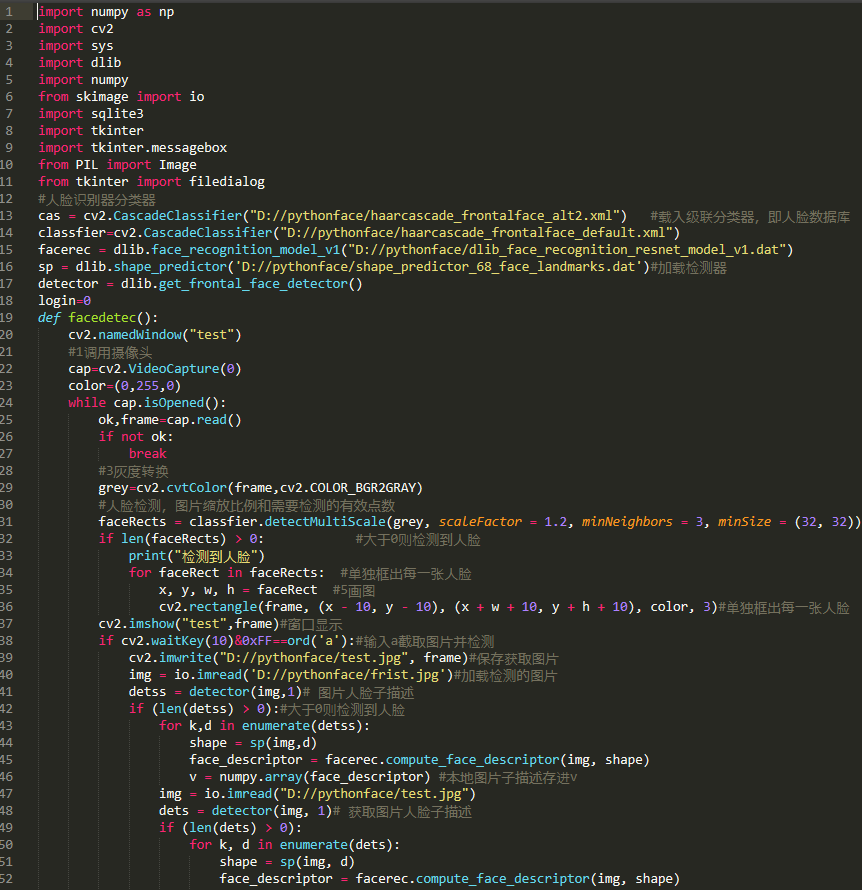
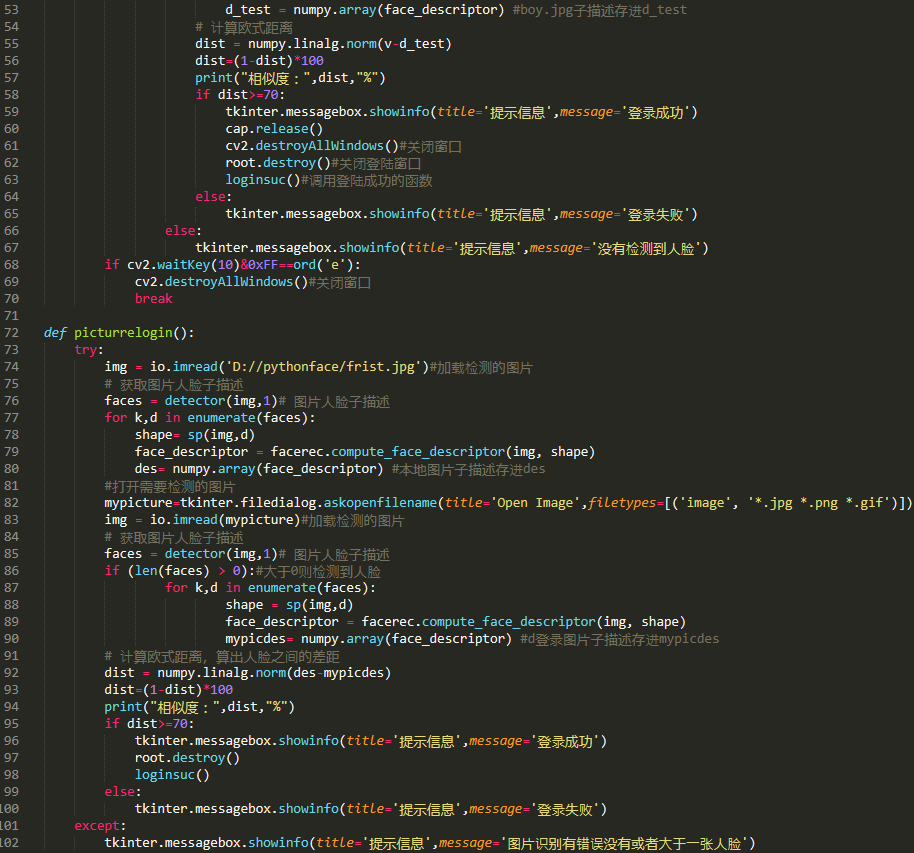
代码截图:
参考文献
- 智慧社区人脸识别系统的设计与实现(华中科技大学·刘合鑫)
- 人脸识别布控系统的设计与实现(武汉邮电科学研究院·邓锋)
- 基于人脸识别的相册管理系统(上海交通大学·田华伟)
- 多信息系统统一身份认证方法的研究和实现(内蒙古大学·张旭)
- 基于人脸图像识别学生宿舍管理系统的设计与实现(武汉邮电科学研究院·刘磊)
- 智慧社区人脸识别系统的设计与实现(华中科技大学·刘合鑫)
- 基于EPP的域名管理系统(山东大学·孟庆领)
- 人脸识别布控系统的设计与实现(武汉邮电科学研究院·邓锋)
- 基于人脸识别的证券客户信息管理系统设计及实现(电子科技大学·翟慧)
- 基于单点登录的互联网统一身份认证系统的设计与实现(电子科技大学·谢坚)
- 基于人脸聚类的图片管理系统的设计与实现(首都经济贸易大学·王子涛)
- 基于人脸聚类的图片管理系统的设计与实现(首都经济贸易大学·王子涛)
- 基于单点登录的企业级应用集成(山东大学·袁品良)
- 基于CNN的交互式巨幅人物合照展示系统设计与实现(华中师范大学·刘燕)
- 基于web的人脸识别登陆和管理系统设计与实现(郑州大学·王哲)
本文内容包括但不限于文字、数据、图表及超链接等)均来源于该信息及资料的相关主题。发布者:毕设向导 ,原文地址:https://m.bishedaima.com/yuanma/35913.html


